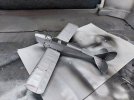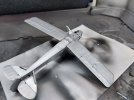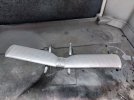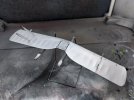
Ian M's De Havilland Tiger Moth. Airfix 1/48

Ian M

Administrator
Staff member
Administrator
Moderator
SMF Supporter
Joined
Dec 14, 2008
Messages
19,723
Points
113
Location
Falster, Denmark
First Name
Ian
20240107_131953.jpg
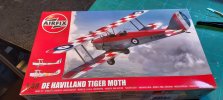
Heard a lot of good things about this and after some of the other newer toolings from Airfix.... why not.
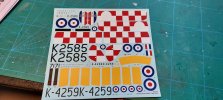
20240107_132019.jpg
Decal sheet. well printed and colourful.
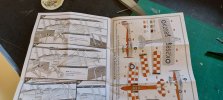
20240107_132231.jpg
The destructions are of the newer type as well. AND have directions for rigging! yay!
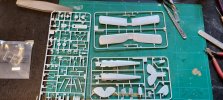
20240107_132333.jpg
I'm so glad it is 1/48 and NOT 1/72. this thing is tiny. lol
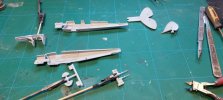
20240107_141744.jpg
Så the cock-pit parts ready for a bit of paint befor the close up.

I must say that the fit thus far is excellent and the detail crisp and clear.
Cant find my old Airfix colour chart, so I am having to look up the colours as I find them in the instructions. lol
 

OldWalrus

SMF Supporter
Joined
Sep 14, 2023
Messages
10
Points
13
Location
West Sussex
First Name
Nick
Got one in the Airfix 'free' offer at the end of last year, it looks a good kit although biplanes scare me... I have got some aftermarket FAA markings to make something similar to what my father learned in, sadly although going solo he was then grounded by his colour blindness. I think they do the medical first these days!
 

Ian M

Administrator
Staff member
Administrator
Moderator
SMF Supporter
Joined
Dec 14, 2008
Messages
19,723
Points
113
Location
Falster, Denmark
First Name
Ian
Wondering as to paint the chequer board or chicken out and decal them.
 

Jim R

SMF Supporter
Joined
Apr 27, 2018
Messages
13,731
Points
113
Location
Shropshire
First Name
Jim
Such an iconic little aircraft. Looks a great kit, up to modern Airfix standard.
Painting the chequer board would be a challenge but in all probability would look better.
 
  • Like
Reactions: JR

JR

Member of the Rabble and Pyromania Consultant
SMF Supporter
Joined
May 26, 2015
Messages
17,275
Points
113
Location
lincs
First Name
John
Go on Ian, show us the painted chequer board.;)
 

Ian M

Administrator
Staff member
Administrator
Moderator
SMF Supporter
Joined
Dec 14, 2008
Messages
19,723
Points
113
Location
Falster, Denmark
First Name
Ian
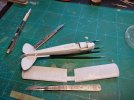
Did I say its tiny?
20240109_113317.jpg
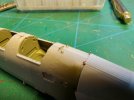
The fit is pretty good, the only iffy bit is under the cock pit area but that is probably my doing... I thought that the square bit was to be covered by the wing. Alas no. Need to buy or make some filler. I floated some CA over the offending step and sanded that back once set.
Worked OK. (As good as my normal filler efforts).
20240109_104131.jpg
The massive motor, a Gipsy III with a monster 130 hp., is well represented and the kit allows for the cowling panels to be shown open. Mine are being closed, hence not bothering with it that much.

Well pleased to find the wings are one piece... well two but you know what I mean. No faffing about with leading edge seams and all that!
Only problem is how to plant the rigging..? I can't exactly drill my normal hole through the wing to stick the rigging in...... Hmm

Oh! the boss has said its lunch time. Laters.
 
Last edited:

Ian M

Administrator
Staff member
Administrator
Moderator
SMF Supporter
Joined
Dec 14, 2008
Messages
19,723
Points
113
Location
Falster, Denmark
First Name
Ian
Anywho...
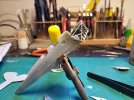
I was having a think and found some multi-strand cable. knocked off a dozen or two eyelets....
20240109_143321.jpg
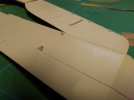
With the aid of the rigging guide I was able to drill some holes into the wings and fuselage where the 'wires' need to be placed.
20240109_143332.jpg
Odd that all had a tiny pin mark on the wings to mark the position but nothing on the fuselage, so the hole in that are best guestimate.

Looking at the artwork for the box, the fuselage looks to be Aluminium with the fabric covered wings... Off to have a dig for info.

Cheers
 

Tim Marlow

Little blokes aficionado
SMF Supporter
Joined
Apr 27, 2018
Messages
16,781
Points
113
Location
Somerset
First Name
Tim
Did I say its tiny?
View attachment 499342
The fit is pretty good, the only iffy bit is under the cock pit area but that is probably my doing... I thought that the square bit was to be covered by the wing. Alas no. Need to buy or make some filler. I floated some CA over the offending step and sanded that back once set.
Worked OK. (As good as my normal filler efforts).
View attachment 499341
The massive motor, a Gipsy III with a monster 130 hp., is well represented and the kit allows for the cowling panels to be shown open. Mine are being closed, hence not bothering with it that much.

Well pleased to find the wings are one piece... well two but you know what I mean. No faffing about with leading edge seams and all that!
Only problem is how to plant the rigging..? I can't exactly drill my normal hole through the wing to stick the rigging in...... Hmm

Oh! the boss has said its lunch time. Laters.
Good progress Ian. These biplanes are tiny aren’t they. Interested to see how you deal with the rigging on the eyelets…….
 

The Smythe Meister

Born to be WILD....... until about 9pm
SMF Supporter
Joined
Jan 30, 2019
Messages
5,732
Points
113
Location
Devon
First Name
Andy
Anywho...
I was having a think and found some multi-strand cable. knocked off a dozen or two eyelets....
View attachment 499362
With the aid of the rigging guide I was able to drill some holes into the wings and fuselage where the 'wires' need to be placed.
View attachment 499363
Odd that all had a tiny pin mark on the wings to mark the position but nothing on the fuselage, so the hole in that are best guestimate.

Looking at the artwork for the box, the fuselage looks to be Aluminium with the fabric covered wings... Off to have a dig for info.

Cheers
Blimey,that`s some cracking work there!!
I`m scouring all the threads of this GB for ideas of how to go about rigging my Albatros,(no assistance in the destructions whatsoever :disappointed2: ),and this method looks most interesting Ian,:cool:..............really fiddly mind!
 

flyjoe180

Joe
SMF Supporter
Joined
Jan 18, 2012
Messages
12,419
Points
113
Location
Earth
First Name
Joe
Looking good Ian. The eyelets are a nice touch. I think painting the chequer patterns would be better than the decals
 

Ian M

Administrator
Staff member
Administrator
Moderator
SMF Supporter
Joined
Dec 14, 2008
Messages
19,723
Points
113
Location
Falster, Denmark
First Name
Ian
Interested to see how you deal with the rigging on the eyelets…….
Me too mate !
Great work so far Ian.
Thank you.
Some amazing improvisation going on Ian. Would never have thought of eyelets!!
So far all my biplane builds, all three of them,lol. The wings have been hollow top and bottom parts, so I just drill a hole and stick the rigging wire in. These buggers are solid so had to thing of something. The eyelets are a boat thing.

Blimey,that`s some cracking work there!!
I`m scouring all the threads of this GB for ideas of how to go about rigging my Albatros,(no assistance in the destructions whatsoever :disappointed2: ),
Thanks. It's not often they are there. Nice when they are though.
Looking good Ian. The eyelets are a nice touch. I think painting the chequer patterns would be better than the decals
Cheers Joe, still thinking about the paint job...lol
 

colin m

Moderator
Staff member
Moderator
SMF Supporter
Joined
Dec 26, 2008
Messages
8,604
Points
113
Location
Stafford, UK
First Name
Colin
Nice to see this being built. I like the Tiger Moth and built Airfix's 1:72 when it came out. So when a 1:48 was announced, that caught my attention, but I still haven't got one.
 

Ian M

Administrator
Staff member
Administrator
Moderator
SMF Supporter
Joined
Dec 14, 2008
Messages
19,723
Points
113
Location
Falster, Denmark
First Name
Ian
No picture but an update.
It is now primed in black. Hard to see anything lol.
I'll give it a couple of days to cure 110% then some "silver"
 

Ian M

Administrator
Staff member
Administrator
Moderator
SMF Supporter
Joined
Dec 14, 2008
Messages
19,723
Points
113
Location
Falster, Denmark
First Name
Ian
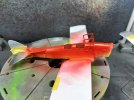
Right then A few days have past and I owe an update or two.
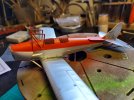
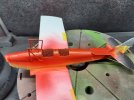
The Silvers have on. Two different. One for the fuselage which should be a bit shinny and a more dull one for the wings as they where cloth covers with dope finish. (I hope lol ).
20240114_101423.jpg20240114_101435.jpg20240114_101459.jpg20240114_101507.jpg
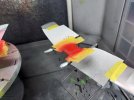
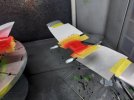
So these got left for a bit then Got masked up for the red on the fuselage. Found that the center bit of the top wing was red as well. Think its a petrol tank....
20240114_120701.jpg20240114_120707.jpg20240114_120710.jpg20240114_120725.jpg
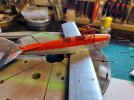
Once painted the tape was removed pretty much right after...A few places will need a touch up with the silver here and there...Bit clumsy. (and multi tasking....)
20240114_122347.jpg20240114_122359.jpg
So thats it for today. I will try to post an update in a day or two...

Comments as always are welcome.
 

Jim R

SMF Supporter
Joined
Apr 27, 2018
Messages
13,731
Points
113
Location
Shropshire
First Name
Jim
Eyelets seem a good idea. Thats a very nice paint job. Red is not an easy colour to paint.
 

Ian M

Administrator
Staff member
Administrator
Moderator
SMF Supporter
Joined
Dec 14, 2008
Messages
19,723
Points
113
Location
Falster, Denmark
First Name
Ian
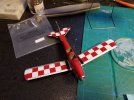
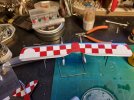
Sorry Mr. Race. I went with the decals. They where fun to apply. in a strange way. . .... who am I kidding. they where a pain in the butt. Mind you the quality is top $ Very thin and quite robust. I discovered that my water was maybe a bit cold which made the decals a bit stubborn.

20240117_151634.jpg
Now if I had known (aka read the painting plans) I would have held off putting the eyelets in place until after the decal was down. Due to piddling around with getting the decal to conform, I shot on of the aforementioned eyelets to infinity and beyond. So I'll need to do another one of them!
20240117_151637.jpg
The chequerboard is now recovering from an overdose of Micro-Sol. If it has calmed down enough I will put the roundels on the wing tomorrow...

Cheers.
 
Top