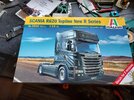
Ian M's Scania R620 4x2 conversion to a T620 6x4 Italeri and Kit Form Services. 1/24

Ian M

Administrator
Staff member
Administrator
Moderator
SMF Supporter
Joined
Dec 14, 2008
Messages
19,794
Points
113
Location
Falster, Denmark
First Name
Ian
20230914_160322.jpg
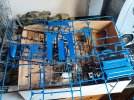
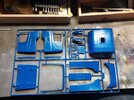
The doner/victim And naturally the sprue photos. 20230918_093846.jpg
20230918_093820.jpg
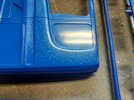
Not being a big civil car/truck builder I have never seen plastic with 'metal flake effect'!
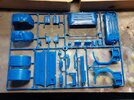
20230918_093947.jpg
Wonder how much of this lot will get used?
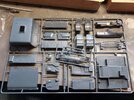
20230918_094018.jpg
A more civilised Grey for the inside of the cab.... for now.
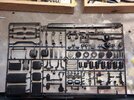
20230918_094158.jpg
Ladder frame and axel bits and some hangers/airbags.
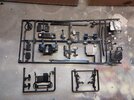
20230918_094216.jpg
Bits they did not know where to group them to. lol It has an air line hanger! yeah!
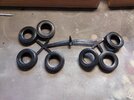
20230918_094041.jpg
The kit has 6 tyres and a spare, I need at least ten...
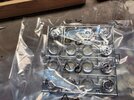
20230918_093857.jpg
Some nice chrome (lol) wheels for another project...
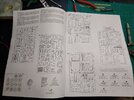
20230918_093537.jpg

20230918_093544.jpg
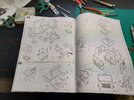
The standard older style Italeri Distractions. Clear B/W drawings + pita colour call outs. One of my first jobs will be to write the appropriate colour NAME.

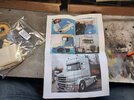
And from KFS (Kit Form Service).
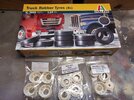
20230918_092636.jpg
New wheels for the back and front or in truck speak drive wheels and steer wheels ! (and the extra tyres that Italeri sell to make the numbers up!)
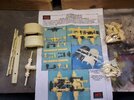
20230918_092925.jpg
A closer look at the rear end mods.. Not as confusing as it looks at first glance. the kit instructions x2 as it says on the single sheet of instructions.
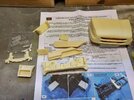
20230918_093210.jpg
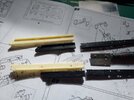
Very clean crisp casts in cream resin. A few wafer thin flashes and easy to remove stubs. I like the resin when you can cut it easy with a knife.
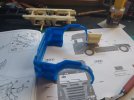
The Instructions for the cab are a lot more comprehensive...Explaining which bits to cut off and where!
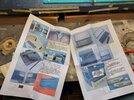
20230918_093308.jpg

20230918_093320.jpg
And IF I'm lucky I'll end up with something like the picture at the bottom of the page!

Not sure what colour to paint it yet.

I figure that I should be able to fit it in the time frame for the GB so I thought "why not!"
I will make a start in a day or two...

Ian M
 

Jim R

SMF Supporter
Joined
Apr 27, 2018
Messages
13,791
Points
113
Location
Shropshire
First Name
Jim
Sounds like a very interesting build to follow. Looks as if you have all the necessary extras. Instructions for the conversion do look comprehensive but the proof will be in the building.
 

Mickc1440

SMF Supporter
Joined
Apr 27, 2018
Messages
4,294
Points
113
Location
Sheffield
First Name
Mick
You know I’m in, the conversion kit from KFS looks really nice. I’ve already picked out my next colour for a truck I haven’t bought yet
 

Ian M

Administrator
Staff member
Administrator
Moderator
SMF Supporter
Joined
Dec 14, 2008
Messages
19,794
Points
113
Location
Falster, Denmark
First Name
Ian
The misses went off on a girl trip with 'her next door' so I got to play for a while:
They say the first cut is the hardest, but in this case not so much.
20230918_132550.jpg
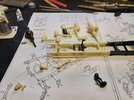
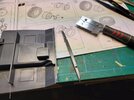
Line the different rails up with the brackets and saw it off!
20230918_171831.jpg
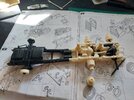
Then glue the other, longer rails on. CA and a couple of reinforcing strips. The four parts at the bottom of this picture are the brake actuators if I am not mistook. I had put them on the axels but the wrong way up. I spent a lot of time getting them the right way round but forgot to check the other plane. De-bonder saves the day. Again. LOL
I avoided making the other mistake of gluing the suspensions on befor placing the axels! Not this time!!!
talking of axels and suspenders: (LOL stupid auto correct, funny though, I'll let that one stay.)
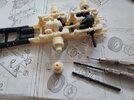
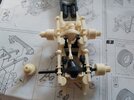
20230918_165817.jpg
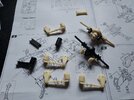
Her are the actuators in place the wrong way up lol. It was here I discovered the error of my ways. I must say these castings are beautiful! Full credit to KFS for that. I have not seen one bubble and the casting stubs are no bigger than a normal sprue gate. A quick snip and a trim with the old sanding board. Job done.
Yes I am taking precautions against the dust.
Going to have to find a colour plan soon.

Any good colour suggestions?

Ian M
 

Ian M

Administrator
Staff member
Administrator
Moderator
SMF Supporter
Joined
Dec 14, 2008
Messages
19,794
Points
113
Location
Falster, Denmark
First Name
Ian
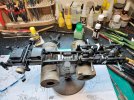
Well I had some extra time on my hands the other day so I hid in the man cave while SWMBO did her thing...
The serious surgery could begin.
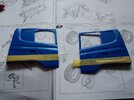
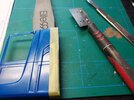
First off the bottom of the doors had to go:
20230919_154202.jpgMarked off with tape, then
20230919_154536.jpg
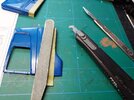
I like to use a sanding stick as a scribe ruler where I can. They dont slide about but need tape under to not scratch the surface up. I start the cut with a few strokes of the P-cutter If not cutting on a panel line.
20230919_154555.jpg
The make the cut with the razor saw.
That was the doors sorted, next was the wheel arches.
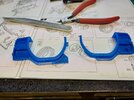
20230919_155718.jpg
I snipped of the offending part with the good sprue clippers (it was not even a mm thick). then sanded the rest back with the rather abused looking sanding stick... Got some more some place...
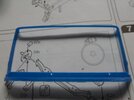
For some odd reason I forgot to take a picture of the front of the cab cutting but here is a picture of the result :smiling3:20230921_174036.jpg
Bit fuzzy, sorry. This was actually the part that really was a test. The instructions said cut off 1.5 from the top of the top most grill.... Think it would have been better to have just given a measurement from either the bottom of the part of the bottom of the windscreen opening. What ever, I got there in the end.
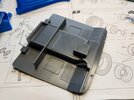
Floor was also on the cut list.
20230919_163617.jpg

20230919_163752.jpg
I just used the lip as a guide and cut the front off. < as directed.

Today I thought I would grab an hour befor the sun hit the window! (the low sun of late summer and the winter shine right in my face!!!)
I'll just do the front suspension and axel then the read wheels.
20230921_150100.jpgFront end was a straight forward job and only had the brake drums to add. Simples!
20230921_150116.jpg
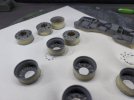
The rear brakes/hubs were a different story. They had to be drilled. A test of nerves? I hate drilling Resin. it has a habit of splitting on me. So after finding the centre with the thin drill, I took it out to 2.8mm then finished with the 3.5mm All done by hand! I might have to see if I have a 3.6 or 3.7 in the workshop as they are a bit tight on the axels.
20230921_150050.jpg
Thinking of pluming the brakes in...

Comments welcome.

Cheers.
 

Ian M

Administrator
Staff member
Administrator
Moderator
SMF Supporter
Joined
Dec 14, 2008
Messages
19,794
Points
113
Location
Falster, Denmark
First Name
Ian
Just grabbing a bit here and there at the moment.
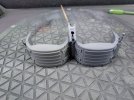
Got the front bumper/lower grill and lights fixed to the front arches.
20230927_101938.jpg

Bits of engine and bits with body parts ready for a splodge of primer.
20230927_101945.jpg
More later.

Comments welcome.
 
Last edited:

Ian M

Administrator
Staff member
Administrator
Moderator
SMF Supporter
Joined
Dec 14, 2008
Messages
19,794
Points
113
Location
Falster, Denmark
First Name
Ian
Hmm. Started to prime the engine parts. This kit needs a bath! Release grease anyone?
Only one part fell off the ladder frame!. Well off the axel actually.
Hopefully all dry tomorrow...
 

Mickc1440

SMF Supporter
Joined
Apr 27, 2018
Messages
4,294
Points
113
Location
Sheffield
First Name
Mick
Nice progress Ian, just persuaded swmbo that another Scania for Christmas is a good idea so I don’t waste the conversion kit :smiling3:
 

Ian M

Administrator
Staff member
Administrator
Moderator
SMF Supporter
Joined
Dec 14, 2008
Messages
19,794
Points
113
Location
Falster, Denmark
First Name
Ian
Just a heads up to others, KFS resin is very greasy! Even after a warm bath in soapy water, a scrub with a soft paintbrush then a rinse and left to dry. They still dont like paint that much. I have now washed off the parts I could with Meths. A good check I have discovered. White tac, elephant snot, call it what you will. If the part will not still on a blob og white tac when you mount it to spray....... it's not going to take the pant well.
Unfortunate for me I started with the wheels and chassis. Which I hand held. We will all see how bad it is once dry.
 

Ian M

Administrator
Staff member
Administrator
Moderator
SMF Supporter
Joined
Dec 14, 2008
Messages
19,794
Points
113
Location
Falster, Denmark
First Name
Ian
That doesn't sound nice at all. Fingers crossed.
It really was/is weird. After the visit to the bubble bath, the parts looked and felt OK. But as soon as the paint hit them..... yikes.

20231002_172126.jpg
As can be seen here the primer is being repelled in corners. Some places the primer is OK but others thin and patchy.

20231002_172159.jpg
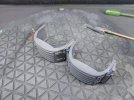
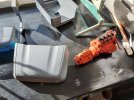
Guess which one is the plastic and which one the resin mud-guard.
20231002_172209.jpg
Far from perfect but I think a quick wipe and maybe a second coat on the resin one. Only a problem really if I do them in the body colour, I could just do them black....
20231002_172242.jpg

20231002_172251.jpg
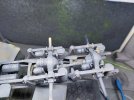
And this will be the last time I build up a full rear end then paint it! grr. That'll teach me.
Again only a real issue if I do the chassis body colour. Oh well.

Not that this has put me off but the next time I use stuff from KFS they will be very thoroughly cleaned.
 

Ian M

Administrator
Staff member
Administrator
Moderator
SMF Supporter
Joined
Dec 14, 2008
Messages
19,794
Points
113
Location
Falster, Denmark
First Name
Ian
Moving forward. Slowly.
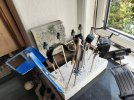
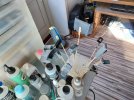
20231005_102456.jpg
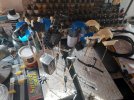
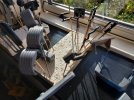
Most of the priming is done. Ran out of holders and room so still more to do yet!
20231005_102500.jpg
Some parts that are black have gotten a coat or two of Tamiya Semi gloss. or is it semi matt? Satin? what ever. lol You know what I mean.
20231005_102508.jpg
Some of the internals for the cab...
20231005_102535.jpg20231005_102542.jpg
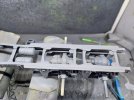
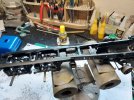
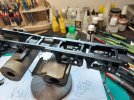
I managed, after three goes to get the chassis painted. I took the easy way out and went for black.
20231005_102554.jpg20231005_102620.jpg
A few parts still to cut free and make ready/good.
20231005_102452.jpg
The Nose took the primer well I am happy to report. And a little sneak peak at the motor.

Really need to start thinking of a colour soon.
 
Top