Impasse

Gern

'Stashitis' victim
SMF Supporter
Joined
May 17, 2009
Messages
9,696
Points
113
Location
Stourbridge
First Name
Dave
I still haven't worked out a way to build the tracks on my little fire engine, so just as a little diversion, I've come back to my favourite sort of build - a diorama.

I built the figures for this some years ago and I've worked out the best way to show them over the last few days. I won't show them until I've finished so don't ask. I am open to bribery and corruption however so a large donation of high value banknotes sent to my address in a plain brown wrapper might just induce me to cough up some clues. PM me for my address if you're that desperate!

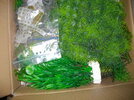
Meantime, some pics of the usual materials I'll be selecting from for the base:

Assorted greenery (railroad stuff, flock and grass, trees and fish tank plants):
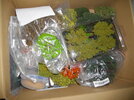
IMGP4264.JPG

IMGP4265.JPG

Rocks (cast from moulds):

IMGP4266.JPG

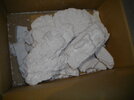
Base materials (only offcuts and scraps here but I got lots of 4'x2' sheets upstairs if I need more):
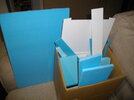
IMGP4267.JPG

On to the build.
 

Gern

'Stashitis' victim
SMF Supporter
Joined
May 17, 2009
Messages
9,696
Points
113
Location
Stourbridge
First Name
Dave
Most of my dios have unfinished sides and edges. I'm going to try and produce something a bit tidier and with that in mind, I need to build a box.

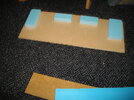
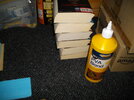
I have a piece of 6mm MDF for a base and I'll use some 10mm extruded foam for the sides. As the foam will have to support the rocks made from plaster of Paris which is heavy, the sides will need some internal supports - starting with the base:

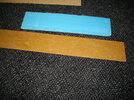
These blocks are of 20mm foam. I'll use a 10mm thick piece to line them flush with the edges of the base. A scrap of wood weighed down will allow the PVA to bond properly:

IMGP4268.JPG

IMGP4269.JPG

A selection of David Baldacci novels will provide sufficient weight:

IMGP4270.JPG
 

Jim R

SMF Supporter
Joined
Apr 27, 2018
Messages
13,726
Points
113
Location
Shropshire
First Name
Jim
Oh you're a tease Dave. Mysterious figures and hints of what is to come. I'm hooked :hugging-face:
 

boatman

SMF Supporter
Joined
Nov 8, 2018
Messages
12,892
Points
113
Location
NORFOLK UK
First Name
christopher
:thinking: an i also am open to bribery and corruption however so a large donation of high value banknotes sent to my address in a plain brown wrapper might just induce me to cough up some clues. on my tiger build lol:rolling:;):smiling6::smiling6: PM me for my address if you're that desperate!:rolling:;):smiling::smiling:
chrisb oh you make me laugh Dave what a brilliant mind you have should have been a politaian lol:rolling:;)
 

spanner570

SALAD DODGER
SMF Supporter
Joined
May 26, 2009
Messages
12,988
Points
113
First Name
Ron
Interesting project Dave.

Don't forget to put some of that PVA on the MDF!

Rather than send money in the post, I will bring the stuff to Cosford next year.............:sad:
 
Joined
Apr 12, 2019
Messages
2,215
Points
113
Location
Selkirk
First Name
Andy
This should be interesting as anyone who reads David Baldacci is worth paying attention to.


Andy.
 

Gern

'Stashitis' victim
SMF Supporter
Joined
May 17, 2009
Messages
9,696
Points
113
Location
Stourbridge
First Name
Dave
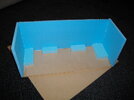
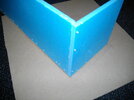
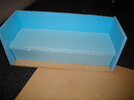
Got the box done. Stuck with PVA glue with dressmaking pins pushed in at various angles to hold the sides in place (they will be removed later):

IMGP4271.JPG

IMGP4272.JPG

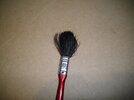
The PVA was splashed on and spread about more or less evenly using one of my superb brushes:

IMGP4273.JPG

Once the PVA has dried I got to do some mejurin' so I can work out what support I need on the inside of the box.
 

Tim Marlow

Little blokes aficionado
SMF Supporter
Joined
Apr 27, 2018
Messages
16,777
Points
113
Location
Somerset
First Name
Tim
Got the box done. Stuck with PVA glue with dressmaking pins pushed in at various angles to hold the sides in place (they will be removed later):

View attachment 466905

View attachment 466906

The PVA was splashed on and spread about more or less evenly using one of my superb brushes:

View attachment 466907

Once the PVA has dried I got to do some mejurin' so I can work out what support I need on the inside of the box.
If you painted a face on that brush it could double for beaker out of the muppets…….
 

Gern

'Stashitis' victim
SMF Supporter
Joined
May 17, 2009
Messages
9,696
Points
113
Location
Stourbridge
First Name
Dave
OK. Box is finished (rough and ready but it will all be covered and strengthened when I add the rocks using Hard as Nails and more plaster of Paris).

I can start with the groundworks when the PVA has set.

IMGP4274.JPG

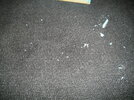
And the reason I have to get the vacuum cleaner out once the neighbours are up and about. This stuff has drifted almost all over the floor in the lounge and some even followed me into the kitchen when I went to clean my brush (one of the perks of dioramering)!

IMGP4275.JPG
 

Andy the Sheep

SMF Supporter
Joined
Apr 7, 2019
Messages
1,539
Points
113
Location
North Eastern Italy
First Name
Andrea
Got the box done. Stuck with PVA glue with dressmaking pins pushed in at various angles to hold the sides in place (they will be removed later):

View attachment 466905

View attachment 466906

The PVA was splashed on and spread about more or less evenly using one of my superb brushes:

View attachment 466907

Once the PVA has dried I got to do some mejurin' so I can work out what support I need on the inside of the box.
Wow! It looks like Samanta Cristoforetti hairs when in the space station! :upside:
 

Gern

'Stashitis' victim
SMF Supporter
Joined
May 17, 2009
Messages
9,696
Points
113
Location
Stourbridge
First Name
Dave
Take 2.

I thought I had enough rocks already cast to create the groundworks - I didn't. There were too many gaps that needed to be filled. Rather than struggle to remove bits I'd already fixed using 'No More Nails', which would have broken either the foam or the cast rocks or both, I scrapped the whole thing except the base and started again.

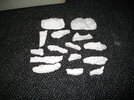
Out with the rubber moulds, Crystacal, measuring jug and weighing scales and a few hours work and now I have enough rocks. Not fixed in place yet, but I absolutely have what I need to cover the vertical back faces of my box.

IMGP4276.JPG

Plenty of pieces left to fill gaps or swap around as needed:

IMGP4277.JPG

Now comes the messy bit - hacking and cutting the cast pieces to fit and filling gaps as needed with all-purpose filler. I'll trim the box sides to match the rock faces when they're done.
 

Gern

'Stashitis' victim
SMF Supporter
Joined
May 17, 2009
Messages
9,696
Points
113
Location
Stourbridge
First Name
Dave
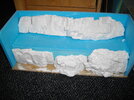
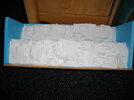
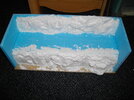
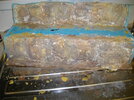
OK. Got all the rocks done.

IMGP4278.JPG

IMGP4279.JPG

Waiting now for the filler to set before I trim the box sides. I'll have to seal the foam with a PVA/water mix as the washes I'll be using to colour the rocks would otherwise soak into it. I don't know if that would have any effect but no point taking chances.
 

Jim R

SMF Supporter
Joined
Apr 27, 2018
Messages
13,726
Points
113
Location
Shropshire
First Name
Jim
I've seen those rock moulds advertised but this is the first time I remember seeing them used. They are certainly effective. I don't know how many different moulds you have used here but the result looks natural and random.
 

Gern

'Stashitis' victim
SMF Supporter
Joined
May 17, 2009
Messages
9,696
Points
113
Location
Stourbridge
First Name
Dave
I've seen those rock moulds advertised but this is the first time I remember seeing them used. They are certainly effective. I don't know how many different moulds you have used here but the result looks natural and random.

I have about 10 moulds, most of which are designed to represent rock faces. There are others which represent things like small boulders and stream beds. I think I used about six for this. If you've not seen them used before, prepare yourself for some real magic!
 

Gern

'Stashitis' victim
SMF Supporter
Joined
May 17, 2009
Messages
9,696
Points
113
Location
Stourbridge
First Name
Dave
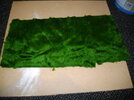
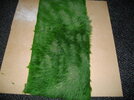
While waiting for the filler to set up, I thought I'd prepare some 'grass'.

Start with some faux fur.

IMGP4280.JPG

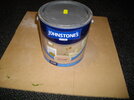
Spread a little common or garden housepaint using tiny little spots of paint on your fingers - making sure it's well rubbed in and spread around.

IMGP4282.JPG

And you get this:

IMGP4281.JPG

I may have to go back over some bits which are still a bit shiny, but I don't think so. There seems to be a decent colour variation which you would expect to see in a field of wild grasses so I should be OK.
 

Gern

'Stashitis' victim
SMF Supporter
Joined
May 17, 2009
Messages
9,696
Points
113
Location
Stourbridge
First Name
Dave
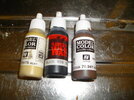
OK. Now for the magic bit!

first I mixed up three very thin washes with these:

IMGP4284.JPG

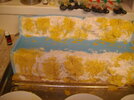
Then splash on the first colour (I used that magnificent brush you've already seen) anywhere you like, regardless of where it runs;

IMGP4285.JPG

I covered quite a bit as I wanted a fairly light colour overall. I followed with the Burnt Umber, then the black, and ended up with this:

IMGP4286.JPG

I'm going to wait until this dries and then add a little more black wash (slightly thicker) here and there to create more highlights, then it's on with lots of the green stuff.
 

adt70hk

I know its a bit sad but I like quickbuild kits!!!
SMF Supporter
Joined
Sep 4, 2019
Messages
9,496
Points
113
First Name
Andrew
Dave,

That's turned out beautifully already. Great work!

ATB.

Andrew
 

Jim R

SMF Supporter
Joined
Apr 27, 2018
Messages
13,726
Points
113
Location
Shropshire
First Name
Jim
By 'eck. Just goes to show what can be achieved with the right brush and the proper "slap it on" technique.
 
Top