Jakko’s 1:48 Tamiya Brewster B-339 Buffalo

Jakko

Way past the mad part
SMF Supporter
Joined
Apr 28, 2018
Messages
10,784
Points
113
First Name
Jakko
As I wanted to pose the canopy open (wouldn’t want to hide the detailed cockpit parts, even with all their minor problems :smiling3:) I cut up both canopies:

773089E5-2CA6-413D-9D4C-4F7A99ED4BDF.jpeg

Because the kit has two canopies, one for the American version with an old-fashioned gunsight that requires a hole in the windscreen and one without, I could cut the centre section from both, so that the front and rear parts would be complete on the canopy with the “whole” windscreen, and the sliding part coming from the other canopy.

I put tape on the pieces I wanted to keep, right along the line to be cut so that I could use it as a guide for the saw. Then it was just a matter of sawing through very carefully and slowly so that the canopy didn’t break.

The parts still need some cleaning up at this point, as you can see :smiling3:
 

Jakko

Way past the mad part
SMF Supporter
Joined
Apr 28, 2018
Messages
10,784
Points
113
First Name
Jakko
After cleaning up the canopy, I applied the masks that were supplied in the kit:

19BC9648-01A9-48BD-8D93-C0F0BA8F60D9.jpeg

I must say I’m not overly fond of these. You have to cut them out yourself from yellow sticky material that feels like Tamiya masking tape, and tears and wrinkles about as easily. Still, it wasn’t too difficult, just a little tedious.

I also painted the area behind the cockpit, and when trying to find which colour that needs to be (as Tamiya forgets to mention it), I discovered I painted almost the whole cockpit wrong by following the kit’s instructions :sad:

4C18180A-BC91-4528-99C7-77BED7D3EAE4.jpeg

Turns out that American F2As, as well as Dutch Model 339s, had the cockpit in aluminium with a clear lacquer over it, not green as British and later American aircraft had. Too late to fix that now, though, so I’ll just have to go with green. I painted the shelf and roll cage behind the pilot aluminium anyway, to at least have that in the right colour.

Then I just had to attach the canopy and belly window with Humbrol Clearfix:

17E0BEE0-A482-4C92-94A3-A56EF8EB0D27.jpeg1EA1E100-5279-420E-B665-A6314CB9BF4B.jpeg

I’ll glue the sliding part in place temporarily with PVA glue, I think, once the rest is dry.
 

colin m

Moderator
Staff member
Moderator
SMF Supporter
Joined
Dec 26, 2008
Messages
8,604
Points
113
Location
Stafford, UK
First Name
Colin
Good work Jakko. I've only used one resin cockpit set before, for a 1:48 Spitfire. It was a good, nicely detailed set and fitted well. But, even with the canopy and door open, you can't really see it. That was the last time I used a cockpit set.
 

Steven000

WWII and nuts.
SMF Supporter
Joined
Aug 29, 2018
Messages
1,945
Points
113
Location
Belgium
First Name
Steven
Looking good Jakko :thumb2:
Nice work on the canopies!
Cheers, Steven
 

Lee Drennen

Box Stock Builder with a Twist/ Rabble Member
SMF Supporter
Joined
Apr 29, 2018
Messages
5,640
Points
113
Location
Wortham Mo
First Name
Lee
Jakko yes very tidy on the canopy and your taking this little guy to a whole new level great job
 

Jakko

Way past the mad part
SMF Supporter
Joined
Apr 28, 2018
Messages
10,784
Points
113
First Name
Jakko
The canopy looks good, but doesn’t fit. The opening part sits too high to fit correctly over the rear part, and I’m puzzling over how to correct that. Thinning it down is almost undoable without leaving a mark :sad: But writing that just now, I suddenly realised I may have to see about heat-forming a piece of thin transparent plastic over the Tamiya canopy … After all it’s a very simple shape: a rectangle with a bend down the middle, so this may just work.
 

Jakko

Way past the mad part
SMF Supporter
Joined
Apr 28, 2018
Messages
10,784
Points
113
First Name
Jakko
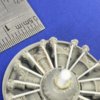
Engine first, though. After pondering on it for a while, I decided to make the sparkplug leads from very thin copper wire, with holes drilled where they go into the cylinders. So far I’ve done one, so only eight more sets left to do …

BE606B89-2839-40E3-B556-A85CA4B890B5.jpeg
 

Mini Me

SMF Supporter
Joined
Jun 1, 2018
Messages
10,159
Points
113
First Name
Rick
Nice bit of detail...did you make the pushrod tubes as well or were they kit provided. Very neat looking.
Rick H.
 

Jakko

Way past the mad part
SMF Supporter
Joined
Apr 28, 2018
Messages
10,784
Points
113
First Name
Jakko
I made them from 0.5 mm plastic rod, as they weren’t moulded on. I suppose the manufacturer left them off because of the undercuts, but TBH I would have much preferred such a nicely detailed engine to have them moulded integrally, since a lack of undercuts will be very difficult to see anyway when the engine is in the plane, and it would have allowed them to do the fiddly work of the spark plug leads.
 

Jakko

Way past the mad part
SMF Supporter
Joined
Apr 28, 2018
Messages
10,784
Points
113
First Name
Jakko
The engine fully wired up:

8AFA82EC-AD56-41DC-87C2-2EFEDF97A270.jpeg

I did the leads to the front plugs first, then to those at the top. Oddly, the former were much easier to do, but also more work as I had to bend it into shape, then remove from the engine to cut it before putting it back and gluing into place. The ones at the top, I cut to length first, then glued them into the holes I’d drilled, and once dry, bent down to the middle and glued to the pushrod tube.

Now the canopy, the only thing that still needed to be fixed. Here it is sitting on the model:

D203C623-AC47-4D5F-8265-F112699443DC.jpeg333C543B-80E3-4A37-9773-00152E125AFC.jpeg

Obviously, it sits too high, because of the thickness of the material that I can’t thin down any further. I first tried cutting a rectangle of Evergreen 0.4 mm clear sheet and heating it to bend it, but neither a hair dryer nor boiling water were hot enough to soften the plastic :sad: A flame was, but curled back the edge of the sheet so that experiment failed too. I then fell back to plan B, adding plastic strip to the bottom of the canopy:

5871E398-D062-461F-9353-3B5384BBE40C.jpeg

It at least reaches the rails now, even if it does sit too high. That last part is a lot less obvious than being at an angle, if you ask me.
 

Steven000

WWII and nuts.
SMF Supporter
Joined
Aug 29, 2018
Messages
1,945
Points
113
Location
Belgium
First Name
Steven
I first tried cutting a rectangle of Evergreen 0.4 mm clear sheet and heating it to bend it, but neither a hair dryer nor boiling water were hot enough to soften the plastic :sad: A flame was, but curled back the edge of the sheet so that experiment failed too. I then fell back to plan B, adding plastic strip to the bottom of the canopy:

The engine looks nice Jakko, I always used a paint-stripper (heat gun) to form canopies, have you tried that yet? Gives a lot more heat then a hair dryer.
 

Jim R

SMF Supporter
Joined
Apr 27, 2018
Messages
13,719
Points
113
Location
Shropshire
First Name
Jim
Hi Jakko
I commented earlier that the worst was behind you. I should have kept my mouth shut :confused:
You're doing a great job of solving issues one after another. I doubt anyone would have realised about the cockpit colour being wrong if you hadn't mentioned it. Cracking job detailing the engine. Looks like you have sorted the opening canopy. The only canopy masks I have used were ready cut and just had to be peeled off the backing - much easier.
Anyway keep up the struggle great work.
Jim
 

Jakko

Way past the mad part
SMF Supporter
Joined
Apr 28, 2018
Messages
10,784
Points
113
First Name
Jakko
The engine looks nice
Thanks, though it may be best to not mention that I put the spark plug wires on the wrong way round :smiling3:

I always used a paint-stripper (heat gun) to form canopies, have you tried that yet? Gives a lot more heat then a hair dryer.
I did think of that, but haven’t tried it. Maybe I should — it’s not like I can’t still replace this canopy if that does get the plastic hot enough.

I commented earlier that the worst was behind you. I should have kept my mouth shut :confused:
The worst part is only ever behind you when the model is on the shelf with the rest of the finished ones. If you’re lucky :smiling3:

You're doing a great job of solving issues one after another.
Thanks, but I don’t consider this to be overly great problem-solving, if I’m honest :smiling3:

I doubt anyone would have realised about the cockpit colour being wrong if you hadn't mentioned it.
Neither had I, until I had to look into the matter. It’s odd, because Tamiya does a good job indicating different parts and paint colours for the four different versions you can build (two RAF, one ML-KNIL and one USN) but for some reason they misses that only two of these should have green interiors.

The only canopy masks I have used were ready cut and just had to be peeled off the backing - much easier.
I’ve not used any, but from reading about them, pre-cut masks seem to be the norm for aftermarket sets. When I got the kit I thought these would be that too, but alas … Still, you get a nice printed line to cut around so it was probably easier than cutting out the framing myself on a fully taped-up canopy. OTOH, it’s a struggle to get them all lined up correctly, which would be far easier with my usual method.
 

colin m

Moderator
Staff member
Moderator
SMF Supporter
Joined
Dec 26, 2008
Messages
8,604
Points
113
Location
Stafford, UK
First Name
Colin
Great work Jakko. Spark plug leads look just fine to me.
 

Jakko

Way past the mad part
SMF Supporter
Joined
Apr 28, 2018
Messages
10,784
Points
113
First Name
Jakko
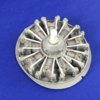
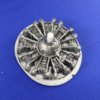
IMHO I might have done them al little more neatly, but the real mistake I made is that I put the lead to the top of the cylinder on the right when it should have been on the left :smiling3: See the photo here and compare it to my model part to see what I mean. This happened because I didn’t have the photo at hand and thought I knew which way round they had to go.

Oh well, too late to fix that now. I could, but I’m not going to bother because it looks convincing enough as it is, and I don’t feel like doing all that fiddly work again :smiling3:
 

rtfoe

SMF Supporter
Joined
Apr 29, 2018
Messages
7,507
Points
113
Location
Malaysia
First Name
Richard
IMHO I might have done them al little more neatly, but the real mistake I made is that I put the lead to the top of the cylinder on the right when it should have been on the left :smiling3: See the photo here and compare it to my model part to see what I mean. This happened because I didn’t have the photo at hand and thought I knew which way round they had to go.

Oh well, too late to fix that now. I could, but I’m not going to bother because it looks convincing enough as it is, and I don’t feel like doing all that fiddly work again :smiling3:
Hi Jakko, what a lot of issues to solve...all good btw. Now, with the wiring in reverse the worse that can happen is the plane flying backwards :smiling6: Doesn't matter as its a static kit. As for the cockpit color I made the same mistake with my SBC Helldiver.
Cheers,
Richard
 

Jakko

Way past the mad part
SMF Supporter
Joined
Apr 28, 2018
Messages
10,784
Points
113
First Name
Jakko
These are all the kinds of mistakes that generally only the builder will know, plus the very small number of people you’ll ever show it to who have actual, detailed knowledge of the machine — so I’m not worried that this one might go backwards on my shelf :smiling3:
 

Jakko

Way past the mad part
SMF Supporter
Joined
Apr 28, 2018
Messages
10,784
Points
113
First Name
Jakko
The painted engine:

298FDF7E-62E3-473C-BB42-CFFAA0D6BA08.jpeg

It’s just a coat of aluminium paint plus thinned black ink (very old Games Workshop). Tamiya says to paint the engine aluminium and the sparkplug leads silver, but I don’t really see how to make much of a difference in colour between them here, so I just left it all the same.

With the addition of the engine and cowling, plus the pitot tube, antenna mast and antenna wire (stretched sprue), I think the model is mostly finished:

47D7DC1B-A210-4FFF-94C1-6E6338B301BD.jpegAC778C22-01E1-422F-B91F-491E8CB1E93C.jpeg2055F797-896D-4841-A77D-683667E4F409.jpegA50D607D-E82D-4859-A646-720E3BF8D46A.jpeg

I’m still debating whether to add the bombs or not. The kit provides two American M30 100-pound bombs, but I’m not sure if the ML-KNIL used this type or some other, and also, as I intend to finish the model as one of those in the last sortie against the Japanese on 7 March 1942, I’m not sure those planes carried bombs at all on that mission.
 

SimonT

Rest in Peace
Rest In Peace
Joined
Apr 27, 2018
Messages
2,448
Points
113
Location
Yorkshire
First Name
Simon
Engine detail looks the part Jakko :thumb2:

Canopy replacement - I have had some success in the past using plug moulding

Similar to what you tried but you get a piece of wood/mdf and cut a hole in the middle roughly the same shape as the thing you want to mould but a bit wider all round so there will be room for the master and plastic to push through without fouling on the sides.

Stick your master shape on a stick of some kind.

Tape your clear plastic sheet to the wood/mdf.

Heat the clear plastic until it just starts to go wobbly - I used a candle

Plunge your master shape through the hole from the plastic sheet side and if the plastic was soft enough you should get a thin representation of the shape that can be cut out of the resulting stretched plastic. May take a few attempts to get the temperature right

You could also build a simple vac-forming machine - box with a platform with the master shape stuck to it. Holes drilled around the perimeter of the master through the platform. A connection for the Hoover/Dyson etc on one side or below the platform. You stick the plastic over the top and seal all the edges, heat it up then switch on the vacuum and it pulls the soggy plastic down for you
Only tried this once - stupidly made the box out of thick plastic sheet as didn't have any wood to hand. It kind of imploded and destroyed itself when I turned on the vacuum as the box had got a bit warm, but it worked, once anyway
 
Top