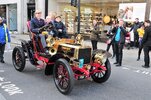
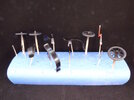
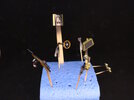
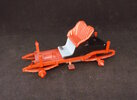
Jim R's 1/32 Airfix 1904 Darracq - Genevieve

The Smythe Meister

Born to be WILD....... until about 9pm
SMF Supporter
Joined
Jan 30, 2019
Messages
5,778
Points
113
Location
Devon
First Name
Andy
Missed this until now Jim :sad:
... Now that I've caught up mind I'd have to say that I love the look of it, :smiling3:....
... Remember the plaçcy bag kits very fondly, (especially the Soviet MiG jet kits back in my early days!!),
That's a cracking looking Charabanc you've got yourself there Mate, excellent stuff ;)
 

Jim R

SMF Supporter
Joined
Apr 27, 2018
Messages
13,786
Points
113
Location
Shropshire
First Name
Jim
Thanks gentlemen for such kind comments. They do encourage me.
Neil - those figures look great. Where did they come from please?

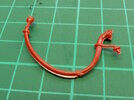
You can see that the horn loops around from the side of the driver's seat to above the front mudguard.
photo.jpg

This is what the kit provides :sad:
P1070313.JPG

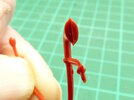
It is also very flattened.
P1070314.JPG

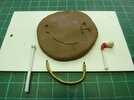
I pressed the kit part into a lump of Plasticine, to get the shape, and attempted to scratch something better. The horn itself is stretched tube and the tube between the bulb and the horn is thin wire wrapped around a wire. The white tubes will be cut down later to make short, joining pieces. It may work :thinking:
P1070315.JPG

Exhaust done and a rudimentary prop shaft added. I doubt it will be seen.
P1070316.JPG

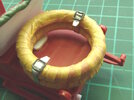
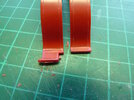
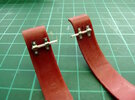
The two spare tyres on the back were just circles. I found a couple of ref. picture that showed spare tyres of that period wrapped in some kind of tape so rather than attempt to clean up the tyres and keep them round I just wrapped them in masking tape. I also scratched a couple of straps and buckles.
P1070318.JPG

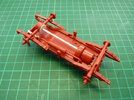
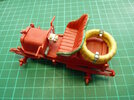
This is a where I'm at - mostly dry fit.
P1070317.JPG

Thanks again for tagging along :thumb2:
 

David Lovell

SMF Supporter
Joined
Apr 27, 2018
Messages
1,506
Points
113
Location
Poole Dorset
First Name
David
Absolutely brilliant Jim ,fantastic work bringing it in to the modern world ,the kit with header card brought back some memories ,woolworths ,wooden floors and counters ,if I had half a crown and was prepared to walk it I could buy a kit and tube of cement then I had the choice of catching the local flyer home or get a bag of hot salted peanuts for 2d ah thoes were the days ,keep it coming Jim. Dave
 

Jim R

SMF Supporter
Joined
Apr 27, 2018
Messages
13,786
Points
113
Location
Shropshire
First Name
Jim
Thanks guys.
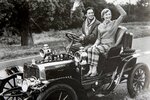
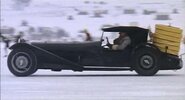
The last major issue that I'm going to try to correct is the rear mudguard and the side steps. It's clear from this still from the film that they are separate. The step is on a bracket fixed to the chassis and sits just above and to the front of the end of the mudguard
car.jpg

The kit has the step attached to the mudguard. Makes things simpler I suppose. I cut off the step.
P1070319.JPG

That meant that the mudguard now needed a new attachment to fix it to the chassis.
P1070320.JPG

P1070321.JPG

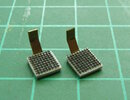
Two new side steps and brackets. The mesh is flooded with CA so hopefully will look a bit like chequer plate when painted..
P1070322.JPG

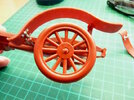
Only a few parts left. The wheels will need a fair bit of clean up.
 

yak face

Wossupwidee?
Staff member
Moderator
SMF Supporter
Joined
Jun 13, 2009
Messages
12,416
Points
113
Location
sheffield
First Name
tony
Outstanding scratchery going on here jim ! Love the steps and the spare tyres . Reminds me of the german car in the film ‘Monte carlo or bust !’ it had ( at least ) four spare tyres stacked on the rear deck all wrapped up like this , driven by the wonderful Gert Frobe .D5A1F68B-67AC-43D3-A549-D8A2E2F7122D.jpeg
keep up the superb work , i love to see an old kit get a proper makeover ! Cheers tony
 

Tim Marlow

Little blokes aficionado
SMF Supporter
Joined
Apr 27, 2018
Messages
16,831
Points
113
Location
Somerset
First Name
Tim
Outstanding scratchery going on here jim ! Love the steps and the spare tyres . Reminds me of the german car in the film ‘Monte carlo or bust !’ it had ( at least ) four spare tyres stacked on the rear deck all wrapped up like this , driven by the wonderful Gert Frobe .View attachment 476520
keep up the superb work , i love to see an old kit get a proper makeover ! Cheers tony
Which tyre had the stolen diamonds in it?
 

Tim Marlow

Little blokes aficionado
SMF Supporter
Joined
Apr 27, 2018
Messages
16,831
Points
113
Location
Somerset
First Name
Tim
Thanks guys.
The last major issue that I'm going to try to correct is the rear mudguard and the side steps. It's clear from this still from the film that they are separate. The step is on a bracket fixed to the chassis and sits just above and to the front of the end of the mudguard
View attachment 476513

The kit has the step attached to the mudguard. Makes things simpler I suppose. I cut off the step.
View attachment 476514

That meant that the mudguard now needed a new attachment to fix it to the chassis.
View attachment 476515

View attachment 476516

Two new side steps and brackets. The mesh is flooded with CA so hopefully will look a bit like chequer plate when painted..
View attachment 476517

Only a few parts left. The wheels will need a fair bit of clean up.
Great work Jim……bringing this old girl on a treat…..
 

Jim R

SMF Supporter
Joined
Apr 27, 2018
Messages
13,786
Points
113
Location
Shropshire
First Name
Jim
Not a lot to show really although I have been working on this. Unfortunately I have had to do a lot of painting before assembly, which I don't like.
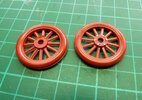
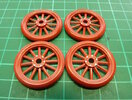
Wheels needed bolt heads and a fair bit of clean up.
P1070323.JPG

P1070324.JPG

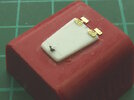
The bonnet has a lift up panel which was missing. (a lot of glue marks!!! :sad:)
P1070325.JPG

Painted bits.
P1070328.JPG

P1070327.JPG

Started to put it together.
P1070326.JPG

Thanks for your continued encouragement.
 

Allen Dewire

Proud Rabble Member
SMF Supporter
Joined
Apr 27, 2018
Messages
4,105
Points
113
Location
Bamberg
First Name
Allen
Late in Jim, sorry about that...Didn't even know you were scratch building a car out of plastic. Most excellent job so far Sir!!! Is that you and the grand kids out for a ride in town in the color photo above??? Looks like you're having a good time!!!...

Prost
Allen
 
Top