Hi Joe
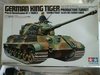
Nice kit you have there mate. But first of all, I'm a nag when it comes to Tiger II's...I'm on a crusade here, I'm trying to educate everyone not to call a Tiger II 'King Tiger' anymore, so please don't call it a 'King Tiger' even if it's on the box


Anyway, painting camouflage on a Tiger II by brush shouldn't be too hard. Depending on the timeframe you are going to depict it. Initially these were delivered in plain Dark Yellow and the maintenance crew airbrushed the camouflage patterns. Since this is soft edge it would be quite hard to replicate by brush.
However, if you are depicting a later Tiger II (like the ones during Battle of the Bulge) it would be easier. Later in the war the Tiger II were delivered with a Licht und Schatten (light and shade or the common referred to 'Ambusch scheme') camouflage - which was painted in the factory. This camouflage was a hard edge one and can be easily replicated even by brush. Paint your Tiger II first in OlivGrün (olive green, unlike often stated this was the basecoat and not DunkelGelb anymore). Use very thin paint - you will need to apply many coats but you will get a very good result. After that simple outline the camouflage colors (DunkelGelb and Schokolade Braun) and paint the insides of the outlines - again using very thin layers of paint. Don't try to cover all at once.
Hope this helps a bit, if you got more questions, just shoot ^^
Cheers

 (I’m a bit of a stickler for using the correct names for things: an M4 medium tank in American service isn’t a Sherman [most of the time anyway], a Universal Carrier isn’t a Bren Carrier, etc.)