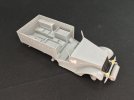
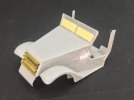
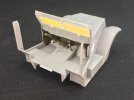
M2 Half-track Car, Philippines, 1942

Jakko

Way past the mad part
SMF Supporter
Joined
Apr 28, 2018
Messages
10,793
Points
113
First Name
Jakko
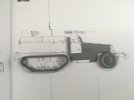
With the M247 nearing the painting stage, my next build is going to be an M2 halftrack, or to give its official designation, a half-track car, M2. It won’t be of any specific real vehicle, but let’s start with some background on the real thing anyway.

In the 1930s, the US Army had been experimenting with half-tracked cars and trucks based on French principles, with an endless rubber-band track (actually rubber vulcanised around steel cables and other parts) around a suspension with a single bogie that usually had four small road wheels, plus a drive sprocket at the front and an idler wheel at the back. Unlike the later German half-tracks, these were relatively uncomplicated vehicles that basically consisted of a common cargo truck in which the rear axle was moved forward to give room for the tracked suspension instead of the normal rear axle and wheels. This T4 half-track truck from 1934 is a good example of the overall kind:
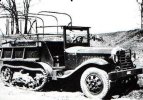
Half-Track Truck T4.jpg

Though they were fairly successful, none seem to have been actually standardised with an M-number, except for the T9 that became the M2 half-track truck:
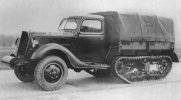
Half-Track Truck T9.jpg

At the same time, the US Army was also developing armoured cars for reconnaissance purposes, adopting the M2 scout car:
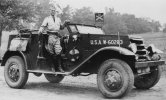
M2 Scout Car.jpg

… and then gradually developing that further into first the M3 and then the M3A1 scout car:
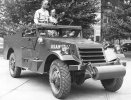
M3 Scout Car.jpg

… of which Paul (@scottie3158) is building a model here on the forum. The photo above is an M3A1, by the way — the M3 had a narrower body with external mudguards over the rear wheels, much like on the M2.

The two lines of development were combined to fill a need for armoured half-tracks: the M2A1 scout car was adapted to take a rear tracked suspension taken from that of the T9 half-track truck to produce the T7 half-track personnel carrier:
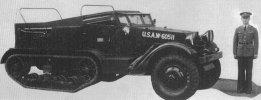
Half-track Personnel Carrier T7.jpg

In the very last days of the 1930s, it was decided to use the newer M3A1 scout car as the basis instead, lengthening the rear body and fitting the suspension from the T7 personnel carrier, to produce the T14 half-track scout car:
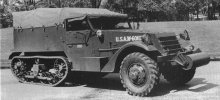
Half-track Scout Car T14.jpg

After some modifications, the vehicle was eventually standardised as the M2 half-track car (without “scout”):
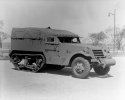
Half-track car M2.jpg

A companion vehicle was also designed, with a slightly longer body, a rear door and a revised interior layout giving more seats, as the M3 half-track personnel carrier:
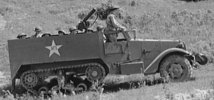
Half-track Personnel Carrier M3.jpg

The M2 and M3 are easy to tell apart if you know what to look for. The simplest way is if you can see the interior, as the M3 has five seats along each side in the back, while the M2 has large, rectangular boxes inside behind the cab, with two seats behind them on each side and also two between them (one facing forward and one to the back). If there’s a skate rail around the whole of the interior, with machine guns mounted on it, it’s also an M2, while a pedestal-mounted machine gun in the middle means it’s an M3.

The M3 has a longer body, so if you can’t see the interior, but do see rear mudguards extending beyond the rear plate of the hull, it’s an M2 (though in the field, many M2s were fitted with a large rack on the back to provide stowage space for the crew’s gear, which sat above those mudguards). The M2 also has downward-hinged doors in the hull side, right behind the cab, for access to the lockers inside the rear compartment — so if you can see their outline, latches or hinges, it’s an M2. When fitted with mine racks on the sides (as most of these halftracks were later on), this is even easier, because on the M3 those run all along the hull side, while on the M2 they start behind the locker doors. The M2 has no rear door, so a half-track that lacks that will be an M2 — however, if there is a door, that doesn’t automatically make it an M3, because the M4 mortar carrier had the shorter M2 body but with a rear door. (An M4 is very hard to tell apart from an M2 unless you can see its interior or the rear door, BTW.)

During the war, both were improved in similar ways, mainly in having “A1” variants (M2A1 and M3A1) that added a ring mount for a machine gun, with armour plating around it, over the front passenger’s seat. The M2A1 did not have the skate rail that the M2 did, though, and in the M3A1, the pedestal mount was deleted too.

The M2, M2A1, M3 and M3A1 were built by the Autocar, Diamond T and White companies, while International Harvester adapted the design to their own production methods to create the M5/M5A1 (M3/M3A1-equivalent) and M9A1 (M2A1-equivalent) half-tracks. You can tell them apart by front wings that don’t have a downward turn to them, by the rear corners of the hull being rounded rather than angular, and a bunch of other details, though the M9A1 did not have a shorter body, nor the external doors to the lockers (in fact, an M9A1 is totally impossible to tell from an M5A1 unless you can see the interior). All of them would be widely used in the Second World War, though because of the large differences between the M2/M3-series on the one hand and the M5/M9-series on the other, the latter were mostly assigned to Lend-Lease (chiefly to the UK and USSR), and only used in very small numbers by American forces.
 
Last edited:

Jim R

SMF Supporter
Joined
Apr 27, 2018
Messages
13,724
Points
113
Location
Shropshire
First Name
Jim
Very interesting background Jakko. American half-tracks crop up somewhere in just about every WW2 film made. After the war the Israeli army procured quite a few and they were in use for many years.
I look forward to another detailed and informative build from you.
 

Jakko

Way past the mad part
SMF Supporter
Joined
Apr 28, 2018
Messages
10,793
Points
113
First Name
Jakko
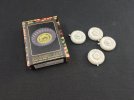
Now the model :smiling3: Some years ago, I bought this kit second-hand:
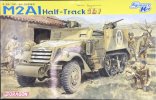
IMG_0879.jpeg

Dragon’s M2/M2A1 kit from 2006, which is not only the only M2 kit available in 1:35 scale, but also the best ;) More seriously, these Dragon halftracks are far better than Tamiya’s series of kits that date back to the 1970s (though that was limited to an M3A2 personnel carrier, an M16 multiple-gun motorcarriage and M21 81 mm mortar carrier). AFV Club has also released some American half-tracks, but only M3-based ones with anti-aircraft guns.

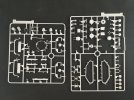
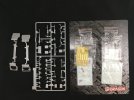
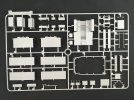
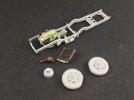
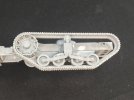
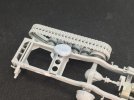
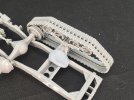
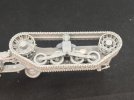
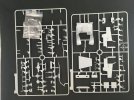
As I said, this kit is second-hand, as shown by the words written on the box front: aan begonnen loosely translates as “started on”, as you can see from these sprue shots:

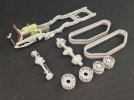
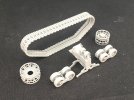
IMG_0880.jpegIMG_0881.jpegIMG_0882.jpegIMG_0883.jpeg

Sprues D (with the wheels and tracks) and J (with the machine guns and pioneer tools) are supplied twice each, but I only pictured them once.

This is how far the previous owner actually got:

IMG_0884.jpeg

He built and painted the engine, glued it into the chassis, built the front wheels, built and painted the radiator, and painted the air cleaner; the other round part just came away from the sprue. Fine, I can ignore most of that because I won’t leave the bonnet open anyway :smiling3:

Because I want to build a very early M2, I need different front wheels. The kit supplies the later pattern, while many early vehicles had a chevron type. Also, the front wheels have flats moulded to them, which a lot of people will welcome but which is actually unrealistic for properly inflated American armoured vehicle tyres of this period … (I didn’t work that out myself, but read it in the PMMS review of this kit — though looking at photos after reading that, he’s correct.) I couldn’t find any M2/M3 wheels with a correct pattern, but Panzer Art has a set for the M3A1 scout car:

IMG_0885.jpeg

Since that used the same size of tyres as the halftracks did, I just bought the set with the idea that this will leave me a second pair of wheels for a future model :smiling3: These also don’t have flats moulded to them, solving two problems in one go.
 
Last edited:
Allen Dewire

Proud Rabble Member
SMF Supporter
Joined
Apr 27, 2018
Messages
4,105
Points
113
Location
Bamberg
First Name
Allen
Looks a nice project Jakko, and I'll try to keep up this time. Is that Scottie standing on the left, in the 4th picture???...

Prost
Allen
 

Jakko

Way past the mad part
SMF Supporter
Joined
Apr 28, 2018
Messages
10,793
Points
113
First Name
Jakko
Very interesting background Jakko. American half-tracks crop up somewhere in just about every WW2 film made.
Mostly M3s, though. The M2 wasn’t used much after the war, though the French had a bunch including in Indochina, so they don’t seem to have been used much in movies either.

After the war the Israeli army procured quite a few and they were in use for many years.
Into the 1980s, even, and then they were handed down to various Israeli-supported parties in Lebanon. Dragon also released specific kits of those, BTW.

Is that Scottie standing on the left, in the 4th picture???...
I think he’s the chap in the background, eyeing up the car to see if there are any details he can add to it.
 
Last edited:
Jakko

Way past the mad part
SMF Supporter
Joined
Apr 28, 2018
Messages
10,793
Points
113
First Name
Jakko
Rather than the model, let’s talk a bit about research :smiling3: If you intend to make a (reasonably) accurate model of a vehicle — or anything else — you’re going to have to do a certain amount of research into what the real thing was like. Sure, you can assume the kit manufacturer got it right, but to be honest, you can never depend on that if your aim is an accurate model. How to do that research is often largely dependent on what you’re building a model of, of course. For military vehicles, aircraft and ships, your best sources will generally be books and the Internet, but if you’re building, say, a model of a spaceship from a science-fiction film, a good start would be to re-watch that film, pausing it when the ship is clearly visible and taking notes. Since this is in a thread about a real-world military vehicle, though, that is not usually the main research — though it can be very useful if you come across video of the vehicle in use.

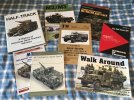
The age-old standby are books, of course. Though I have by no means exhaustive knowledge about American halftracks, this is my book collection about them:

IMG_0886.jpeg

Most of these have been purchased over the past twenty years or so, rather than all in one go for a particular model. IMHO, this is a good way of building up a library: buy books about vehicles (or other subjects) that interest you, but don’t go overboard. Stick to fairly generic books about a specific subject at first so you get some background knowledge on them, which you can then deepen with more specialised books if you find yourself being interested in more details than the basic books cover. Let’s tackle them in approximately that order.

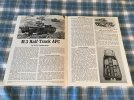
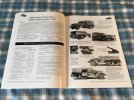
That probably means starting with the Osprey New Vanguard books on the lower left and the Armour in Focus booklet on the right. The latter is ancient — on the last interior page, it has a copyright date of 1967. It’s also very short, with just twelve pages including the front and back covers in a size somewhere between A4 and A5 (slightly smaller than the Osprey books, but not much). Despite this, it provides a good overview of halftrack vehicle development and use in the United States, plus a number of interesting photographs:

IMG_0892.jpeg

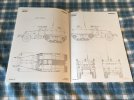
There’s also a five-view drawing in the centre, in full colour, but its quality is rather low by modern standards. Undoubtedly modellers fifty years ago thought a book like this was a good addition to their libraries, but today, unless you like collecting old books, you don’t need any like this. (For the record, it cost me €1.50 in a second-hand book shop maybe a decade ago, which I consider reasonable value for money. I certainly wouldn’t pay much more for a book like this.)

The Osprey books are identical, aside from the covers — the one with the red bars is a first printing from 1994, the other a fifth printing from 2002, and I only realised I had it double when taking the photographs for this message …

IMG_0891.jpeg

Osprey books like this, whether from the New Vanguard series or others, tend to give a good historic background, details of variants, and/or historical combat use, though not all books will have all of this, as it depends on the subject and author. All have a good number of photographs plus colour plates in the middle to show what the subject looked like in service and/or in detail, as well as their markings; these are usually based on historic photographs. In all, books like these are usually a good introduction to the subject, and good to place it in historical context, but they’re not really useful for modellers wanting to correct or detail models. They will often provide good inspiration for how you might paint, stow and weather a model, as well as for dioramas, though.

Also note that these two (three :smiling3: ) books are about the M3 halftrack, not the M2, but as I mentioned at the start of this thread, the M2 and M3 are basically the same vehicles that differ only in the rear body. Research will turn up things like this soon enough, and if you keep it in mind you can often take knowledge from a book about a related vehicle and apply it to the one you’re building a model of. But beware of simply assuming that things which are true for one are also automatically true for the other :smiling3:

The LandCraft M2/M3 book, the one with the model of a halftrack on the cover, is much like the Osprey ones in many ways: quite good on overall history and describing variants and historical use in reasonable detail, as well as having a good number of photographs and a bunch of colour plates, but not going into the kind of detail you probably want for correcting a kit’s shortcomings. Where this differs from the Osprey book is being aimed much more directly at modellers — as you can already tell from the cover, of course. In addition to the real vehicle, it also covers available kits at the time of writing (2019 for this particular one) and shows built models:

IMG_0890.jpeg

These may provide inspiration, I suppose, but I must say I could easily have done without them. On the whole, I’d say it’s a toss-up whether to buy this or the Osprey book. I didn’t see anything in either that makes me say you need them both on your shelf, and I suspect this goes for others in the series too (though I don’t own any).

Which neatly brings us round to research in general: you will very often find the same information in different sources. If you buy a book that you think will be useful, but turns out to have nothing you didn’t already know, it’s basically wasted money, so you may want to try and find out first what a book actually talks about before ordering it — being able to buy it in a book store or at a modelshow, where you can leaf through it, will help a lot, but unfortunately webshops are the more likely places where you’ll be buying your reference books.

Still, duplicate information can be useful, as it may corroborate things you’re not sure of. However, beware that a lot of books and other sources simply repeat what the author read elsewhere, so multiple sources all claiming the same thing doesn’t necessarily make it correct. (I’ve been guilty of this myself, too, as it’s sometimes quite difficult to make out the real reason for things being as they are on a vehicle without access to primary sources.) The more a book is aimed at specialists, the less likely this will be, though. In works intended for the general public, who may not have any great particular interest in the subject, take everything the text claims with a grain of salt unless you know it’s correct from other sources.

Online, rather than as books, you can find similar information on many web sites, some of the better being places like Tanks Encyclopedia and — perhaps a bit unexpectedly — many posts on the Armored Vehicle History forum on the World of Tanks site, even if you have to wade through a lot of posts to find what you may be after.

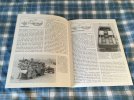
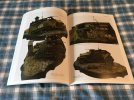
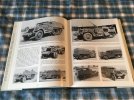
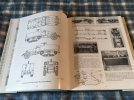
That brings us to a book aimed at specialists: Half-Track: A History of American Semi-Tracked Vehicles, the big white book on the left. This is also a general history of these vehicles, but goes into much greater depth and detail than books like Osprey New Vanguard ever could. Take a look:

IMG_0887.jpegIMG_0888.jpeg

Books like this describe not just the broad lines but go into a fair bit of detail about the whys and hows of vehicle development, when all kinds of details changed, even who was responsible for such things. They then illustrate this with good, clear, original photographs from archives as well as pictures taken from official manuals and (often purpose-made) line drawings of the real thing.

R.P. Hunnicutt, who wrote this book, is the author of a whole series of similar books on American vehicles of the 20th century. If you want the same kind of treatment for German ones (again from the whole 20th century, not just the Second World War), look for books by Walter J. Spielberger. There are a lot more authors writing books like these, and recent decades have seen a lot of them published because we’ve reached the point where modellers and other enthousiasts want this kind of detail. The downside is that a lot of these books are rather expensive, so you probably don’t want or need them unless you have a serious interest in the subject. If your aim is to simply build a believable model in a reasonable historical context, you can probably do without all of the detail books like these provide.

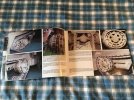
Also, they’re quite good for adding details to models, but you can still do better in that respect, because even though the illustrations from manuals etc. show a lot of detail, as a modeller you will still often wonder how things actually fit together, or want a better view of what it really looks like. In that case, you want books that are properly aimed at modellers, like the Walk Around M2/M3 Half-Track at lower right. This is filled with photographs like these:

IMG_0893.jpeg

You can find similar pictures online if you search for the vehicle name plus walkaround (usually as one word). Books and sites like this often cover pretty much every detail you could want to take a close look at, but again, there’s a “beware” here. In this case, it’s that the photos are almost always of restored vehicles, and you don’t know how accurate the restoration has been done. If you are aiming for accuracy, you will want to compare to things like historic photographs, pictures from vehicle manuals, and similar that you know show things as they were supposed to be when the vehicle was in service.

Those vehicle manuals also usually cover all kinds of stuff modellers want to see in good detail — but frustratingly, often also a lot of things not at all. Of course, obtaining original manuals is not always easy. If you’re lucky you may find some for sale (and if you’re really lucky, they will even be cheap) but don’t count on it. Luckily for those building models of American vehicles, a lot of technical manuals for them can be found online. The best way to find them is if you know the number, but otherwise searching for the vehicle’s official designation plus Technical Manual may help. I found out that the number for the halftracks is TM 9-710, and typing that into Google led me to online scans:
There are also separate manuals on the power train, TM 9-1710, and the chassis and body, TM 9-1710C, that also turn out to be online:

For American vehicles, a good starting point for this kind of search is TM 9-2800:
This is a catalog of all vehicles in US military service at the time it was published, and each of them includes a header “Technical Manuals” with the numbers of the relevant TMs that you can then use to try and find a scan online. Once you have a basic TM for an American vehicle, there will also be a list of related publications towards the back, which you can use to try and find other manuals that may be useful for building a model of it. You may want to add the word scan or PDF as well, to try and force the search engine to give you those instead of links to vendors of original or scanned copies.

But in case you can’t find a scanned manual, or only find them for sale but not for free download (which is fairly common), with some American vehicles at least you can also buy a book from Tankograd’s Technical Manual (TM) series, the one with the tan cover in the photo of my collection of halftrack books. This series is basically a short history and technical specifications, illustrated with annotated photographs taken from US Army TMs as well as of the vehicle in use:

IMG_0889.jpeg

The downside is that these cost money and are nowhere near as exhaustive as a real TM, but on the positive side, the picture quality is good to excellent, unlike in many scanned TMs you can find online, where the text rather than the pictures seems to have been the main concern.

The last book I pictured is the Kagero Topdrawings one:

IMG_0894.jpeg

I purchased this recently, and to be honest, I’m not quite sure what to make of it. All it is, other than a short introduction, is five-view drawings of the different variants of the M2 and M3 halftracks (the title mentions the M4 but that’s not in it at all), plus some colour art in the middle and on the back cover. A book like this would be useful for when you need to make a major conversion, or even scratchbuild a model, but I don’t see the point for ones you can buy accurate (or reasonably so) plastic kits of.

You can also find drawings like this online, but I’ve found it very hard to find good ones. Mostly, you end up at the-blueprints.com, where the quality is extremely variable, and the ones you can download for free tend to be of such a low resolution that they’re unusable for just about anything. If you want scale drawings, your best option is probably to pay for a book that has them.
 

Jim R

SMF Supporter
Joined
Apr 27, 2018
Messages
13,724
Points
113
Location
Shropshire
First Name
Jim
Very interesting Jakko. Gives an insight into where to look and what to expect. I suppose the first decision is the level of accuracy you want for your model coupled with a realistic assessment of your scratching skills. Also how deep your pockets are for books and aftermarket stuff. Luckily so much is available for free on the web. One thing I do think is important is knowing what parts in the kit can be omitted. So many kits have alternative parts and optional parts and often only a good idea of what you're modelling can dictate what to use. The kit instructions don't always help.
Thanks Jakko. Food for thought.

By coincidence that kit was the second kit I built in 2010 when I started modelling.
 

Jakko

Way past the mad part
SMF Supporter
Joined
Apr 28, 2018
Messages
10,793
Points
113
First Name
Jakko
I suppose the first decision is the level of accuracy you want for your model coupled with a realistic assessment of your scratching skills.
I think you’re probably right, plus you need to take a good look at the kit you have before starting to build it as well as while you’re building it.

Also how deep your pockets are for books and aftermarket stuff. Luckily so much is available for free on the web.
Part of the reason I talked so much about books and not very much about web sites is because in my experience, books tend to be better sources in general — largely because of the great number of web sites that don’t tell or show you anything useful. If you don’t have a good book on the subject, then web sites are a good thing to turn to, but expect to spend ages trawling through them before finding the exact things you’re after. Or to give up in frustration, of course ;)

But, as you say, books cost money while web sites don’t :smiling3: If you don’t have any great interest in the subject but do want a model of it, buying an inexpensive book might be a viable investment, but certainly not an expensive one. On the other hand, if the subject interests you regardless of whether you want to build models of it, or if you foresee yourself building many models of different variants, then IMHO your best option would be to invest in some good reference works on the subject. This is why, for example, I purchased this modest pair of books last year:

img_0180-jpeg.491602


More here — the most expensive book(s) I ever bought, but worth it for me given my overall interests and the Sherman models I have in mind to build.

One thing I do think is important is knowing what parts in the kit can be omitted. So many kits have alternative parts and optional parts and often only a good idea of what you're modelling can dictate what to use. The kit instructions don't always help.
Research can also help with that, yes. If you can find out, for example, at which time certain parts were added to the real vehicle, you may be able to work out that certain bits that come with the kit can be left off because your model will represent an earlier version. Or you may spot that they’re wrong for the vehicle entirely.

By coincidence that kit was the second kit I built in 2010 when I started modelling.
The Dragon M2 halftrack? I’ve only ever built two 1:35 scale American halftracks before, the Tamiya M3A2 and M21. I kind of want to build more, but then, I also want to build so many other things yet I instead waste time typing stuff on my computer instead ;)
 

Jakko

Way past the mad part
SMF Supporter
Joined
Apr 28, 2018
Messages
10,793
Points
113
First Name
Jakko
Since these halftracks are essentially trucks with an armoured body (the British designation for the American halftracks was even “Truck, 15-cwt., half-track”), the model requires the same kind of work to the chassis as a truck kit does. This reminded me again of why I’m not fond of building truck kits in the first place ;)

IMG_0895.jpeg

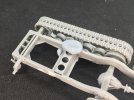
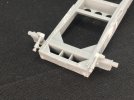
Here, I built the axles, tracks, and made some corrections to the chassis as well as adding more kit parts to it. The previous owner had glued the cylindrical linkage thing on the side of the chassis in the wrong place — onto the lug moulded there, instead of in front of it — so I cut it loose and put it in the right place.

I also filled mounting holes for the idler springs on the rear sides of the chassis, which is why you can see white putty there. The reason for doing this is that the kit provides springs to go there (parts A21 and A22) but complete fails to acknowledge that there are three options here: early American halftracks of all models had no spring at all, then in late 1942 came a thin spring, and finally in mid-1943 the fat one (actually two concentric springs) that the kit supplies. These springs were added because it was found that the track would get thrown when travelling cross-country, since the suspension would get compressed more than on the road and the track would no longer be tight around the wheels. The thin spring was devised by 2nd Armored Division as it prepared to depart for the invasion of French North Africa, and then authorised as a field modification for the US Army as a whole. The thicker spring was subsequently factory-designed and installed, as well as being retrofitted to existing vehicles in the field. It would have been nice if Dragon had catered for all of these, since two or three of the marking options in this kit for vehicles in 1941–42 should not have the springs at all.

Notice also that the idler wheels are moulded in two pieces (inner and outer halves) and the drive sprockets in three (the inner and outer halves plus the sprocket ring between them). They are pretty impressive mouldings, with the whole “cage” structure of each half moulded in one piece. I did cut off a little locating pin on the back of the drive sprocket, for reasons that will become clear in a bit :smiling3: The tracks are also just two parts each, split lengthwise down the middle into a right half and a left half. Do note that they have a definite front and rear, because the sprocket is larger in diameter than the idler, so each will only fit correctly at one end.

Next, I built the bogies, though leaving the pairs of roadwheels separate:

IMG_0905.jpeg

I also added some missing detail to the bogies, as the real ones had a hole with a raised lip towards the bottom on each side. I glued 1.5 mm discs of thin plastic card to the bogies, and when the glue had dried, drilled them out with an 0.9 mm drill. I might see about also adding three little cast-in webs a bit above those holes, that also appear in some photos, but I’m not sure how to make twelve identical ones of those yet.

The whole suspension is a huge improvement over the old Tamiya kits, by the way. The sprockets and idlers on those are much more crudely done, to the extent that a lot of the resin and etched sets for them included (or even consisted of) replacement parts for these wheels, and Tamiya’s vinyl track always wanted to be round rather than sit against the wheels properly. Incidentally, the real track could sag a bit when worn or when the suspension was compressed, but when properly adjusted (and not too worn-out), it should be tight around the wheels, like Dragon has moulded it.

Now comes the fun bit: assembling the whole rear suspension so that it can be taken off again for painting. This is tricky because I’m not fitting the idler springs — if you do have those on, then the idler arms (parts D31) should end up in the correct location automatically. Without those springs, though, the idler arms are hard to position. Here’s the method I came up with.

First, fit the rear axle and wait until the glue has dried. Then put the sprocket into the track, and also insert the bogie with only one pair of wheels clipped into place — if you try to do that with both pairs, you can’t really get it in, because you have to be able to lower it on one side in order to get the return roller under the top run of the track. Once it’s in, you can put in the second pair of roadwheels and clip them into the bogie as well, though this may take a little practice :smiling3: All that done, put the drive sprocket onto the rear axle and slot the bogie into position on the chassis:

IMG_0899.jpeg

I put some Blu-Tack above and below it to ensure it stays in place and doesn’t move:

IMG_0900.jpegIMG_0901.jpeg

Then all you do is put the idler wheel arm (D31) into the idler wheel, put the wheel into the track, ensuring that the arm falls into its locating hole in the chassis, and glue the arm to the chassis. Make sure to press the idler wheel fully into the track as you do this, then leave the whole thing in peace until the glue sets:

IMG_0902.jpegIMG_0903.jpeg
 

Jakko

Way past the mad part
SMF Supporter
Joined
Apr 28, 2018
Messages
10,793
Points
113
First Name
Jakko
On the idler mounts, I glued a bit of plastic rod to represent the attachment point for the screw that’s used to adjust the idler:

IMG_0906.jpeg

On halftracks with the idler springs, these screws didn’t connect to that, but the springs did. The screws on those were repurposed as stops, to limit the idler’s rearward travel.

Removing the springs also meant that the brackets that attach to the tops of the idler arms and run to the back of the chassis, also aren’t needed — those were only on vehicles equipped with springs, if I interpret the manual correctly. So I filled the holes for them in the back plate of the chassis.

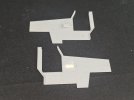
Later halftracks had a jerrycan bracket on each side of the cab, just forward of the doors, but those were not on early vehicles. Unfortunately, Dragon moulds the mounts for the brackets integrally with the cab side plates, so I have to cut them off:

IMG_0913.jpeg

This is not that easy. I first sawed through the block parallel to the side plate, then carefully chiseled and filed it away, together with a few other bits that weren’t on the early halftracks, and glued a piece of 0.75 mm plastic card into the hole. Unfortunately, that meant I also took off some screws (the things that look like rivets on the armour plates are actually domed screws), so I’ll have to replace them later. This is why I’ve only done one side yet: so I can take the locations of the screws from the other side. Before that, though, it will need putty and sanding to blend in this repair.

Oh, and don’t buy the Kagero book with drawings:

IMG_0907.jpeg

I think the kit is accurate 1:35, whereas the book …
 

Jakko

Way past the mad part
SMF Supporter
Joined
Apr 28, 2018
Messages
10,793
Points
113
First Name
Jakko
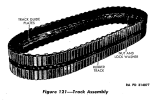
In real life, they’re a rubber band with steel cables running lengthwise, connected by steel bars, inside.

M2 track description.png
M2 track.png

Which means that for once, we modellers can have hard plastic tracks that are not a pain to assemble ;)
 

Jakko

Way past the mad part
SMF Supporter
Joined
Apr 28, 2018
Messages
10,793
Points
113
First Name
Jakko
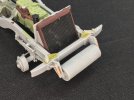
Early halftracks had a roller on the front, to prevent them getting stuck when the nose hits some terrain feature. This was later replaced by a winch, and Dragon gives you both options, so I built the roller. However, the springs on either side of it were moulded integrally with the supports, when on the real thing they clearly sat against those supports rather than in a kind of square trough like Dragon has moulded them. So, cut away and replace by some copper wire wound around a bit of plastic rod:

IMG_0915.jpeg

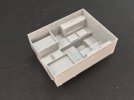
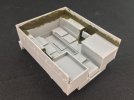
I also built the rear compartment, or well, the basic parts for it:

IMG_0916.jpeg

I’ll wait until I’ve built the main parts of the cab, so I can line the two up correctly, before adding the details, though.
 

Jakko

Way past the mad part
SMF Supporter
Joined
Apr 28, 2018
Messages
10,793
Points
113
First Name
Jakko
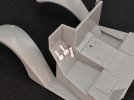
Replacement pedals in the cab, because they were moulded as little rectangles on the floor:

IMG_0923.jpeg

Not that much of this will be on show, but at least they should be clearly separated from the floor like this.

That done, I could fit the sides of the cab as well as the bonnet, then dry-fit cab and rear area on the chassis to make sure they line up correctly:

IMG_0924.jpeg
 

Jakko

Way past the mad part
SMF Supporter
Joined
Apr 28, 2018
Messages
10,793
Points
113
First Name
Jakko
The cab is mostly finished now, inside and out:

IMG_0931.jpegIMG_0932.jpeg

The etched shutters for the radiator come with the kit, but are tricky to fit because they don’t really want to stay flat and straight. I also think they need careful handling so I don’t bump them and break them off. Dragon does also provide a part with the shutters moulded integrally, but closed, though.

Inside the cab, I painted the bits that will be hard to spray later on, and also replaced the gearshift lever because the real thing has three bends rather than two like Dragon’s part.

I also did some more work on the rear compartment:

IMG_0933.jpeg

Mainly painting here as well, but I also added a lip around the lid of the left-hand stowage locker, which is missing in the kit. The right locker will be open, but I’ll have to scratchbuild the lid for it because the kit part is far too thick where it doesn’t show. This is very odd, really, because Dragon gives you both shelves inside both lockers but no way to display those open … For an M2 I would have expected the side doors to be separate parts too, but they’re moulded integrally with the sides. It’s not too hard to open them, of course, because they’re just rectangular lids that sit in the corner of the armour plate, making them easy to cut out and replace by some plastic card, but it’s an odd design choice.

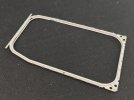
The painted part, BTW, is because it will be covered by the machine-gun skate rail. That rail is nicely moulded, though it has a mould line down the centre, which needs careful removing by scraping, filing and sanding.

Dragon also missed the two raised edges to the skate rail, along the bottom and top, but those would have been impossible to mould except by making the rail in a top and bottom half, which would probably have left a join that would be a lot harder to remove. To replicate those edges, I’m using 0.25 by 0.5 mm strip:

IMG_0935.jpeg

Only the bottom edge done here, and as you can see in the picture, the piece of strip I used was exactly 4 mm too short for the full length. After taking the picture I’ve of course glued in a bit to close the gap :smiling3:
 

Jim R

SMF Supporter
Joined
Apr 27, 2018
Messages
13,724
Points
113
Location
Shropshire
First Name
Jim
Coming on very well Jakko. Your work on this has certainly improved it's accuracy and detail.
I remember those PE radiator flaps. I ended up gluing a styrene strip behind each flap to keep it rigid.
 

Jakko

Way past the mad part
SMF Supporter
Joined
Apr 28, 2018
Messages
10,793
Points
113
First Name
Jakko
I was thinking of reinforcing them from the inside too, but then figured that would probably be visible so I’m trusting in them being a bit out of the way to keep them from damage …
 

Scratchbuilder

SMF Supporter
Joined
Jul 2, 2022
Messages
1,938
Points
113
First Name
Mike
Looks a nice project Jakko, and I'll try to keep up this time. Is that Scottie standing on the left, in the 4th picture???...

Prost
Allen
That was before he was kicked out of the army and went abroad where he grew a mustache and parted his hair down the middle, changed his name to Tojo....
 

Scratchbuilder

SMF Supporter
Joined
Jul 2, 2022
Messages
1,938
Points
113
First Name
Mike
Very interesting background Jakko. American half-tracks crop up somewhere in just about every WW2 film made. After the war the Israeli army procured quite a few and they were in use for many years.
I look forward to another detailed and informative build from you.
We kept ours as well and the REME procurred some and used them as mobile workshops.
 
Top