OZ-ooMS Tallgeese (1/100 Bandai Gundam MasterGrade)

D

Deleted member 6559

Guest
Lovely work Wouter. The chipping is superb - looks like all the general state of our domestic appliances, so I can relate to that..
 

Steve Jones

Steve Jones Scale Modelling Site
Joined
Apr 27, 2018
Messages
6,698
Points
113
Location
Plymouth
First Name
Steve
Brilliantly weathered and chipped Wouter. Stunning work as always my friend
 
Joined
Apr 28, 2018
Messages
695
Points
93
Location
Belgium
First Name
Wouter
Peter and Steve, thanks for popping in lads ^^. Not too much weathered yet though. Still need to do that. I just varnished and decalled the lads's gun, and then we can let the weathering frenzy loose again :tongue-out3:

Cheers
 
E

EJD

Guest
Hi Chris, glad you made the plunge into Gunpla. Saw your very first finished one on FB and I was very pleased with the outcome, well done!

Today was a bit of 'shelfqueen day' :D

Well, been working on it for a couple of days/weeks on and off now - so not only today :D
Prior to weathering we need chipping... A LOT...I was afraid I overdone it but when I look at it now at the photos I think it's quite restrained for my doing. Probably heavy chipping for most Gunpla enthousiasts but I think it's not too much so far. On the real fun now ^^
View attachment 332106View attachment 332105
wow, that looks really good.
 
  • Like
Reactions: JR

JR

Member of the Rabble and Pyromania Consultant
SMF Supporter
Joined
May 26, 2015
Messages
17,275
Points
113
Location
lincs
First Name
John
Wouter, the new modelling room sounds good, as this does. Nice to see it back.
 
Joined
Apr 28, 2018
Messages
695
Points
93
Location
Belgium
First Name
Wouter
EJ and John, thanks fellas.

I started weathering finally. At them moment I working with oils because these are the most versatile to use I think. I did one half so you can see the difference. It's quite subtle but it's obvious I hope :smiling2: . The Dobergun was painted and decalled, and after that I gave it a coat of two of Mr. Color Flatt varnish. With weathering under way it really shows how thick the decals are (and these are even aftermarket!).
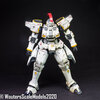
Tallgeese (38).jpg
Tallgeese (39).jpg
Tallgeese (40).jpg
It doesn't show clearly on the photos but you can see the edges of the carrier film here and there. It's clear to me that Micro Set and Sol aren't just strong enough for Asian thick decals. So I got myself Mr.Mark Softer...quite hard to get these days in Europe. Gunze have made versions of Mr. Mark Setter and Softer with the addition of the word 'Neo'...I guess these are softened down to handle thinner European style decals. Luckily I found a French seller who had the original formula ^^. Will try that on a next build.

Cheers
 

Jim R

SMF Supporter
Joined
Apr 27, 2018
Messages
13,724
Points
113
Location
Shropshire
First Name
Jim
Hi Wouter
Glad you're enjoying the new workroom. This is looking superb. I know nothing about this genre of modelling but I can recognise quality. Little man sure is little :tongue-out3:
Jim
 

Steve-the-Duck

SMF Supporter
Joined
Jul 3, 2020
Messages
1,128
Points
113
Location
Medway Towns
First Name
Chris
That has to be the fattest thighs I have ever seen on a Mobile Suit... I do like the weathering job
 
Last edited:
Joined
Apr 28, 2018
Messages
695
Points
93
Location
Belgium
First Name
Wouter
Paul, thanks mate.

Hi Jim, the little man is indeed, a little one :smiling5: . Thanks!

Chris, this MS sure got fat thighs, but fattest, not sure...if you look at a Sazabi or so :smiling2:.

We are well past the 10 hours mark when it comes to oil paint weathering :flushed:. A bit further in the process after last update I wanted to try something new which Mig showed in his weathering Mecha book, by Ammo of Mig.
Basically you spray chipping solution on top of some areas, and spray Ammo Engine Grime on top of that. With water and a stiff brush you remove some - more or less the same as the hairspray method.
It states that the chipping solution is an acrylic product, so my oil paint weathering should have been safe...not so :rolling:. When I started removing the engine grime from the upper legs, I also removed the oil paint weathering underneath it. Quite clear I wasn't a happy bunny. So lesson learned: I will add a additional layer of varnish prior trying such techniques again...

Anyway, after the disaster I continued weathering with oils (not finished yet) and this is how Tallgeese looks at the moment. Quite hard to catch all the subtle effects on photo though.
Tallgeese (41).jpg
Cheers
 

Jim R

SMF Supporter
Joined
Apr 27, 2018
Messages
13,724
Points
113
Location
Shropshire
First Name
Jim
Hi Wouter
Beautifully done. I can well understand the hours spent. Very annoying when a reaction occurs that shouldn't happen. I think it is to do with some acrylic products having solvents which you don't expect. Rather like Tamiya acrylics.
Jim
 

Steve Jones

Steve Jones Scale Modelling Site
Joined
Apr 27, 2018
Messages
6,698
Points
113
Location
Plymouth
First Name
Steve
10 hours of oil work?? Just started then :smiling5: Two years on the Stug wasnt it??:smiling2::smiling5::cool::thumb2:

Sorry to hear about the decals. Hopefully the oil work is covering up the issues. Really like the weathered look.
 
Joined
Apr 28, 2018
Messages
695
Points
93
Location
Belgium
First Name
Wouter
Hi Jim, thanks and yeah you are right, you can never know. Next time I'll apply a layer of varnish in between. I think in the articles and magazines they should mention this because this will happen to more people in the future no doubt :tongue-out3:

Hi Steve, the StuG, now you mention something, quite right chap LOL

Well, Tallgeese is nearing completion. Some more weathering with oils has been done, as some splattering using enamels on the lower legs. The base of the feet received some mud treatment, though just gentle. Tallgeese (42).jpgThe s
hield and boosters got weathered, although I tried to restrain myself especially on the booster packs. The Dober gun got some weathering as well, but since it's a weapon, I reckon it would be treated quite well by the maintenance crews.
Oh, and Zechs Merquise, the pilot saw that all was well.
Tallgeese (43).jpg
Next will be adjusting here and there and then a flat coat. Hopefully I can take the endshots during the week. I'm just hesitating wether I'd use the white or the black background :tongue-out:

Cheers
 
  • Wow
Reactions: JR

JR

Member of the Rabble and Pyromania Consultant
SMF Supporter
Joined
May 26, 2015
Messages
17,275
Points
113
Location
lincs
First Name
John
That's as good as any I've seen in adverts for A-mig Wouter.
That little guy :fearful: do you just use a pin to paint .:surprised:
 
Joined
Apr 28, 2018
Messages
695
Points
93
Location
Belgium
First Name
Wouter
Thanks a lot John. About painting the little guy, no pin, just a 00 W&N brush and nerves of steel :cool:...well, I lied about the nerves part :smiling2:.

Well then, Tallgeese is finished, I'll post the rest of the photos in the finished builds forum.
Tallgeese (47) TEXT.jpg

Cheers
 

Steve Jones

Steve Jones Scale Modelling Site
Joined
Apr 27, 2018
Messages
6,698
Points
113
Location
Plymouth
First Name
Steve
Outstanding Wouter. Were the dents, scratches and general weathering from your own imagination or did you work from reference pictures??
 
Joined
Apr 28, 2018
Messages
695
Points
93
Location
Belgium
First Name
Wouter
Mister Jones! Well, I used the Mecha book by Mig as inspiration but I quickly strayed away from his methods and just did my own. Scratches and all were mostly imagination but the internet is full of inspirational stuff.

Hi Si, thanks a lot bud ^^
 
Top