Revell 1/25 1970 Dodge Charger

Mr Bowcat

SMF Supporter
Joined
Dec 29, 2016
Messages
3,647
Points
113
Location
London
First Name
Bob
Hi all,

So, next on the bench is this.

53579679477_0d9aa12927_c.jpg


My eldest daughter is a fan of the films, and the Charger in particular. She is off to University in September to train to become a Midwife, and I wanted to build something for her to take with her as a little reminder of home.
 

Mr Bowcat

SMF Supporter
Joined
Dec 29, 2016
Messages
3,647
Points
113
Location
London
First Name
Bob
Morning all.

Made a start on this yesterday by getting the body prepped for paint. There was a bit of a seam along the front and rear wings, nothing too major. However the inside of the roof was terrible, four really deep EPM's, which as they had got in at an angle were raised on one side and low on the other. I got these filled and sanded, somewhat awkward due to the position and curves.

53585110283_612a29d57f_c.jpg


The kit also comes with moulded trim on the wheel arches, however the F&F car does not have these, so a bit of slicing and sanding soon fixed that.

53585210204_487139c31c_c.jpg


53585110253_ab8b066b3c_c.jpg
 

Scratchbuilder

SMF Supporter
Joined
Jul 2, 2022
Messages
1,943
Points
113
First Name
Mike
I remember the one in Bullet that wrote off Steve McQueens Shelby Mustang... He was only meant to slide along the dirt, not go into the ditch.
 

Jim R

SMF Supporter
Joined
Apr 27, 2018
Messages
13,732
Points
113
Location
Shropshire
First Name
Jim
The head lining and the wheel arches look very neatly done. Much more care needed on a gloss finish than on some muddy old tank :smiling:
 

Mr Bowcat

SMF Supporter
Joined
Dec 29, 2016
Messages
3,647
Points
113
Location
London
First Name
Bob
Morning gang.

I realised I've not updated this thread, to engrossed in the build.

The body has been painted and glossed, still needs flatting, polishing and the chrome trim painting, so will post pics of that when it's done.

In the meantime I've pushed on with some other parts. First up, the engine.

53629021531_60a274ee97_c.jpg


53629359314_ce3b7a5805_c.jpg


I used a Scale Production distributor which is now mostly hidden, but I think the leads look good. And yes, I'm that sad that the plugs are wired in the correct firing order.

Also completed the interior. Now this wouldn't be a F&F car without a little Nitrous.

53629228408_4a501fb0de_c.jpg


53629021516_fe18fdf7f4_c.jpg


53629021511_a8beabc43a_c.jpg


53629021506_1d1a054bc0_c.jpg


I've now moved on to prepping the chassis and running gear and will update when that's done.
 

yak face

Wossupwidee?
Staff member
Moderator
SMF Supporter
Joined
Jun 13, 2009
Messages
12,405
Points
113
Location
sheffield
First Name
tony
Engine looks magnificent bob , looking forward to seeing the body , cheers tony
 

Mr Bowcat

SMF Supporter
Joined
Dec 29, 2016
Messages
3,647
Points
113
Location
London
First Name
Bob
Morning all. :smiling3:

Well I've been having a nightmare with this. The body had been painted, glossed and polished some time ago but I still had to paint the chrome window trim. I masked everything up, and then in a stupid moment decided to use a paint pen for the chrome instead of airbrushing. This went disastrously with the chrome paint bleeding under the masking tape.

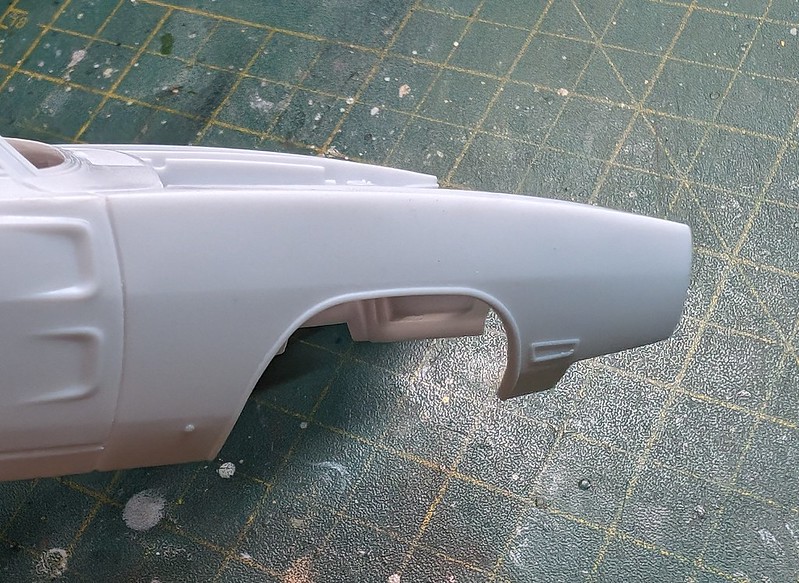
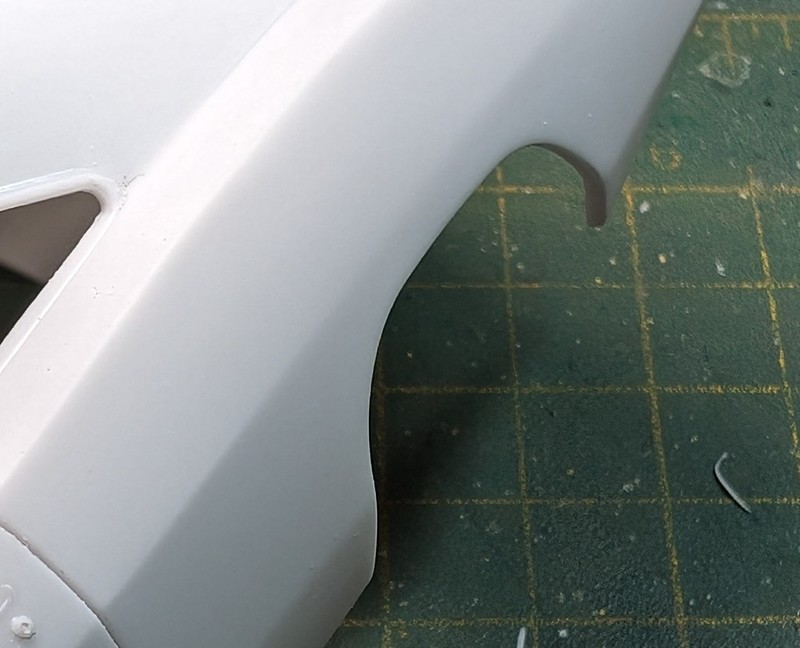
I tried to remove it with thinners and sanding, but of course this just made things worse. Luckily I had only done one side so decided just to respray the top of the door and edge of the roof that were damaged, so masked up this area. This left a paint ridge along the roof which I thought I could sand out. I was wrong, leading to more masking and the entire roof needing to be sprayed, glossed and polished again. Having done this I found some dust stuck in the boot (trunk) lid, and while trying to polish this out I got to close too the edge of the rear wing (which is very square) and rubbed through to primer. This then had to be sprayed again, which I did without masking to avoid the same issues I had with the roof.

So 3 weeks later I was back to square one and ready to paint the chrome trim again. I masked up again and did what I should of in the first place and airbrushed.

53675539529_62416b4201_c.jpg


53675406868_76c7e3b201_c.jpg


I still need to polish the body again but will wait a few days to make sure the chrome is fully cured. I really don't want to have to mask it all up again.

So lesson learned, don't try and cut corners.
 

Jim R

SMF Supporter
Joined
Apr 27, 2018
Messages
13,732
Points
113
Location
Shropshire
First Name
Jim
Certainly fighting you all the way Bob. I have no doubt you'll sort all the issues. The engine and the interior are stunning.
How do you go about polishing the bodywork? What do you use?
 

Mr Bowcat

SMF Supporter
Joined
Dec 29, 2016
Messages
3,647
Points
113
Location
London
First Name
Bob
Cheers all. :smiling3:

Jim, currently using Trizact 6000 & 8000 pads to flat back (used wet), then Tamiya coarse and fine compounds, finished with a final wax coat once the whole model is complete.
 
Top