You are using an out of date browser. It may not display this or other websites correctly.
You should upgrade or use an alternative browser.
You should upgrade or use an alternative browser.
Sheds
- Thread starter Ancientmariner
- Start date
Ancientmariner
SMF Supporter
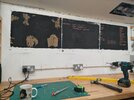
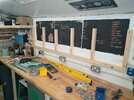
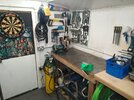
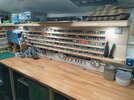
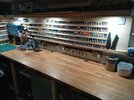
Thanks John. This morning I decided the shutters don't get used so can be permanently boarded over. This led to more shelf space creation and a stash shelf as well (well some of the stash).
Used the old shutters cut down and a fair bit of off cuts to finish off. Not the work of a master craftsman but ok for an afternoons work.
Used the old shutters cut down and a fair bit of off cuts to finish off. Not the work of a master craftsman but ok for an afternoons work.
Attachments
Ancientmariner
SMF Supporter
It would be nice to be able to do it all at once and a lot easier but budgets make it impossible.
Very happy with it, though I think a carpenter would have a heart attack of they looked at my "can do attitude" carpentry
Very happy with it, though I think a carpenter would have a heart attack of they looked at my "can do attitude" carpentry
James,
all you need now is the dartboard - nothing relieves tension more than hurling sharp objects at a target!
Dave
all you need now is the dartboard - nothing relieves tension more than hurling sharp objects at a target!
Dave

What and knock the door off !James,
all you need now is the dartboard - nothing relieves tension more than hurling sharp objects at a target!
Dave

Ancientmariner
SMF Supporter
Ancientmariner
SMF Supporter
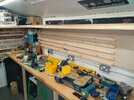
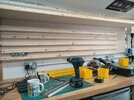
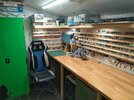
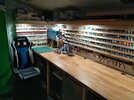
So roof insulation has been a remarkable success and shed temp is far more under control than before. Also have only done one half of the roof so far.
Decided to install spots as well for better illumination when modelling and it saves having big strip lights on if I'm just sat having a beer.
Modelling Ben h is complete as far as I am concerned. Nothing else to do but get modelling!
Decided to install spots as well for better illumination when modelling and it saves having big strip lights on if I'm just sat having a beer.
Modelling Ben h is complete as far as I am concerned. Nothing else to do but get modelling!
Attachments
Jim R
SMF Supporter
Hi James
Bet you can't wait to sit at that bench and start cutting plastic. You've certainly earned it after all the work.
Jim
Bet you can't wait to sit at that bench and start cutting plastic. You've certainly earned it after all the work.
Jim
Ancientmariner
SMF Supporter
Indeed jim but I need to insulate the other half of the roof really and then can properly get down to it.Hi James
Bet you can't wait to sit at that bench and start cutting plastic. You've certainly earned it after all the work.
Jim
May do some railway modelling tomorrow though and also move some of the stash there.
- Joined
- Mar 1, 2018
- Messages
- 314
- Points
- 43
- First Name
- Noel
It's a workspace most can only dream of. Very impressive.
All you need now is the book ' Fifty Sheds Of Grey' ! Lol.
All you need now is the book ' Fifty Sheds Of Grey' ! Lol.
Tworrs
SMF Supporter
James, you are putting my humble abode to shame 
Very impressive,

Very impressive,
- Joined
- May 26, 2009
- Messages
- 13,006
- Points
- 113
- First Name
- Ron
I hope this thread is for general shed stuff. If not, can the mods move it elsewhere please.
I've not done much 'plastic' lately. Recently, the wife dropped hints she wanted a Potting shed!
So, to earn me some leisure points, I thought "I'll give her a 'Potting shed, and how!", and after looking at the horrendous price of kit ones, I set to with me tape, paper and pencil...
I had the idea of using second hand glazed pine doors. I found 9 locally for £20 in total and built the shed around these. The shed so far has cost us about £150 and is about 12ft x 8". The decking is 4ft out.
The veranda cum decking is re-cycled stuff from a previous, wind wrecked thingy.
As it is situated against a hedge, a view to the rear was not required, so I built the back out of new 3x2 studding and 8x4 boards.
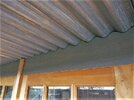
The roof is corrugated tin. No desperate need for insulation or lights just yet. It's for potting in the daylight hours.
Here it is.
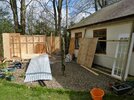
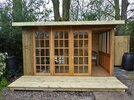
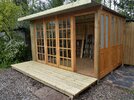
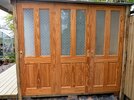
Here's a closer look at one end of the shed.
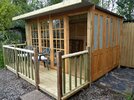
Veranda from re-cycled stuff from a previous, destroyed sitting area.
I made these plywood profile infills to stop the draft going on the Mem Sahib.
Painted.....
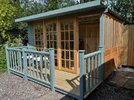
A photo from today. The opening door on the right is slightly different from the other three, but will do until I can acquire an exact match for the other three.
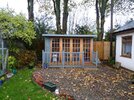
There you go....One happy wife.
Cheers.
Ron
I've not done much 'plastic' lately. Recently, the wife dropped hints she wanted a Potting shed!
So, to earn me some leisure points, I thought "I'll give her a 'Potting shed, and how!", and after looking at the horrendous price of kit ones, I set to with me tape, paper and pencil...
I had the idea of using second hand glazed pine doors. I found 9 locally for £20 in total and built the shed around these. The shed so far has cost us about £150 and is about 12ft x 8". The decking is 4ft out.
The veranda cum decking is re-cycled stuff from a previous, wind wrecked thingy.
As it is situated against a hedge, a view to the rear was not required, so I built the back out of new 3x2 studding and 8x4 boards.
The roof is corrugated tin. No desperate need for insulation or lights just yet. It's for potting in the daylight hours.
Here it is.


Here's a closer look at one end of the shed.

Veranda from re-cycled stuff from a previous, destroyed sitting area.

I made these plywood profile infills to stop the draft going on the Mem Sahib.

Painted.....

A photo from today. The opening door on the right is slightly different from the other three, but will do until I can acquire an exact match for the other three.

There you go....One happy wife.
Cheers.
Ron
Jim R
SMF Supporter
That is excellent Ron. Certainly shows the skills gained from all those years of "wood butchery". I'm sure Mrs Ron feels repaid for all the aeroplane chucking she has done over the years.
Andy the Sheep
SMF Supporter
Definitely a first class work, Ron. 

boatman
SMF Supporter
JEN said can you come an build her one 570 ? lol
as she really likes that
chrisb
as she really likes that
chrisb
- Joined
- May 26, 2009
- Messages
- 13,006
- Points
- 113
- First Name
- Ron
Thanks fellas.
Jim, yes, indeed and hopefully this shed makes us even...Although I very much doubt it.
Andy. Glad you like the creation.
Pete, if you take a look at the pictures with the veranda added, you can see the lock holes have been covered. The same as the front elevation ones....
Chris. Jen would not approve of my idea of 'Leisure Points', so I'll have to decline her request.
Your good buddy,
Ivor Nammeransor
Jim, yes, indeed and hopefully this shed makes us even...Although I very much doubt it.
Andy. Glad you like the creation.
Pete, if you take a look at the pictures with the veranda added, you can see the lock holes have been covered. The same as the front elevation ones....

Chris. Jen would not approve of my idea of 'Leisure Points', so I'll have to decline her request.
Your good buddy,
Ivor Nammeransor
Unless I’m going mad (highly likely I know) they are plugged in the later pictures Pete……..Nicely done Ron, I hope SWMBO is pleased. I hope you're going to plug those lock holes in the doors though!
Pete
Nice job, by the way, Ron. More summerhouse than potting shed is that. Bet you spend time in there modelling when it warms back up


