Neil Merryweather
SMF Supporter
Here’s what I’ve been getting up to when I can’t face the thought of any more 54mm French Fusiliers…..
Last summer I built a huge T Rex head for my granddaughter on my 3D printer Link HERE and I felt that in fairness I should offer to make something for her older sister. I suggested she look online for something steampunk as that’s kind of her style (although she hadn’t ever heard the term…)and she sent me a link to this….

I don’t know why she picked a gun but I checked out the website https://blenderartists.org/t/steampunk-gun/1260089
and the model was available to buy as an .stl file, ready to be printed.
Job done, I thought.
Sadly, as is common when using models with a high quality visual render, the underlying 3D data is not so highly detailed, as can be seen here.
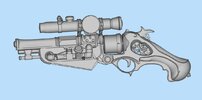
This is done to reduce the polygon count and thus the file size, typically in gaming and animation, to make the regeneration of the image faster. Notice how the curved surfaces are quite faceted-for the same reason.
So I had a bit (a lot…) of work to do to somehow create all the 3D decoration and basically rebuild all the nasty faceted curved surfaces.
Before:
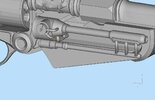
After (WIP)
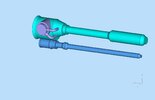
And the other aspect to this project is to break it down into a kit of parts so as to build it with as little support structure as possible-example to follow shortly. The different colours here denote separate parts for printing.
I started this process back in April, printing parts as and when they were ready, and I still haven’t quite finished. I started assembling it today and then I thought some of you might be interested, so before I got too far into it I took some pics of the parts.
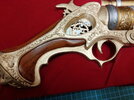
The butt (part-assembled, sorry)
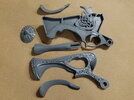
Two thirds of the barrel assembly
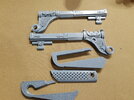
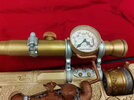
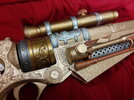
The chamber and sight
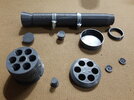
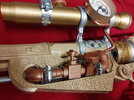
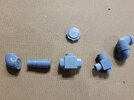
And the pipes on the left hand side
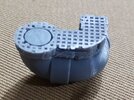
And here is what the support structure looks like on the bent piece of tube on the extreme right
This is how it looks when it’s removed
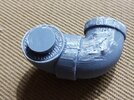
It’s not pretty and requires work to make good, so the trick is to build the parts in such an orientation that support is not required at all, or is kept to a minimum and, if possible, out of sight .
Which is why I have split the barrel in half, because filling a split line is easier than removing the evidence of the support
There is a water-soluble support filament but it’s a bit temperamental so I only use it when it’s unavoidable
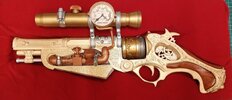
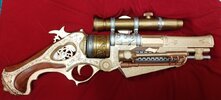
And this is as far as I have got- I hope some of you find it interesting.
Cheers
Neil
Last summer I built a huge T Rex head for my granddaughter on my 3D printer Link HERE and I felt that in fairness I should offer to make something for her older sister. I suggested she look online for something steampunk as that’s kind of her style (although she hadn’t ever heard the term…)and she sent me a link to this….

I don’t know why she picked a gun but I checked out the website https://blenderartists.org/t/steampunk-gun/1260089
and the model was available to buy as an .stl file, ready to be printed.
Job done, I thought.
Sadly, as is common when using models with a high quality visual render, the underlying 3D data is not so highly detailed, as can be seen here.

This is done to reduce the polygon count and thus the file size, typically in gaming and animation, to make the regeneration of the image faster. Notice how the curved surfaces are quite faceted-for the same reason.
So I had a bit (a lot…) of work to do to somehow create all the 3D decoration and basically rebuild all the nasty faceted curved surfaces.
Before:

After (WIP)

And the other aspect to this project is to break it down into a kit of parts so as to build it with as little support structure as possible-example to follow shortly. The different colours here denote separate parts for printing.
I started this process back in April, printing parts as and when they were ready, and I still haven’t quite finished. I started assembling it today and then I thought some of you might be interested, so before I got too far into it I took some pics of the parts.
The butt (part-assembled, sorry)

Two thirds of the barrel assembly

The chamber and sight

And the pipes on the left hand side

And here is what the support structure looks like on the bent piece of tube on the extreme right

This is how it looks when it’s removed

It’s not pretty and requires work to make good, so the trick is to build the parts in such an orientation that support is not required at all, or is kept to a minimum and, if possible, out of sight .
Which is why I have split the barrel in half, because filling a split line is easier than removing the evidence of the support
There is a water-soluble support filament but it’s a bit temperamental so I only use it when it’s unavoidable
And this is as far as I have got- I hope some of you find it interesting.
Cheers
Neil


