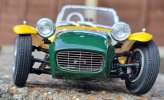
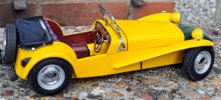
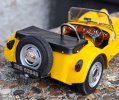
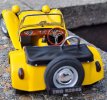
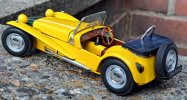
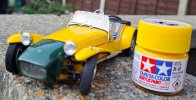
Tamiya 1/24 Lotus 7 with tweaks.

Stefee

SMF Supporter
Joined
Feb 12, 2023
Messages
203
Points
93
Location
HemelHempstead
First Name
Stefan
Hi all,


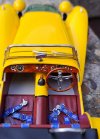
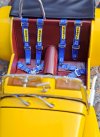
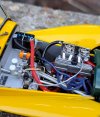
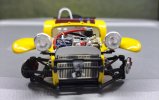
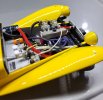
Just finished my latest build as per title. Lovely kit if a little fiddly in places (looking at you seat belts). I went a bit mad in the engine bay with cables, pipes, brackets, coil etc. but really enjoyed bringing it up. The one problem is that the bonnet doesn't fit 100%.


This represents a car we rebuilt for a customer who was the Dealer Principal for Mercedes Benz in Roodepoort/Krugersdorp in South Africa with whom we did a lot of business. He was 6 foot 6 inches tall and had a bad leg from his time in the military so we had to do loads of mods to the pedal box, steering column etc. so he could drive it in relative comfort. He wanted the car opposite of the green body and yellow nose cone just to be different and we also fitted a burr walnut dash, steering wheel and gear know which I have tried to recreate. A really fun car to drive with handling that puts many modern vehicles to shame.


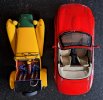
Excuse the number of photos but I am proud of this build. All Tamiya Acrylics except for the exhaust side pipes which is Mr. Hobby Super Metallic Chrome over gloss black. All comments and criticisms welcome. The last 2 images are to show the diminutive size of the car especially against a 1/24 Mazda MX5.
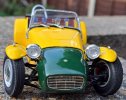
LOTUS 1.jpg

LOTUS 2.jpgLOTUS 5.jpgLOTUS 15.jpgLOTUS 6.jpgLOTUS 7.jpgLOTUS 8.jpgLOTUS 9.jpgLOTUS 10.jpgLOTUS 11.jpgLOTUS 13.jpgLOTUS 16.jpgLOTUS 18.jpg
 

therapy

SMF Supporter
Joined
Apr 21, 2019
Messages
884
Points
93
Location
East Anglia
First Name
Nick
Lovely gloss on that paintwork Stefan. And you're right, she sure is tiny!

Nick.
 

Allen Dewire

Proud Rabble Member
SMF Supporter
Joined
Apr 27, 2018
Messages
4,105
Points
113
Location
Bamberg
First Name
Allen
Wow, that is a great finish Stefan!!! Love the cable/plumbing work and that glossy finish is really cool. I bet those seat belts were fun to to make too. I never realized the Lotus 7 was so small either. Good stuff Sir!!!...

Prost
Allen
 

Stefee

SMF Supporter
Joined
Feb 12, 2023
Messages
203
Points
93
Location
HemelHempstead
First Name
Stefan
Thank you all for the positive feedback and kind comments, makes the 83 hour build time worth the effort.
 

Stefee

SMF Supporter
Joined
Feb 12, 2023
Messages
203
Points
93
Location
HemelHempstead
First Name
Stefan
Thank you all for the positive feedback and kind comments, makes the 83 hour build time worth the effort.
 

Tim Marlow

Little blokes aficionado
SMF Supporter
Joined
Apr 27, 2018
Messages
16,777
Points
113
Location
Somerset
First Name
Tim
That’s cracking. A real jewel of a build. Especially love the burr walnut. How did you do that?
 

Stefee

SMF Supporter
Joined
Feb 12, 2023
Messages
203
Points
93
Location
HemelHempstead
First Name
Stefan
That’s cracking. A real jewel of a build. Especially love the burr walnut. How did you do that?

Hi Tim,
Thanks for the comments. The wood was simply Tamiya XF57 buff then dry brushed/stippled small areas of XF9 Hull Red, XF7 Red and XF1 Black (all matt colours), at this stage it looks rubbish but the magic happens when you paint X26 Clear Orange Gloss over it. On my VW T1 camper van build I did exactly the same but finished off with a satin clear.
The darker the base the darker the finish and too many coats of Clear orange dulls the effect, I must try with Clear Yellow and Clear Red to see how they look.
 

Tim Marlow

Little blokes aficionado
SMF Supporter
Joined
Apr 27, 2018
Messages
16,777
Points
113
Location
Somerset
First Name
Tim
Hi Tim,
Thanks for the comments. The wood was simply Tamiya XF57 buff then dry brushed/stippled small areas of XF9 Hull Red, XF7 Red and XF1 Black (all matt colours), at this stage it looks rubbish but the magic happens when you paint X26 Clear Orange Gloss over it. On my VW T1 camper van build I did exactly the same but finished off with a satin clear.
The darker the base the darker the finish and too many coats of Clear orange dulls the effect, I must try with Clear Yellow and Clear Red to see how they look.
Cheers Stefan. I’ve used the clear orange over a buff/brown underpaint to do WW1 props, but not for that sort of effect. It looks really effective. Never tried clear red or yellow like this either. The Red might work for a mahogany finish :thumb2:
 

Steve-the-Duck

SMF Supporter
Joined
Jul 3, 2020
Messages
1,128
Points
113
Location
Medway Towns
First Name
Chris
That's a real beaut, as a build and finish
But, I'm just going to say it; the yellow bodywork on this car just looks so wrong somehow! Garish, that's the word I'm looking for. Still, if it was what the guy wanted...
 

Stefee

SMF Supporter
Joined
Feb 12, 2023
Messages
203
Points
93
Location
HemelHempstead
First Name
Stefan
But, I'm just going to say it; the yellow bodywork on this car just looks so wrong somehow! Garish, that's the word I'm looking for. Still, if it was what the guy wanted...

Chris I agree re the colour but, as you say that's what he wanted, plus when he entered clubman races he was very easy to spot!
 

Jabba

SMF Supporter
Joined
Feb 7, 2023
Messages
40
Points
33
Location
Saint-Yrieix-la-Perche (87500)
First Name
Peter
Wow! Nice job Stefee! Those brake pipes must have been very fiddly. I have been using some 0.8 wire from my MIG welder for brake lines recently as it is the right colour for the old Kunifer bake pipe that we used to use at the time, and its easy to bend into shape.
 
Top