Tamiya 1/35 PBR (pibber)

Andy T

SMF Supporter
Joined
Apr 26, 2021
Messages
1,964
Points
113
Location
Sheffield
First Name
Andy
Ahoy shipmates. This is my first real boat build so I'm starting with something easy.

As usual for me it'll be built out of the box but I may add a few tweaks. I hope you'll allow me artistic license as I know very little about the subject and I'm happy to keep it that way ;)
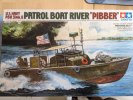
1000003751.jpg

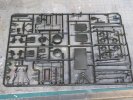
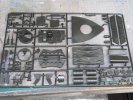
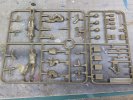
I'll keep the sprue shots as thumbnails, but at least they're here if you want to look
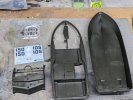
1000004534.jpg 1000004535.jpg 1000004536.jpg 1000004537.jpg

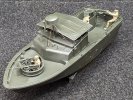
The first few steps were super quick and we have a boat-shaped thing already. I found the included stand handy for building on:
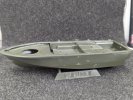
1000004552.jpg

Next up was the cockpit / helmsman area. Pretty nicely detailed but I've left a couple of bits off for ease of painting:
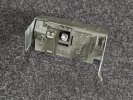
1000004554.jpg

These are the walls around that area. They were covered in large ejector marks that needed dealing with (this becomes a theme with this kit) I've left a couple of small one that will be hidden by later parts:
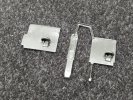
1000004555.jpg

Then we come to this front area. It had some really visible moulding lines so these were removed and the corners rounded a bit to better represent the real thing.

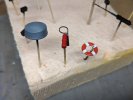
I also added the two masts. The instructions suggest rigging them with stretched sprue but knowing how clumsy I am I've used copper wire, adding a few twirly bits at the ends. Not sure how accurate they are but I saw them in the build video I watched and thought it added a bit of interest:
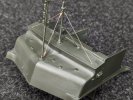
2023-09-26 12.40.12.jpg

Next up was the bow turret. Again plenty of injector marks and I was unsure which would be visible, so dealt with them all:
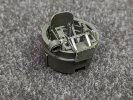
1000004569.jpg

I've also been knocking up some of the smaller sub assemblies to give them time to dry before clean up:
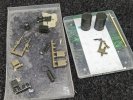
1000004570.jpg

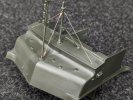
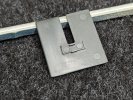
And this is the armour shield for the aft MG showing more ejector pin marks. I've removed the ones on the left with lots of sanding. It thins the part a bit and softens the edges but I find it much quicker than waiting for filler to dry and should be unnoticeable once painted:
1000004571.jpg
 

Attachments

  • 1000004565.jpg
    1000004565.jpg
    101 KB · Views: 2

Jakko

Way past the mad part
SMF Supporter
Joined
Apr 28, 2018
Messages
10,814
Points
113
First Name
Jakko
This was Tamiya’s celebratory release as the 150th kit in the 1:35 scale military series, so they went to town on it. The ejector pin marks are quite bad, though, yes. Good idea about the copper wire — I think I used thread on the ones I built, but copper wire should be easier to get straight.
 

Andy T

SMF Supporter
Joined
Apr 26, 2021
Messages
1,964
Points
113
Location
Sheffield
First Name
Andy
Tensioning the wire was a little tricky as its probably a bit thicker than I'd have liked. The free ends connect underneath and I twisted them together until it looked okay.
 

Jim R

SMF Supporter
Joined
Apr 27, 2018
Messages
13,732
Points
113
Location
Shropshire
First Name
Jim
Your first floaty thing :thumb2: Looks a decent kit apart from all those ejector pin marks. Sanding them away on the armour shield probably had the added benefit of thinning the shield to a more scale thickness ;)
 

Andy T

SMF Supporter
Joined
Apr 26, 2021
Messages
1,964
Points
113
Location
Sheffield
First Name
Andy
Jim- I read somewhere that some of the armour panels on these are ceramic. I'm glad I saw that as I was going to do a bit light chipping & rust effects on them :tears-of-joy:
 

The Smythe Meister

Born to be WILD....... until about 9pm
SMF Supporter
Joined
Jan 30, 2019
Messages
5,733
Points
113
Location
Devon
First Name
Andy
I'm in for this one Andy :cool:,
.... ummed and ahhd about getting one several times over the years but never taken the plunge!
Looks a nice kit,and you're certainly making good,rapid, progress :thumb2:
 

Mickc1440

SMF Supporter
Joined
Apr 27, 2018
Messages
4,257
Points
113
Location
Sheffield
First Name
Mick
That’s coming along nicely, I reckon you’re a closet boat lover with all these nautical terms you keep using what’s wrong with back and pointy end :smiling3:
 

Jakko

Way past the mad part
SMF Supporter
Joined
Apr 28, 2018
Messages
10,814
Points
113
First Name
Jakko
Didn't they have a plastic hull as well?
The Mk. II, like this kit represents, did — well, polyester-reinforced fibreglass, I would think. The Mk. I was made of wood, IIRC, and you can recognise it in photos because the turret on the front deck has the machine guns right next to each other in the middle instead of on either side like in the kit.
 

Andy T

SMF Supporter
Joined
Apr 26, 2021
Messages
1,964
Points
113
Location
Sheffield
First Name
Andy
Thank you all, and welcome aboard!

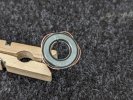
First job today was to add some "rope" to the lifebuoy ring for a bit of extra character:

2023-09-27 13.30.14.jpg

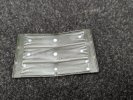
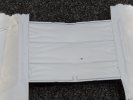
Then more pin marks. It's the underside of the canvas cover so didn't matter too much but I need to slow myself down somehow!

Filled with Mr dissolved putty, sanded, then a coat of Halfords primer to check progress:

2023-09-27 14.35.40.jpg

2023-09-27 15.02.35-1.jpg

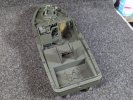
The figures were put together too. Most of them are connected to the model somehow so were built & posed in situ. The chap in the turret was a bit of a challenge as its a tight fit in there! He will sit properly once the guns are glued in place though:

1000004584.jpg

1000004585.jpg

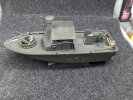
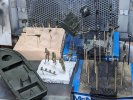
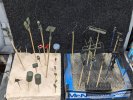
And finally a rather chaotic picture of everything stripped down and mounted ready for the enjoyable part.

1000004589.jpg
 

Allen Dewire

Proud Rabble Member
SMF Supporter
Joined
Apr 27, 2018
Messages
4,105
Points
113
Location
Bamberg
First Name
Allen
Now Andy, we have to discuss this current speed building phenomenon going on here Sir. I mean, how many does this make in the last week or so???..........Oh hell, It doesn't matter as long as you are enjoying yourself. I must admit this is also going to be a top build and I'm surprised you went with a cool floaty thang!!!

You are now at your favorite point in the build, so I'll follow along and watch the hissy work magic, drool a bit, and then sell all my kits in evilbay..................Great stuff so far my friend!!!...

Prost
Allen
 

Andy T

SMF Supporter
Joined
Apr 26, 2021
Messages
1,964
Points
113
Location
Sheffield
First Name
Andy
Sorry Allen, I do seem to be on a roll right now lol

I've still not gotten myself a job as I'm contemplating a total change of career, so I have a lot of free time on my hands. With the weather being so bad recently I spend most of my day in the shed, modelling.

Heaven only knows how our retired members fare!
 

Allen Dewire

Proud Rabble Member
SMF Supporter
Joined
Apr 27, 2018
Messages
4,105
Points
113
Location
Bamberg
First Name
Allen
Hey Andy, as long as you're having fun, that's what matters! Our weather has been really good and warm to boot. As for being retired, I at least try to play at the table everyday. Some days, things go well, and others, they just go down the loo!!!...

I wish you all the best in your career endeavors my friend and I hope you find something that is personally satisfying and will make you happy too...

Prost
Allen
 

Waspie

SMF Supporter
Joined
Mar 13, 2023
Messages
2,481
Points
113
Location
Portland - Dorset
First Name
Doug
Sorry Allen, I do seem to be on a roll right now lol

I've still not gotten myself a job as I'm contemplating a total change of career, so I have a lot of free time on my hands. With the weather being so bad recently I spend most of my day in the shed, modelling.

Heaven only knows how our retired members fare!
In my case badly. SWMBO has embarked on a massive upgrade programme to the house and as usual - snags and more snags.
Lost most of my work area to storing 'stuff' from the house.
Your doing enough for both of buddy. ;) :smiling5:

Edited to add, nice choice. Echo's of Apocalypse Now. One of my all time favourite movies.
 

Andy T

SMF Supporter
Joined
Apr 26, 2021
Messages
1,964
Points
113
Location
Sheffield
First Name
Andy
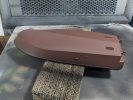
One of the options is for hull red below the waterline. Since I had some Tamiya from a job lot I decided to use that:

1000004610.jpg

While that was drying I sprayed the bits & bobs in some of the many versions of olive drab I have, to give variety:

1000004605.jpg

I painted the radar dome in the optional grey and detail painted the fire extinguisher & life ring:

1000004602.jpg

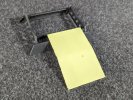
Terrible picture but the canvas "roof" was done in a desaturated khaki:

1000004606.jpg

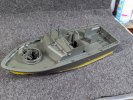
The hull was dry by now so I masked it up and started the main painting. I'm using the Mr Color modulation set so I gave everything a coat from the shadow bottle. I can use this as a foundation to build up the highlights & variation, at least knowing there's some colour all over:

1000004608.jpg

1000004609.jpg
 
Top