Tamiya 'famo' 18 ton halftrack

shovelhead 1977

SMF Supporter
Joined
Feb 28, 2019
Messages
179
Points
43
First Name
raymond
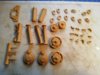
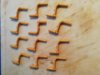
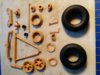
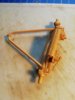
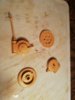
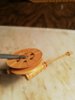
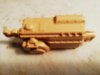
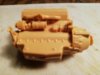
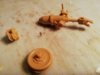
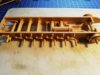
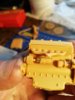
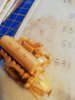
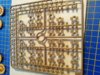
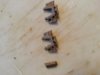
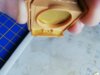
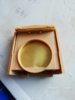
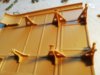
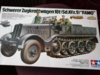
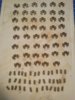
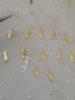
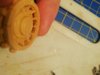
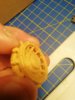
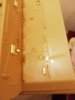
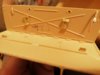
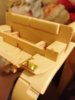
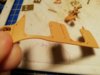
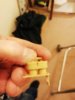
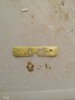
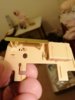
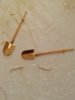
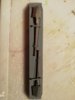
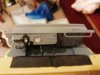
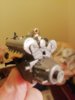
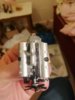
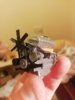
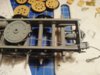
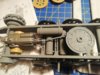
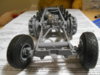
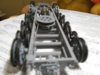
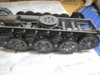
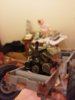
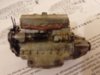
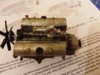
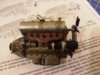
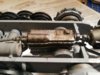
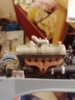
hope this is in the right place !, this model to be built next started this a few months ago so I thought about time this was finished ! loads of parts including a set of photo etched parts ,
 

Ian M

Administrator
Staff member
Administrator
Moderator
SMF Supporter
Joined
Dec 14, 2008
Messages
19,727
Points
113
Location
Falster, Denmark
First Name
Ian
Well lets be seeing it then!
 

shovelhead 1977

SMF Supporter
Joined
Feb 28, 2019
Messages
179
Points
43
First Name
raymond
sorry pictures are not to clear, these are a few of the assembled parts ready for detailing. just been reading through the instructions and found one mistake it ,the road wheels all come in two halves which are to be cemented together then fitted to the axles once cemented together you can't fit them all on as they are supposed to sort of overlap each other but you cant fit them on this way,best way is to fit inner halves to axles then cement the outer halves in place !
 

Attachments

  • 135 scale tamiya  ' famo' 18 ton halftrack suspension parts.jpg
    135 scale tamiya ' famo' 18 ton halftrack suspension parts.jpg
    105.9 KB · Views: 8
  • 135 scale tamiya  ' famo' 18 ton halftrack   suspension parts.jpg
    135 scale tamiya ' famo' 18 ton halftrack suspension parts.jpg
    97.7 KB · Views: 8
  • 135 scale tamiya  ' famo' 18 ton halftrack front axle parts.jpg
    135 scale tamiya ' famo' 18 ton halftrack front axle parts.jpg
    108.2 KB · Views: 8
  • 135 scale tamiya  ' famo' 18 ton halftrack front axle complete.jpg
    135 scale tamiya ' famo' 18 ton halftrack front axle complete.jpg
    83.5 KB · Views: 8
  • 135 scale tamiya  ' famo' 18 ton halftrack 22 ton winch parts.jpg
    135 scale tamiya ' famo' 18 ton halftrack 22 ton winch parts.jpg
    89.8 KB · Views: 8
  • tamiya 'famo'18 ton halftrack winch complete.jpg
    tamiya 'famo'18 ton halftrack winch complete.jpg
    54.9 KB · Views: 9
  • 135 scale tamiya  ' famo' 18 ton halftrack  gearbox.jpg
    135 scale tamiya ' famo' 18 ton halftrack gearbox.jpg
    55 KB · Views: 8
  • 135 scale tamiya  ' famo' 18 ton halftrack engine.jpg
    135 scale tamiya ' famo' 18 ton halftrack engine.jpg
    59 KB · Views: 8
  • 135 scale tamiya  ' famo' 18 ton halftrack coupling parts.jpg
    135 scale tamiya ' famo' 18 ton halftrack coupling parts.jpg
    76 KB · Views: 10
  • tamiya 'famo' 18 ton halftrack chassis and suspension fitted.jpg
    tamiya 'famo' 18 ton halftrack chassis and suspension fitted.jpg
    97.3 KB · Views: 10

Ian M

Administrator
Staff member
Administrator
Moderator
SMF Supporter
Joined
Dec 14, 2008
Messages
19,727
Points
113
Location
Falster, Denmark
First Name
Ian
If you have glued the wheels together. You can get them on the axles by standing the wheels up in the "assembled" position and place the chassis alongside and carefully move them into place and press onto the axles....
Ask me how I know... O.o
 

Jakko

Way past the mad part
SMF Supporter
Joined
Apr 28, 2018
Messages
10,821
Points
113
First Name
Jakko
best way is to fit inner halves to axles then cement the outer halves in place !
Just keep the outer faces of the wheel axes clear of paint (or scrape it off, of course), then install them like you say — you can still glue the inner and outer halves together fine.
 

shovelhead 1977

SMF Supporter
Joined
Feb 28, 2019
Messages
179
Points
43
First Name
raymond
a couple of photo etched parts fitted to headlights and engine, also some track parts
 

Attachments

  • headlights and photo etched mounting plates fitted,.jpg
    headlights and photo etched mounting plates fitted,.jpg
    58.4 KB · Views: 12
  • some photo etched parts fitted to engine.jpg
    some photo etched parts fitted to engine.jpg
    70.3 KB · Views: 12
  • photo etched parts fitted to engine.jpg
    photo etched parts fitted to engine.jpg
    74.2 KB · Views: 12
  • track link parts 'three of these sprues'.jpg
    track link parts 'three of these sprues'.jpg
    159.8 KB · Views: 11
  • track links 46 each side.jpg
    track links 46 each side.jpg
    46.1 KB · Views: 11

Ian M

Administrator
Staff member
Administrator
Moderator
SMF Supporter
Joined
Dec 14, 2008
Messages
19,727
Points
113
Location
Falster, Denmark
First Name
Ian
Those tracks build up well Easy to clean up as well if I recall.
 

shovelhead 1977

SMF Supporter
Joined
Feb 28, 2019
Messages
179
Points
43
First Name
raymond
more photo etched fitted, bit of tidying up to do and then be ready for painting , brackets fitted to bottom of body bit more tidying and painting to do !
 

Attachments

  • radiator ready for painting (1).jpg
    radiator ready for painting (1).jpg
    68 KB · Views: 6
  • radiator ready for painting (2).jpg
    radiator ready for painting (2).jpg
    75.2 KB · Views: 6
  • radiator ready for painting (3).jpg
    radiator ready for painting (3).jpg
    64.1 KB · Views: 6
  • mounting brackets fitted to flatbed ,ready for painting.jpg
    mounting brackets fitted to flatbed ,ready for painting.jpg
    70.3 KB · Views: 6

shovelhead 1977

SMF Supporter
Joined
Feb 28, 2019
Messages
179
Points
43
First Name
raymond
forgot to put a picture of what its supposed to be like, so here it is !
 

Attachments

  • IMG_20191114_122520.jpg
    IMG_20191114_122520.jpg
    135.5 KB · Views: 5

shovelhead 1977

SMF Supporter
Joined
Feb 28, 2019
Messages
179
Points
43
First Name
raymond
done some of the track just waiting for glue to dry plates now fitted to both drive sprockets,what a fiddly job that was but got there in the end !
 

Attachments

  • track links 47 each side.jpg
    track links 47 each side.jpg
    94.4 KB · Views: 4
  • plates for drive sprocket, 12 each side.jpg
    plates for drive sprocket, 12 each side.jpg
    57.1 KB · Views: 5
  • drive sprocket with plates fitted (1).jpg
    drive sprocket with plates fitted (1).jpg
    81.4 KB · Views: 5
  • drive sprocket with plates fitted (2).jpg
    drive sprocket with plates fitted (2).jpg
    125 KB · Views: 5

shovelhead 1977

SMF Supporter
Joined
Feb 28, 2019
Messages
179
Points
43
First Name
raymond
pic 1 and 2 tying down eyes, brackets,,strap with buckle , and two floor mounted brackets pic 3 tool tray and locker clasps, pic 4 body side with door tie down eyes pic 5 mudguard hinge pic 6 air filter clamps
 

Attachments

  • more photo etched parts fitted (1).jpg
    more photo etched parts fitted (1).jpg
    52.8 KB · Views: 7
  • more photo etched parts fitted (2).jpg
    more photo etched parts fitted (2).jpg
    56.9 KB · Views: 7
  • more photo etched parts fitted (3).jpg
    more photo etched parts fitted (3).jpg
    64.2 KB · Views: 7
  • more photo etched parts fitted (4).jpg
    more photo etched parts fitted (4).jpg
    67.9 KB · Views: 6
  • more photo etched parts fitted (5).jpg
    more photo etched parts fitted (5).jpg
    49.4 KB · Views: 6
  • more photo etched parts fitted (6).jpg
    more photo etched parts fitted (6).jpg
    56.9 KB · Views: 6

shovelhead 1977

SMF Supporter
Joined
Feb 28, 2019
Messages
179
Points
43
First Name
raymond
some more parts completed,some really fiddly etched parts !
 

Attachments

  • dashboard clock housing.jpg
    dashboard clock housing.jpg
    58.9 KB · Views: 6
  • dashboard backplate.jpg
    dashboard backplate.jpg
    57.9 KB · Views: 6
  • shovels.jpg
    shovels.jpg
    57.1 KB · Views: 7
  • shovels fitted.jpg
    shovels fitted.jpg
    74.2 KB · Views: 9
  • dashboard fitted.jpg
    dashboard fitted.jpg
    74 KB · Views: 9

shovelhead 1977

SMF Supporter
Joined
Feb 28, 2019
Messages
179
Points
43
First Name
raymond
engine near completion, just a few little details to add, winch , cable and gearbox ready, bit of touching up on the painting and then ready for weathering !
 

Attachments

  • famo engine nearly complete (1).jpg
    famo engine nearly complete (1).jpg
    54.8 KB · Views: 10
  • famo engine nearly complete (2).jpg
    famo engine nearly complete (2).jpg
    65.8 KB · Views: 10
  • famo engine nearly complete (3).jpg
    famo engine nearly complete (3).jpg
    62.7 KB · Views: 10
  • winch and cable installed.jpg
    winch and cable installed.jpg
    98.2 KB · Views: 10
  • winch and gear box fitted.jpg
    winch and gear box fitted.jpg
    124 KB · Views: 10

shovelhead 1977

SMF Supporter
Joined
Feb 28, 2019
Messages
179
Points
43
First Name
raymond
chassis, ready for tracks and weathering to be done !
 

Attachments

  • ready for tracks to be fitted and for weathering ! (1).JPG
    ready for tracks to be fitted and for weathering ! (1).JPG
    113.5 KB · Views: 9
  • ready for tracks to be fitted and for weathering ! (2).JPG
    ready for tracks to be fitted and for weathering ! (2).JPG
    92 KB · Views: 12
  • ready for tracks to be fitted and for weathering ! (3).JPG
    ready for tracks to be fitted and for weathering ! (3).JPG
    99 KB · Views: 12

shovelhead 1977

SMF Supporter
Joined
Feb 28, 2019
Messages
179
Points
43
First Name
raymond
tried a bit of dirtying up today, never done weathering or anything like this before, any opinions welcome !
 

Attachments

  • bit of weathering done (1).jpg
    bit of weathering done (1).jpg
    64.6 KB · Views: 13
  • bit of weathering done (2).jpg
    bit of weathering done (2).jpg
    84.5 KB · Views: 14
  • bit of weathering done (3).jpg
    bit of weathering done (3).jpg
    90.9 KB · Views: 14
  • bit of weathering done (4).jpg
    bit of weathering done (4).jpg
    107.5 KB · Views: 14
  • bit of weathering done (5).jpg
    bit of weathering done (5).jpg
    108.3 KB · Views: 14
  • bit of weathering done (6).jpg
    bit of weathering done (6).jpg
    70.4 KB · Views: 12
Top