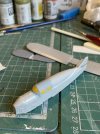
Tonys Korpak 1/72 polikarpov po2 L

yak face

Wossupwidee?
Staff member
Moderator
SMF Supporter
Joined
Jun 13, 2009
Messages
12,404
Points
113
Location
sheffield
First Name
tony
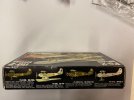
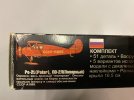
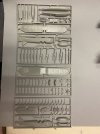
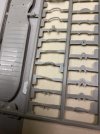
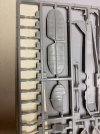
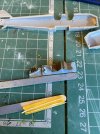
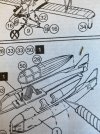
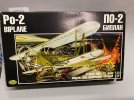
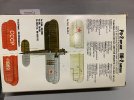
Heres my entry for Ians GB . Its an ageing eastern european kit of the Po2 . Apparently this was a Frog tooling that never got released before they went belly up. Like all the other toolings it ended up in Russia and ended up in this boxing . Its not a bad kit considering its vintage (first tooled in 1977 ) and offers options to build several different types ( floatplane , ambulance , bomber , polar )
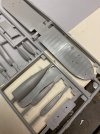
Its reasonably detailed but suffers from a fair bit of flash and some of the smaller mouldings are a bit misshapen but nothing that's a deal breaker.
Im going to do the all red Po2 L polar version with skis and fully enclosed cabin IMG_3424.jpegIMG_3425.jpegIMG_3426.jpegIMG_3428.jpegIMG_3429.jpegIMG_3431.jpegIMG_3432.jpegIMG_3434.jpeg
 

Steve-the-Duck

SMF Supporter
Joined
Jul 3, 2020
Messages
1,144
Points
113
Location
Medway Towns
First Name
Chris
Nice. And something different from a Night Witches Sewing Machine. If I saw it on a show table I'd be hard-pressed to recognise it a s a Po-2

Now, there is an interesting collection in itself of all the red Soviet Polar explorer planes
 

yak face

Wossupwidee?
Staff member
Moderator
SMF Supporter
Joined
Jun 13, 2009
Messages
12,404
Points
113
Location
sheffield
First Name
tony
Nice. And something different from a Night Witches Sewing Machine. If I saw it on a show table I'd be hard-pressed to recognise it a s a Po-2

Now, there is an interesting collection in itself of all the red Soviet Polar explorer planes
Cheers chris , yes the inter war soviet polar and record breaking aircraft were very unusual and interesting . I did another dodgy old eastern bloc kit a few years ago of the Tupolev ant 25 , another one that needed bashing into shape but it turned out to be one of the most satisfying models i ever built , i love the challenge of a poor kit.
 
Last edited:

yak face

Wossupwidee?
Staff member
Moderator
SMF Supporter
Joined
Jun 13, 2009
Messages
12,404
Points
113
Location
sheffield
First Name
tony
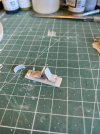
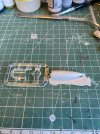
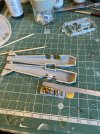
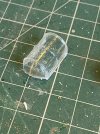
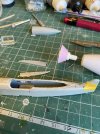
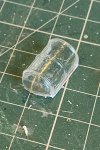
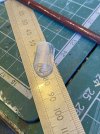
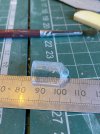
Made a start today , cockpit has been assembled and painted , some basic harnesses added from painted strips of tamiya tape , eyelets punched through with a pin. Its not brilliant but very little will be seen once the canopy and rear decking goes on . Speaking of which , the clear part is atrocious , not very clear and covered in lumps and bumps . Its all ive got to work with though so I’ll have to try and sand and polish it later .
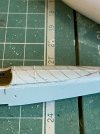
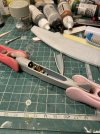
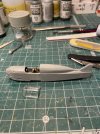
Once I got the fuselage together I could start with the butchery! The rear cockpit divider and rear fuselage were marked out and sawed off leaving plenty of excess to sand off till I could get the decking and canopy to fit near enough. IMG_3438.jpegIMG_3439.jpegIMG_3442.jpegIMG_3445.jpegIMG_3447.jpegIMG_3449.jpegIMG_3451.jpegIMG_3452.jpegIMG_3453.jpegIMG_3454.jpeg
 
Last edited:

adt70hk

I know its a bit sad but I like quickbuild kits!!!
SMF Supporter
Joined
Sep 4, 2019
Messages
9,501
Points
113
First Name
Andrew
Wow!! That canopy is awful......I can safely say I have never seen this ever done before.

ATB.

Andrew
 

yak face

Wossupwidee?
Staff member
Moderator
SMF Supporter
Joined
Jun 13, 2009
Messages
12,404
Points
113
Location
sheffield
First Name
tony
Cheers guys , yes its one of the worst ive had . The inside is nice and smooth though so its just the outer surface . I'm going to have a go at polishing it first and if that doesnt work i’ll use it as a former and try and crash mould a new one .
 

Steve-the-Duck

SMF Supporter
Joined
Jul 3, 2020
Messages
1,144
Points
113
Location
Medway Towns
First Name
Chris
Save what you can of the canopy, buut...

Very nice cockpit work. Interesting, isn't it, how many smaller scale kits have the foot pedals in them mowadays, or at least in the last twenty years?
 

Mark1

SMF Supporter
Joined
Apr 17, 2021
Messages
3,554
Points
113
Location
South london
First Name
Mark
Nice job with the chopping but yeah that canopy does look like it was excreted rather than moulded lol
 

The Smythe Meister

Born to be WILD....... until about 9pm
SMF Supporter
Joined
Jan 30, 2019
Messages
5,733
Points
113
Location
Devon
First Name
Andy
Cracking along there Tony :smiling3:
..... as for the Canopy.....
.... What's wrong with that?!!!;):tears-of-joy::tears-of-joy:
 

colin m

Moderator
Staff member
Moderator
SMF Supporter
Joined
Dec 26, 2008
Messages
8,604
Points
113
Location
Stafford, UK
First Name
Colin
This GB really has got the esoteric aircraft popping up, and here's another. Very interesting Tony.
 

tr1ckey66

SMF Supporter
Joined
Mar 6, 2009
Messages
3,686
Points
113
First Name
Paul
Another Bi-plane build off to a flying (pun intended) start!!!
Hi Tony!
You've got a really unusual and, by the looks of things, challenging little build on your hands there.
That canopy is really bad. I think I'd probably have a go at crashing a new one, something I've never done before, as the original will probably have any framing detail removed in the polishing process (I may be wrong, and you may have a cunning plan!!!)
Either way, I know that this will prove to be a really interesting build with (perhaps) some cracking pointers on how to form canopies!!! As usual, the office detail you put into these tiny models is incredible.

Great and unusual stuff - I can honestly say, I didn't know anything about this aircraft until this morning!
Good luck mate
Paul
 

yak face

Wossupwidee?
Staff member
Moderator
SMF Supporter
Joined
Jun 13, 2009
Messages
12,404
Points
113
Location
sheffield
First Name
tony
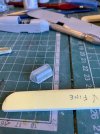
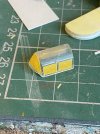
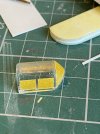
Now the rear decking is in place its time to sort the canopy. I thought i’d try polishing it first before resorting to crash moulding . On looking at the colour profile on the box it appears the top part of the canopy isnt glazed so thats helped a little , only the side windows and windscreen to sort . I started out by sanding it all with a very fine grit ( old sanding stick , best guess equivalent to about 2000 grit ) to get all the lumps and bumps off .
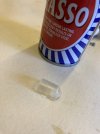
Once I had done this it was time to give it a polish , using——— Brasso!
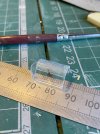
Yes you read it right , good old Brasso , rubbed repeatedly with cotton buds and then polished up with more of the same . Eventually i got a good shine and as clear as the thick transparency is going to get . Then it was masked up and fitted , and painted in the internal frame colour of blue grey. It needs a smear of acrylic putty to sort the joint on the windscreen and it should be fine . IMG_3487.jpegIMG_3471.jpegIMG_3475.jpegIMG_3479.jpegIMG_3478.jpegIMG_3480.jpegIMG_3481.jpegIMG_3482.jpegIMG_3485.jpeg
 
Top