Geoff’s 1/72 Arma Hobby Hurricane Mk.I

Andy the Sheep

SMF Supporter
Joined
Apr 7, 2019
Messages
1,553
Points
113
Location
North Eastern Italy
First Name
Andrea
Nice results Geoff. :thumb2:
I'm going to use the same set of colours and what I see has a relaxing effect on my expectations. Now I can only blame myself in case of blunders. ;)
 

Geoffers

SMF Supporter
Joined
Jan 26, 2017
Messages
1,051
Points
113
Location
Shropshire
First Name
Geoff
Camo is beautiful. Your knocking this out quick
Cheers Lee
Nice results Geoff. :thumb2:
I'm going to use the same set of colours and what I see has a relaxing effect on my expectations. Now I can only blame myself in case of blunders. ;)
Thanks Andy, they go on really nicely so I’m sure you will have no problems :smiling4:

Geoff.
 

Geoffers

SMF Supporter
Joined
Jan 26, 2017
Messages
1,051
Points
113
Location
Shropshire
First Name
Geoff
Hello chaps,

Latest update.

After the camouflage had had chance to cure I went over both the brown and green with a highly thinned mix of a lighter green and brown to fade it a bit.

Once this had settled it was time for the transfers to go on.

Not too many to put down and they all settled nicely with Micro Set & Sol.

There was a choice of a light aircraft grey or yellow code letter.
I couldn’t find any information to confirm either so went with yellow to give a better visual effect :thinking:

IMG_3363.jpeg
IMG_3364.jpeg
IMG_3365.jpeg
IMG_3366.jpeg
IMG_3367.jpeg

Chipping and weathering next, thanks for looking :thumb2:

Geoff.
 
Last edited:

Geoffers

SMF Supporter
Joined
Jan 26, 2017
Messages
1,051
Points
113
Location
Shropshire
First Name
Geoff
I’ve hit a bit of a snag :confounded:

Just finished spraying the propeller and wheels and popped the aircraft down in the spray booth ready for a flat coat to seal the transfers.
I then realised I’d caught the one wing on the mixing pot I’d thinned the black paint in.
IMG_3369.jpeg
Unfortunately I’d thinned with Self Levelling Thinner so any attempt to wipe it of started to remove the top coat.

I’ve put it to one side now to have a think about how to repair the damage :thinking:

Aargh!

Geoff.
 

Geoffers

SMF Supporter
Joined
Jan 26, 2017
Messages
1,051
Points
113
Location
Shropshire
First Name
Geoff
After a bit of a think I have come up with the following plan to try and repair the damage.

1/ give it a clear coat to seal in and protect the stencils which will need masking over.

2/ mask round the area and carefully sand back the damage.

3/ re-prime and re-spray the area.

The main problem is the roundels, if it was the standard RAF version it would be easy as I have several spares. Being an orange centre is a problem but I do have some orange paint so may see what I can do with that.

I may spray the orange straight onto the wing then carefully cut out the red centre of a standard roundel before applying to let the orange show through.

If anyone has any alternative plan please feel free to share :smiling4:

Cheers,

Geoff.
 

HAWKERHUNTER

SMF Supporter
Joined
Feb 29, 2012
Messages
692
Points
93
First Name
Steve
Geoff that is a real pain. It looks like that thinner has really eaten into the pain work. The only consolation is that it is on the underside of the model so any repair you do will be hidden. I have just checked my spares bin and the roundels I have also have the red center. I would put the shout out in the Market Place (Bits Bin) of the forum with the dimensions of the roundel and maybe some one will have one. A lot of the lads on here are printing their own decals so I am sure someone will be able to help. Good luck and keep on with it.
 
Last edited:

Geoffers

SMF Supporter
Joined
Jan 26, 2017
Messages
1,051
Points
113
Location
Shropshire
First Name
Geoff
Geoff that is a real pain. It looks like that thinner has really eaten into the pain work. The only consolation is that it is on the underside of the model so any repair you do will be hidden. I have just checked my spares bin and the roundels I have also have the red center. I would put the shout out in the Market Place (Bits Bin) of the forum with the dimensions of the roundel and maybe some one will have one. A lot of the lads on here are printing their own decals so I am sure someone will be able to help. Good luck and keep on with it.
Thanks for having a look Steve, I’ve managed to get around the problem I think. I’ll post an update soon to explain how :thumb2:

Geoff.
 

Geoffers

SMF Supporter
Joined
Jan 26, 2017
Messages
1,051
Points
113
Location
Shropshire
First Name
Geoff
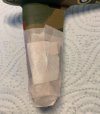
I have managed to repair the damage suffered on the underside of the wing to a degree.

First up was masking around the damaged area to try and protect the stencils. I had thought that as I had put a clear coat over them they would be fine…..wrong they came off as soon as I removed the masking tape even with it being low tack tape :sleeping2:

IMG_3372.jpeg

Some careful sanding followed to clean it up.

IMG_3374.jpeg

As I use lacquer paint I decided not to bother priming and just lay a top coat directly onto the surface.
I didn’t want to risk overspray though so masked the upper wing, being extra careful to avoid sticking anything on the roundel, once bitten twice shy ;)

IMG_3375.jpeg

IMG_3376.jpeg

Once dry it was time to replace the lost decals.

Fortunately Arma Hobby includes x2 sets of stencil decals so these were no problem. The roundel was more tricky, none in the spares box and no reply to my begging post on the sell/buy section.
I could buy an aftermarket set but being stingy I came up with another solution.
There’s are roundels left over with a red centre so I decided to use one of these and carefully paint the centre with Tamiya X6 Orange.
IMG_3379.jpeg
Not perfect but good enough :thinking:

I’ve then given it a coat of flat clear to seal it all in before I start the weathering.

Thanks for looking :thumb2:

Geoff.
 

Attachments

  • IMG_3375.jpeg
    IMG_3375.jpeg
    148.4 KB · Views: 0

Jim R

SMF Supporter
Joined
Apr 27, 2018
Messages
13,811
Points
113
Location
Shropshire
First Name
Jim
Well Geoff, I reckon that's a great fix. It was all looking superb and then the accident, bet the air was blue. Although none of us want accidents, they happen to the best though, it's very satisfying when there's a successful cure.
 

Geoffers

SMF Supporter
Joined
Jan 26, 2017
Messages
1,051
Points
113
Location
Shropshire
First Name
Geoff
Well Geoff, I reckon that's a great fix. It was all looking superb and then the accident, bet the air was blue. Although none of us want accidents, they happen to the best though, it's very satisfying when there's a successful cure.

Thanks Jim, your right I was very cross but only myself to blame :flushed:

I’m very pleased to have sorted it out, not perfect but I’m satisfied with the result :smiling6:

Geoff.
 

The Smythe Meister

Born to be WILD....... until about 9pm
SMF Supporter
Joined
Jan 30, 2019
Messages
5,791
Points
113
Location
Devon
First Name
Andy
Yep, nice one Geoff....
.... nice feeling when you've recovered from a mini disaster isn't it :thumb2: :cool:.
 
Top