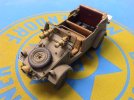
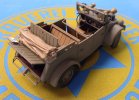
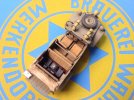
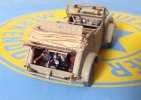
1/35 Tamiya Kübelwagen with a Twist...

Allen Dewire

Proud Rabble Member
SMF Supporter
Joined
Apr 27, 2018
Messages
4,105
Points
113
Location
Bamberg
First Name
Allen
Afternoon People,

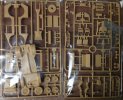
I have decided to finish the Kübel instead of starting a new kit. The Kübel should be familiar to every one, so I won't go into any intro for it. I will also be using some parts from the Tamiya Kübelwagen Maintenance kit, resin wheels from DEF Model, and a resin conversion kit from Blast Models. The kits,
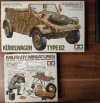
IMG_4529.JPG
A sprue shot,


IMG_4531.JPG
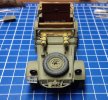
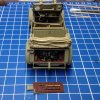
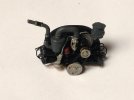
The destructions are typical Tamiya and easy to follow. As the build is in progress, we have to backtrack a bit. I started out building the motor first, hence the maintenance kit. The Kübel kit only has the bottom of it. I plan on leaving the motor cover open when it's done,
IMG_4200.JPG
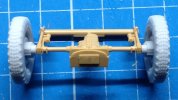
I wired the spark plugs, ran some fuel lines added a few tidbits and painted it up. Next up was prepping the resin wheels. DEF Model makes some excellent resin wheels and most sets have a sag on them. The model I'm building, needs these later wheels and DEF was the only firm to make them. As I test fitted them on the rear trans-axle, I noticed something odd,
IMG_4207.JPG
If you look closely, you'll see the inner tread profile on both go in opposite directions, when they should go in the same direction. The front wheels are the same too. I dropped an email with pic to DEF Models and within 18 hours I had an answer. Kim, the chief director of the firm, wrote he had never noticed this and I was the only person to write about it. He thanked me and said he would correct this ASAP. I really had hoped he would have sent me a replacement set...

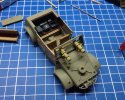
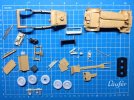
Moving on, I cleaned up all the parts needed and put them on my mat. I had also painted a few,
IMG_4204.JPG
Some of you can now see where this is going and maybe what it is...Some hairy stick work and test fitting was next,
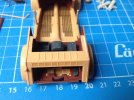
IMG_4212.JPG
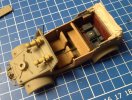
I found a Kübelwagen etch set in the stash and used some of it. Etch floor boards were CA'd in place. The folded soft top from the blast kit was test fitted and the rear seat was modified to sit in the half folded position. I made up and added the etch turn signal arm housings,
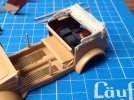
IMG_4214.JPG
Painted up the jack and accessories, made the etch turn signal arms and drilled out the outside door handles,
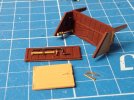
IMG_4216.JPG
With this finished, I moved on to the wiring for the power system behind the rear seat, added the seat back framing from plastic rod and put decals from the stash on the power setup,
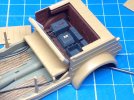
IMG_4218.JPG
I had to ensure the cabling didn't interfere with the rear seat. Another pic with the motor glued in,
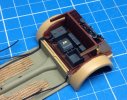
IMG_4222.JPG
Some CA helped in the task. Letting this dry, I painted up the seats and other little things,
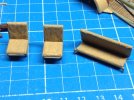
IMG_4220.JPG
On to cleaning up the potholes on the inside of the doors and adding the etch handles to them. I then gave a base coat to the canvas top,
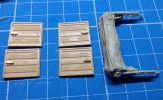
IMG_4234.JPG
I also painted up the resin wheel set even though they were the wrong tread pattern direction, as I have to use them on this build,
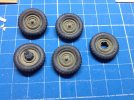
IMG_4235.JPG
Now it was time to paint and install the resin special dash this vehicle used,
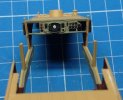
IMG_4237.JPG
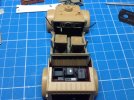
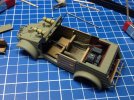
Not the best paint job in this pic (no decals), but from a distance, it looks okay. So let's slap this puppy together for a test fit,
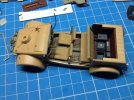
IMG_4239.JPG
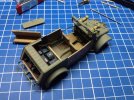
Another one,

IMG_4240.JPG
Everything fits good. The putty and glue marks on the rear deck sides is from me installing it backwards. Had to use lots of TET and carefully pry it apart and then install it correctly...This is about how far I got on it.

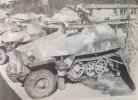
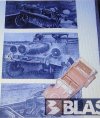
For those still wondering, this vehicle is not a paper panzer project and a few were made and tried. My Kübel was captured intact in Fallingbostel, Germany in 1945. It was designed to be used with the Sd. Kfz. 251/20 Falke & UHU, in support of I/R equipped Panthers for night fighting,
IMG_4225.JPG

I hope you find it interesting. More updates to follow as get more done. Thanks for looking in and have a great holiday weekend folks...

Prost
Allen
 

Jim R

SMF Supporter
Joined
Apr 27, 2018
Messages
13,746
Points
113
Location
Shropshire
First Name
Jim
Looks good Allen. Fine progress and detailing. I built this kit way back around 2011 and used the same engine maintenance set.
 

Andy T

SMF Supporter
Joined
Apr 26, 2021
Messages
1,975
Points
113
Location
Sheffield
First Name
Andy
Lovely work so far Allen. Will stick around to see how this goes.
 

yak face

Wossupwidee?
Staff member
Moderator
SMF Supporter
Joined
Jun 13, 2009
Messages
12,415
Points
113
Location
sheffield
First Name
tony
I would say excellent start Allen , but youre halfway through already !
Great work with the extras and scratchbuilt details , I presume the extra lights on the front are Infra red ? Cheers tony
 

scottie3158

SMF Supporter
Joined
Apr 27, 2018
Messages
12,722
Points
113
Location
Spalding
First Name
Paul
Allen,
That is an interesting conversion. Ahh Fallingbostel I know it well lived there for 3 years back in the early 90's.
 

Allen Dewire

Proud Rabble Member
SMF Supporter
Joined
Apr 27, 2018
Messages
4,105
Points
113
Location
Bamberg
First Name
Allen
Morn and Happy Easter Everyone,

Looks good Allen. Fine progress and detailing. I built this kit way back around 2011 and used the same engine maintenance set.
Thanks Jim! It's a good kit and as long as you follow the destructions, you're fine. I didn't with the rear deck piece...

Lovely work so far Allen. Will stick around to see how this goes.
Thank you Andy! It's not deep space, but it looks like it could be...

I would say excellent start Allen , but youre halfway through already !
Great work with the extras and scratchbuilt details , I presume the extra lights on the front are Infra red ? Cheers tony
That's why I wasn't sure whether to blog it or not. Only the center light is the I/R. The other 2 are headlights. I also should have given a better description of what it is. Thanks and see below...

Allen,
That is an interesting conversion. Ahh Fallingbostel I know it well lived there for 3 years back in the early 90's.
Thanks Bro and there were some interesting things found in that area in '45...

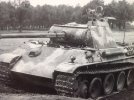
As I said to Tony, I will give you a better idea of what this was and how it was supposed to be utilized late in the war...This Kübel was designed for the commander of the Night fighting troop. Infrared night devices were in development as the war went south for the German's. The attempt to turn the tide was the idea of fighting at night. They mounted a NV scope with I/R light in the MG mount on the commander's cupola atop a late Panther,

IMG_4539.JPG
This had a few probs in testing. The setup only had a range of 500 meters. The commander had to tell the gunner where to aim and shoot and, the driver where to go, as he was in the dark too. remember, a Panther fought best at over 1000 meters...What to do...

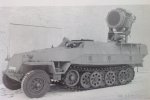
They developed a 60 cm I/R light from the normal 60cm FlaK light. They mounted this, along with a self contained generator, inside a Sd. Kfz. 251 Ausf. D,

IMG_4536.JPG
This was designated 251/20 and nicknamed 'UHU' (Owl). The driver had his own device to navigate. With no real room inside, for troops, they made another vehicle to haul them around,

IMG_4537.JPG
The driver and TC both had NV setups and this was named Sd. Kfz. 251/20 'Falke' (Falcon)...NOW, with the UHU's big I/R lamp, the Panther's gun and the other NV's, range was pushed up to 1500 meters. Troops (who also had NV equipped weapons) could fight and join into the night ops. The Kübel was the transport for the Commander to direct the battle. That was the plan, but as always, it was too little, too late. I hope this clears up any questions. If not, just holler. I do have another crazy night fighting WIP, but that's another story...

Back to this puppy, I did some more work and a lot of hairy sticking on it. Masking for using the hissy wasn't a real option here as it was more work than it was worth. So here she is,

IMG_4532.JPG
I used AK's late war Dark Yellow thinned with their thinner and a flat hairy stick. Etch hinges on the doors (they don't work) and added the NV scopes. A couple more pics,

IMG_4534.JPG
IMG_4533.JPG
It still needs paint on the doors and some touch ups. Some red oxide in the motor room and a few other places. I does look kind of green, but we won't get into late war paint mixes.......Glued in the rear seat and placed the ragtop on it, as I still have to weather it,

IMG_4538.JPG
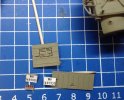
With the sun shining in, it looks a bit more like normal dark yellow. There isn't a lot of parts left to add. Headlights, I/R light. opened driver's door, deck and motor cover, and the wheels. I have been working on the license plate holders and sorting decals as the are both big squares on this Kübel and not a thin, long one normally seen on the front. The I/R light mount/bumper covers it. Lucky me, as this build only has 3 decals on the it...

Thanks again for looking in and the great comments! Now go 'Eier suchen'.................

Prost
Allen
 

Strenko J

Faithful rabble apprentice
SMF Supporter
Joined
May 1, 2018
Messages
566
Points
93
Location
Pennsylvania
First Name
Joe
Happy Easter Allen, the Kube looks fantastic.

also Remember to always check those little “chocolate “ eggs before eating them today …that little wabbit can sometimes leave some homemade nuggets..
 

Allen Dewire

Proud Rabble Member
SMF Supporter
Joined
Apr 27, 2018
Messages
4,105
Points
113
Location
Bamberg
First Name
Allen
Thanks Joe! Happy Easter to you and the family too, my friend. I don't eat sweets or chocolates, so I think I'm safe. Over here, they let the wabbits run through the apple turnovers and cheese cakes. One has to be careful at the bakery...........
 

Jakko

Way past the mad part
SMF Supporter
Joined
Apr 28, 2018
Messages
10,834
Points
113
First Name
Jakko
This had a few probs in testing. The setup only had a range of 500 meters. The commander had to tell the gunner where to aim and shoot and, the driver where to go, as he was in the dark too. remember, a Panther fought best at over 1000 meters...What to do...
That’s not all that much of an issue if your opponent has nothing of the kind, of course. They won’t be fighting much at all at 500 metres, except for trying to shoot at your muzzle flash.

Unfortunately for the Germans, had it actually come to this, the British already had Tabby at that time, and I’m sure the Americans also had similar gear either under development or in production.
 

Si Benson

SMF Supporter
Joined
Apr 27, 2018
Messages
3,324
Points
113
First Name
Si
Good evening Mr D…

Can always count on you to build something off the beaten track and this build certainly ticks that box!


I do like to see the older kits getting a bit of a facelift or some etch to detail it up. Looks like your well into it now…..looking great so far :thumb2:
 

Allen Dewire

Proud Rabble Member
SMF Supporter
Joined
Apr 27, 2018
Messages
4,105
Points
113
Location
Bamberg
First Name
Allen
Servus, I hope everyone had a Happy Easter and found your 'Eier',

That’s not all that much of an issue if your opponent has nothing of the kind, of course. They won’t be fighting much at all at 500 metres, except for trying to shoot at your muzzle flash.

Unfortunately for the Germans, had it actually come to this, the British already had Tabby at that time, and I’m sure the Americans also had similar gear either under development or in production.
So true Jakko. Some amazing technology was developed back then. Just look at what we fight with today...

Good evening Mr D…

Can always count on you to build something off the beaten track and this build certainly ticks that box!


I do like to see the older kits getting a bit of a facelift or some etch to detail it up. Looks like your well into it now…..looking great so far :thumb2:
Why thank you, Mr. Benson! You know I love weird stuff and this puppy has been calling to be built. I have another 'wacky' that I might finish next. Remember the old original Tammy Schwimmwagen kit, with the steel axles??? Hope you had a great Holiday my friend...

Very interesting and lots of really nice paint jobs!
Thank you Steve! I usually brush small things and AB the big stuff. This kit is kind of small and hard to mask. So, out with the big flat brush...

Work continues at the table (don't have a bench) and between meals, I have gotten a lot done. I mentioned the 3 decals and finally got then on,

IMG_4546.JPG
They're not perfect and were typical Tamiya, being thick as bricks. I also sliced up the license plates as I didn't see they were on a white background while trimming the excess carrier film off. Micro Set and Sol were heavily used. I had brushed a coat of AV Gloss on the door where the weight class goes. Letting these dry and between coats of Sol, I CA'd the resin wheels on,

IMG_4543.JPG
A rather tricky job as the wheels are weighted and have a sag on the bottom. Slow drying CA was used and I did the front wheels first, and let them dry. Then on to the back ones. Lo and behold........All 4 touch the mat!!! I also threw a bit of steering in the fronts,

IMG_4545.JPG
Just don't look at the tread patterns on them. The right one is correct and the driver's side one isn't. Now it was time to add some other details. Power supply cover and the headlights,

IMG_4547.JPG
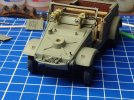
Did you ever try to paint white rectangles in the headlight lens'??? Don't, as it was a real beatch with shaky hands and a 5/0 brush, taking an hour or more. They're still a bit wonky, but done. This vehicle didn't have the normal covers with slits in them. Oh, and the license plate is so, as it adds character to the Kübel (my excuse)......On to the back end,

IMG_4549.JPG
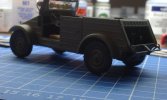
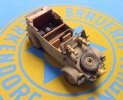
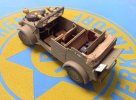
Resin tail light added and the little white strip to the hood. This was to hold the hood or trunk open, your choice. Then it was CA'd in place. The next series of pics are of the almost? completed model, taken on an advert from the main sponsor of all my endeavors,

IMG_4551.JPG
IMG_4553.JPG
IMG_4554.JPG
IMG_4555.JPG
IMG_4557.JPG
IMG_4558.JPG
Damn, I'm thirsty!!!...Now some of you may ask, where's the door? It is still drying from another coat of AV Matt to knock the shine off the 'brick' decal. I then realized I messed up with the doors because I wanted to have the rear door open and not the front one. DOH!!!. Oh well, I'll add it and maybe make a small base for the Kübel as I have plenty of grass mats/botanics in the stash and cheap picture frames from the Euro store down the street...

The next pics will be in the completed section after I weather it up to hide all my mistakes and shoddy workmanship. Thank you for following my journey into the 'Night' side and all your comments/likes...
Now hit the bench and get crackin' on something!!!...

Prost
Allen
 

Jakko

Way past the mad part
SMF Supporter
Joined
Apr 28, 2018
Messages
10,834
Points
113
First Name
Jakko
Just look at what we fight with today...
With technology, when it doesn’t do what we want ;)

Did you ever try to paint white rectangles in the headlight lens'??? Don't, as it was a real beatch with shaky hands and a 5/0 brush, taking an hour or more. They're still a bit wonky, but done.
It would probably have been easier to paint them white first and then paint the outline of the rectangle with black, filling in the rest of the headlight after. Or mask off the white with a bit of tape :smiling3:
 

yak face

Wossupwidee?
Staff member
Moderator
SMF Supporter
Joined
Jun 13, 2009
Messages
12,415
Points
113
Location
sheffield
First Name
tony
Looking fantastic allen , youve earned a treat from your sponsor !
 
Top