Academy M48A3 Patton

stillp

SMF Supporter
Joined
Nov 17, 2016
Messages
7,232
Points
113
Location
Rugby
First Name
Pete
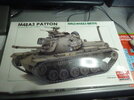
Here's my next victim:
P1170497.JPG
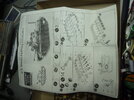
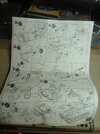
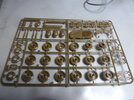
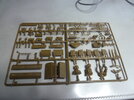
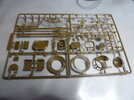
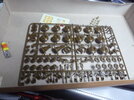
Bought from Models For Sale at the Shuttleworth show several years ago, for £8. As far as I can make out from Scalemates and the date on the instruction sheet, it dates from 1986, so I'm not expecting state-of-the-art moulding. Sprues look pretty good though:
P1170490.JPGP1170491.JPGP1170492.JPGP1170493.JPGP1170494.JPGP1170495.JPGP1170496.JPG
There's also a piece of clear plastic thin sheet for the front of the searchlight, and a length of thread for the cable to the light.
A strange thing though - the box was sealed in plastic,and each sprue was in a separate sealed bag - so why, when I washed the sprues, does it all smell like mouse p**s?
Pete
 

stillp

SMF Supporter
Joined
Nov 17, 2016
Messages
7,232
Points
113
Location
Rugby
First Name
Pete
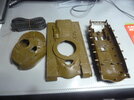
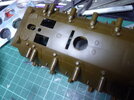
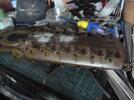
I might need some mud on the lower hull:
P1170501.JPGP1170500.JPG
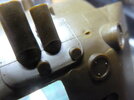
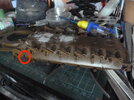
Looks as if a previous incarnation of this kit was intended to be motorised:
P1170502.JPG
I'll need to fill a few of those holes. Or maybe not, they're on the underside.
Pete
 

Jakko

Way past the mad part
SMF Supporter
Joined
Apr 28, 2018
Messages
10,864
Points
113
First Name
Jakko
This is a straight copy of the Tamiya kit, like all early Academy models. Chances are the parts are in different locations on the sprues, but other than that, you could use Tamiya instructions for building it. Even the markings are identical (but poorer-quality decals).

As such, like Karl said, it has a number of flaws, but it will look like an early model M48A3 with the later cupola installed. The main thing you may want to correct is to lower its suspension by a couple of millimetres, as Tamiya apparently measured up an empty vehicle so it rides higher than it should.
 

adt70hk

I know its a bit sad but I like quickbuild kits!!!
SMF Supporter
Joined
Sep 4, 2019
Messages
9,517
Points
113
First Name
Andrew
Joining the party!
 

stillp

SMF Supporter
Joined
Nov 17, 2016
Messages
7,232
Points
113
Location
Rugby
First Name
Pete
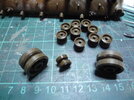
The road wheels and return rollers have quite a lot of mould draw taper, so I've spent most of the day sanding. Road wheels are done, but the return rollers can wait till tomorrow.
P1170503.JPG

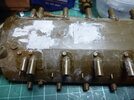
I've made a start on filling those holes in the lower hull.
P1170504.JPG
Not sure how much work I'm going to do on the hull as it's impossible to sand without removing some detail.
Pete
 

Jakko

Way past the mad part
SMF Supporter
Joined
Apr 28, 2018
Messages
10,864
Points
113
First Name
Jakko
It’ll be almost entirely out of sight, so I wouldn’t bother too much. The main gaps you need to fill are the vertical slots above the drive sprocket axles, I’d say — those will be in plain sight all the time.
 

stillp

SMF Supporter
Joined
Nov 17, 2016
Messages
7,232
Points
113
Location
Rugby
First Name
Pete
I've made a bit of progress:
P1170513.JPGP1170514.JPG
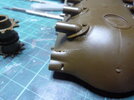
The kit is showing its origins as a motorised 'toy'. Where parts have locating slots, those slots are a lot wider than they should be, leaving gaps. There are also a lot of sink marks in places that can't be reached for sanding. I'll leave them and try to slop some mud around when it's finished.
One good thing is that the road wheels use poly caps, so I can remove them for painting.

Jakko, a part is provided to fill those vertical slots.

Pete
 

stillp

SMF Supporter
Joined
Nov 17, 2016
Messages
7,232
Points
113
Location
Rugby
First Name
Pete
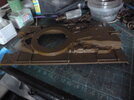
I haven't been modelling much recently for various reasons, but I've managed to fill a few holes in the lower hull and add some of the details to the upper hull and turret. The road wheels have been sanded and assembled - they have polycaps so are removable. Then I thought I'd better get some paint on while everything is still accessible.
IMG_20230201_095551533.jpg
That's Mr Hobby Aqueous olive drab. Might not be the right shade of OD for a Vietnam era tank, but it'll do. I'm not sure what colour to paint the inside of the infra-red searchlight. It's black at the moment but the box art seems to have some parts in silver. Any thoughts folks?

The Triumph Herald on the left of the booth is still doing duty as a paint test mule.
Pete
 

adt70hk

I know its a bit sad but I like quickbuild kits!!!
SMF Supporter
Joined
Sep 4, 2019
Messages
9,517
Points
113
First Name
Andrew

Jakko

Way past the mad part
SMF Supporter
Joined
Apr 28, 2018
Messages
10,864
Points
113
First Name
Jakko
Might not be the right shade of OD for a Vietnam era tank, but it'll do.
It’ll be fine as long as you don’t apply the Marine Corps decals :smiling3: USMC vehicles of the era were green, not OD, but that’s something that manufacturers didn’t realise at the time this kit (or the Tamiya one, anyway) was released.

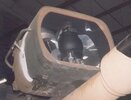
I'm not sure what colour to paint the inside of the infra-red searchlight. It's black at the moment but the box art seems to have some parts in silver.
The curved back is a mirror, but the side walls and the front of the lamp are black while some parts are in a dull metallic finish, according to this photo I took over 20 year ago:

A99EE05E-807B-43B0-9F1E-377453ABBABC_1_105_c.jpeg

Though it’s on Bovington’s M60A1 RISE/Passive here, this is the same type of searchlight as in your kit.
 

stillp

SMF Supporter
Joined
Nov 17, 2016
Messages
7,232
Points
113
Location
Rugby
First Name
Pete
Thanks Jakko, I think I'll leave it all black. The mirror doesn't seem to be visible in photos.
Pete
 

Allen Dewire

Proud Rabble Member
SMF Supporter
Joined
Apr 27, 2018
Messages
4,105
Points
113
Location
Bamberg
First Name
Allen
Sorry Pete, I just saw this and had a good ketchup. Looks like you have everything under control and we even have some paint on her. Top stuff Sir!!! I'll try to keep up now, too...

Prost
Allen
 
Top