Airfix 1:72 Harrier GR9

Ed Sunder

SMF Supporter
Joined
Nov 13, 2022
Messages
82
Points
53
Location
Flintstone, GA
First Name
Ed
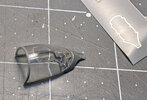
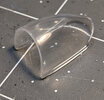
Well, things are coming along, but I've gotten to the point where I'm working on the clear bits and there's an issue. The sliding part of the canopy clear part has sprue gates that attached to the window in such a way that it would make part of the clear window stick out proud about a millimeter of the main window. I think that plastic got out of the extrusion - it didn't look like it was meant to be there. So I sanded it down as best I could, although I lost a bit of the lower window detail (which I should be able to replace with some putty), but there's just no way to easily remove it. I already got rid of the seam down the middle of the canopy, which I'd never seen on such a small model - I've had it on 1:48 f-16's - but which wasn't too much trouble. But I've sanded and polished and sanded and polished and there's just no way to get this to really blend. Here's what it looks like now:
PXL_20221130_021623988.jpg

You can see it in the corner - it looks like a chip out of the plastic (and on the bottom, it is sanded out a bit - like I said I can fix that part with putty or something) but the other part is standing proud in such a way that I just can't get it smooth. Part of the issue is that the canopy shape is a curve and so as I sand, it's difficult to only sand that part and not things around it and also to match the shape. I'm not sure I have a good solution. It isn't absolutely terrible, but I just hate stuff like that...

Update: I used a metal file to go at it more precisely, it took a while to get the scratches out, but it actually worked decently. My only real issue now is that the pressure I was putting on it seems to have created an internal very faint crack on the back - it's only visible at certain angles and is pretty small. It perfectly aligns with the seam I had to remove. I am hoping that once the ejection cord decals are on, it'll be close to invisible. Photos will come later...
 
Last edited:

Ed Sunder

SMF Supporter
Joined
Nov 13, 2022
Messages
82
Points
53
Location
Flintstone, GA
First Name
Ed
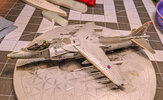
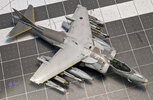
After doing detail brush painting in a number of areas and gloss-coating the whole thing a couple days ago, I've spent this evening decaling:
PXL_20221202_025152240.jpg

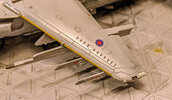
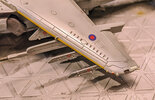
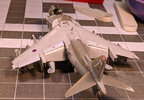
They really break up the scheme and I'm quite happy with how they've turned out. After cleaning up any debris, I'll put another coat of future on to seal them in and then dull coat as appropriate. One thing that I realized isn't in the instructions nor is it molded on the model are the wing lights:
PXL_20221202_025205954.jpg

So I painted some on, which I think look decent.
PXL_20221202_031620411.jpg


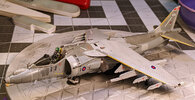
So here's where I'm at now:
PXL_20221202_031721776.jpg

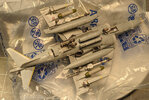
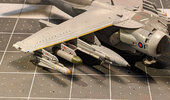
It's getting close! I need to add the clear parts on (after finishing needed work on them), add the weapons, clear-coat and then dull coat the model and I'll be done. I actually have two more decals that need to go on, but they are in a spot that I often use to hold the model so I'll be leaving them off until just before the clear-coat.

It's been a fun little kit and if I were to do it again, I'd be able to save myself a bunch of time and headache. I sometimes feel like I should just buy two of every kit so that I can use the first one to figure out how to really do the second one right.
 

Ed Sunder

SMF Supporter
Joined
Nov 13, 2022
Messages
82
Points
53
Location
Flintstone, GA
First Name
Ed
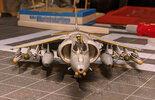
After a lot of work on the canopy shape - sanding and polishing etc to fix the bad shot of the clear part - I felt good enough about it to go ahead and assemble this section of the model. I started by painting the rear part, adding some details based on my reference materials. I then wanted to add the iconic det cord found on the canopy. In this model, it comes as a two part decal, but I decided to instead create a vinyl part instead on my vinyl cutter. I think it looks really good and doesn't have any of the potential negatives of the decal. It's slightly over scale, though it's no further off than the decal, and would be hard to make much thinner as it's about a quarter of a mm wide. After masking and painting the clear part I added the det cord and used clear glue to attach the parts together. I also painted the windscreen, but I don't have a photo of that. Here's how it turned out (along with the vinyl from which I cut it out):

PXL_20221204_031711234.jpg

I'll need to do some detail painting on the grille at the back and some paint/dull coat on where the glue is a bit shiny at the joint between the parts. I'm also considering scratch building some mirrors for around the canopy edge - I think they would add some nice detail.
 

Mickc1440

SMF Supporter
Joined
Apr 27, 2018
Messages
4,257
Points
113
Location
Sheffield
First Name
Mick
That's great work, I had to scroll back to check I'd actually read 1/72
 

yak face

Wossupwidee?
Staff member
Moderator
SMF Supporter
Joined
Jun 13, 2009
Messages
12,405
Points
113
Location
sheffield
First Name
tony
Its all looking superb Ed , the problems with the canopy arent noticeable at all now . Great idea with the vinyl cutter for the canopy cord , that must be a really useful tool to have , making your own masks , for canopies etc . Cheers tony
 

Tim Marlow

Little blokes aficionado
SMF Supporter
Joined
Apr 27, 2018
Messages
16,781
Points
113
Location
Somerset
First Name
Tim
Excellent work. Really good attention to detail and modelling. I’m extremely impressed by this build.
 

adt70hk

I know its a bit sad but I like quickbuild kits!!!
SMF Supporter
Joined
Sep 4, 2019
Messages
9,501
Points
113
First Name
Andrew
Coming on very, very nicely indeed. As Mick said hard to believe it's 1/72!!
 

Ed Sunder

SMF Supporter
Joined
Nov 13, 2022
Messages
82
Points
53
Location
Flintstone, GA
First Name
Ed
I had to scroll back to check I'd actually read 1/72
I'm a big fan of the "one true scale" :smiling3: I have room for 1/72 models and really like that scale anyway, so it's win win for me.
that must be a really useful tool to have , making your own masks , for canopies etc
It is a wonderful tool. I picked it up several years back for just under $100 on ebay and I use it quite a lot. I've done some models completely without decals by using paint masks - nothing looks as much like paint as actual paint. I've also done a bit of work using them as things like reinforcing plates or building up some details inside an F-14 engine nozzle using vinyl I've cut out.

Thanks for the encouragement everyone - I really am enjoying this build. I should have it done within the next week or so.
 
Top