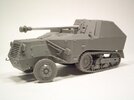
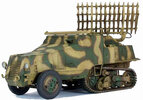
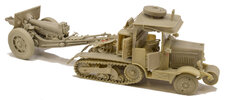
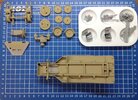
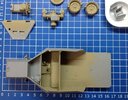
Allen's 1/35 Brach Models 16 tube Reihenwerfer auf Somua MCG S307(f)

Jim R

SMF Supporter
Joined
Apr 27, 2018
Messages
13,761
Points
113
Location
Shropshire
First Name
Jim
Well Allen that information was well worth a read through. Quite a guy our Capt. Alfred Becker.
You've made a great start and as John said time spent prepping the parts is time well spent.
 

Panzerwrecker

SMF Supporter
Joined
Mar 2, 2022
Messages
362
Points
93
First Name
Los
Great choice of vehicle. These quirky Brach kits look great. Never ever seen a build log on one before so nice to see what you get for having your wallet temporarily raped ;) looking forward to progress
 

Allen Dewire

Proud Rabble Member
SMF Supporter
Joined
Apr 27, 2018
Messages
4,105
Points
113
Location
Bamberg
First Name
Allen
Evening Folks and please don't ask........The build is still underway and I'm making progress...First,

Wow!! that happened so fast, I forgot to look! I guess I'll have to stick around for the re-runs. ;)

Rick, you need to stop taking those naps all the time!!! Won't be any re-runs yet, so please stay awake Buddy......
Allen, I missed the start of this thread and I just had a catch up.
Very interesting vehicle and an amazing kit.
I'll seat somewhere, if any seat is still available, ready to delight my eyes. :smiling3:

There's always a place for you Andrea. You might want to wear very dark glasses and bring earplugs just in case I have problems. I wouldn't want to corrupt your morals my friend......
That was a great piece on Captain Alfred Becker Dude 1 , thoroughly interesting. Reminded me of Percy Hobart Major General Sir Percy Cleghorn Stanley Hobart, KBE, CB, DSO, MC .Very similar in their engineering ideas.

He was an interesting man Dude 2. The German problem was the losses on the East Front and the lack of effective anti-tank weapons to repel the Russian tanks. Hobart was cool as he made a lot of good mods to his tanks too. Hobart's funnies come to mind......
Thanks for the ID Allen; the Mossie is temporarily stalled due to my inability to satisfactorily eliminate the nose seam (despite copious amounts of filler and sanding)! However, the Spitfire is Shelf of Doom, the Half-track build is progressing well and I intend to finish both within the time constraints! I now realise the problems of over-commitment
Steve

Sorry to hear that Steve...Are you getting good bench time or are you still involved in the renovation project with your fine lady??? How bad is that nose seam Sir??? Can you say hammer................
Well Allen that information was well worth a read through. Quite a guy our Capt. Alfred Becker.
You've made a great start and as John said time spent prepping the parts is time well spent.

Thanks Jigs. Between the wars, he had a textile factory and after WWII and his release, he went back to Krefeld and started another textile business which is still going today. Prep with a resin kit is the only way to go. One has to test fit everything twice before dabbing the CA on it.
Great choice of vehicle. These quirky Brach kits look great. Never ever seen a build log on one before so nice to see what you get for having your wallet temporarily raped ;) looking forward to progress

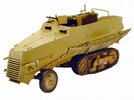
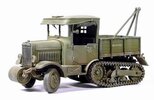
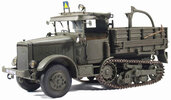
Thanks Los. Luciano Brach does make some interesting kits. Got a few more in the stash. They are pricey for sure and my wallet feels raped, but to be honest, I've get a warm and fuzzy feeling while building this. He makes 2 other kits based on the MCG. One with 7.5cm PaK 40 and a troop transport similar to the Sd. Kfz. 250. DES makes a few kits of French 1/2 tracks also. They're very finely cast resin kits too, but with a price......

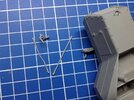
As to my above statement...I started to finish the front suspension and went about cleaning up the tie rod and the steering arm. One has to be careful as these parts are thin and long to boot. Took a while and nothing got broken with my sausage fingers. I also drilled the steering arms out to fit the pins into them,

IMG_3191.JPG
One could replace the pins and make the steering fully workable, but if I started that, this build could take 6 months to finish. You know one thing leads to another. I will have the wheels turned to one side and CA everything in place. The tie rod pins, when in place in the steering arms, are 0.3mm too far apart and skews the steering with too much toe-in. No biggie, as I can fix that with no probs. I then went about removing the 2 stabilizers between the differential and the rear suspension mount last night. In doing so, I touched one of the fasteners for the motor side panels and it fell into my lap or so I thought. Hence the "don't ask" from above. One of these,

IMG_3192.JPG
Many foul words and an hour with my LED flashlight, on my wood laminate floor looking for it, NADA!!! The piece is 2x3mm and gone. I even checked inside my Nikes, but it was nowhere to be found. Ok, plan 2......I have a collection of a similar pieces from Dragon kits in my spares, but where??? Spent a lot more time looking for where I put the damn things and finally found them, along with my collection of wing nuts too. Unfortunately, they are shaped the opposite of the one above. I spent a lot more time today, after work, looking all over the floor for it again. No luck, so I'll just modify one of the Dragon pieces to use......I was not amused over this.....

Tomorrow, weather permitting, I want to AB the driver's interior, the underside, the track/suspension components and other parts. My order came today with fresh paint. I have been masking off the glue points as I don't like to CA painted parts together. Glue resin to resin and then do touchups as needed. Enough waffle for tonight folks..........

Update morn, with luck. Thanks for looking in and all abuse is welcome and cheerfully accepted...

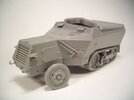
I've posted some pics of other resin kits of French (Becker built armored and Normal) 1/2 tracks below. Not cheap, but very nicely cast and worth it.....


Prost
Allen

Brach Models
bm73.jpg
BM99-1.jpg
DES Kit
35125_00.jpg
35108_00.jpg
35025_00.jpg
35120_00 .jpg
35156_00.jpg
Food for thought...........................................
 

Mini Me

SMF Supporter
Joined
Jun 1, 2018
Messages
10,161
Points
113
First Name
Rick
Allen, who can sleep with JR drooling all over the place!! I missed all the excitement cause I was busy wiping his chin! And the next time you decide to take off in a sudden burst of inspiration...how bout a head's up. ;)
 
  • Haha
Reactions: JR

Airborne01

SMF Supporter
Joined
Mar 30, 2021
Messages
3,188
Points
113
Location
Essex
First Name
Steve
Evening Folks and please don't ask........The build is still underway and I'm making progress...First,


Rick, you need to stop taking those naps all the time!!! Won't be any re-runs yet, so please stay awake Buddy......


There's always a place for you Andrea. You might want to wear very dark glasses and bring earplugs just in case I have problems. I wouldn't want to corrupt your morals my friend......


He was an interesting man Dude 2. The German problem was the losses on the East Front and the lack of effective anti-tank weapons to repel the Russian tanks. Hobart was cool as he made a lot of good mods to his tanks too. Hobart's funnies come to mind......


Sorry to hear that Steve...Are you getting good bench time or are you still involved in the renovation project with your fine lady??? How bad is that nose seam Sir??? Can you say hammer................


Thanks Jigs. Between the wars, he had a textile factory and after WWII and his release, he went back to Krefeld and started another textile business which is still going today. Prep with a resin kit is the only way to go. One has to test fit everything twice before dabbing the CA on it.


Thanks Los. Luciano Brach does make some interesting kits. Got a few more in the stash. They are pricey for sure and my wallet feels raped, but to be honest, I've get a warm and fuzzy feeling while building this. He makes 2 other kits based on the MCG. One with 7.5cm PaK 40 and a troop transport similar to the Sd. Kfz. 250. DES makes a few kits of French 1/2 tracks also. They're very finely cast resin kits too, but with a price......

As to my above statement...I started to finish the front suspension and went about cleaning up the tie rod and the steering arm. One has to be careful as these parts are thin and long to boot. Took a while and nothing got broken with my sausage fingers. I also drilled the steering arms out to fit the pins into them,

View attachment 464993
One could replace the pins and make the steering fully workable, but if I started that, this build could take 6 months to finish. You know one thing leads to another. I will have the wheels turned to one side and CA everything in place. The tie rod pins, when in place in the steering arms, are 0.3mm too far apart and skews the steering with too much toe-in. No biggie, as I can fix that with no probs. I then went about removing the 2 stabilizers between the differential and the rear suspension mount last night. In doing so, I touched one of the fasteners for the motor side panels and it fell into my lap or so I thought. Hence the "don't ask" from above. One of these,

View attachment 464994
Many foul words and an hour with my LED flashlight, on my wood laminate floor looking for it, NADA!!! The piece is 2x3mm and gone. I even checked inside my Nikes, but it was nowhere to be found. Ok, plan 2......I have a collection of a similar pieces from Dragon kits in my spares, but where??? Spent a lot more time looking for where I put the damn things and finally found them, along with my collection of wing nuts too. Unfortunately, they are shaped the opposite of the one above. I spent a lot more time today, after work, looking all over the floor for it again. No luck, so I'll just modify one of the Dragon pieces to use......I was not amused over this.....

Tomorrow, weather permitting, I want to AB the driver's interior, the underside, the track/suspension components and other parts. My order came today with fresh paint. I have been masking off the glue points as I don't like to CA painted parts together. Glue resin to resin and then do touchups as needed. Enough waffle for tonight folks..........

Update morn, with luck. Thanks for looking in and all abuse is welcome and cheerfully accepted...

I've posted some pics of other resin kits of French (Becker built armored and Normal) 1/2 tracks below. Not cheap, but very nicely cast and worth it.....


Prost
Allen

Brach Models
View attachment 464995
View attachment 464996
DES Kit
View attachment 464998
View attachment 464999
View attachment 465000
View attachment 465001
View attachment 465002
Food for thought...........................................
Allen, the Mossie nose seam is slowly yielding and I've done a little more to it elsewhere: the half track has just mirrored your experience in that I dropped (a relatively large part!) the main hand rail from the bench seat on the deck; finger tip searches, torchlight searches, clear everything out to search impossible places etc, etc (I may have sworn one or thrice too)! Decided to crack on regardless in the hope it re-emerges, otherwise I'll fabricate a new part :disappointed2: Just finished the latest phase in school renovation - my aching bones say I'm getting to old for this! Still, SWMBO is very grateful, and I get delicious school dinners to boot!
Those resin kits are very interesting, apart from one or two figures I've never tackled anything like them! Really looking forward to the finished masterpieces, and following with deep interest!
Steve
 

Allen Dewire

Proud Rabble Member
SMF Supporter
Joined
Apr 27, 2018
Messages
4,105
Points
113
Location
Bamberg
First Name
Allen
Allen, who can sleep with JR drooling all over the place!! I missed all the excitement cause I was busy wiping his chin! And the next time you decide to take off in a sudden burst of inspiration...how bout a head's up. ;)

Will do Rick. Yea, you have to take care of John sometimes. He just gets all crazy during a build...
Where was your bench apron, eh? Dude2 & I use ours religiously, thus fewer floor/shoe/cuff searches.

Well Paul, that idea has crossed my mind a few times and I voted against it. Me, being a bonehead, tend to quickly rise from the table (don't have a bench) to get something and would forget I had the thing on. With my luck, the whole table would follow me and create quite a disaster, even with Velcro attachments. Funny thing is, this is the first piece I haven't found so far...
Allen, the Mossie nose seam is slowly yielding and I've done a little more to it elsewhere: the half track has just mirrored your experience in that I dropped (a relatively large part!) the main hand rail from the bench seat on the deck; finger tip searches, torchlight searches, clear everything out to search impossible places etc, etc (I may have sworn one or thrice too)! Decided to crack on regardless in the hope it re-emerges, otherwise I'll fabricate a new part :disappointed2: Just finished the latest phase in school renovation - my aching bones say I'm getting to old for this! Still, SWMBO is very grateful, and I get delicious school dinners to boot!
Those resin kits are very interesting, apart from one or two figures I've never tackled anything like them! Really looking forward to the finished masterpieces, and following with deep interest!
Steve

We ain't getting any younger Steve, but free food is a good thing to get. Happy to hear the Mossie is getting there and you've put the hammer back in the cupboard. Remember, if you don't find the handrail and scratch a new one, the lost piece will show up after your done with the build. Murphy's Law...Oh, I'm not so sure about a Masterpiece Sir...

Off to mix some paint and then fire up the hissy stick this afternoon. Barring disaster, more to follow later good people...........

Prost
Allen
 

Mini Me

SMF Supporter
Joined
Jun 1, 2018
Messages
10,161
Points
113
First Name
Rick
I usually find the piece I lost in the most obvious place as I looked everywhere but in the most obvious place! :tongue-out3:
 
  • Like
Reactions: JR

Airborne01

SMF Supporter
Joined
Mar 30, 2021
Messages
3,188
Points
113
Location
Essex
First Name
Steve
Will do Rick. Yea, you have to take care of John sometimes. He just gets all crazy during a build...


Well Paul, that idea has crossed my mind a few times and I voted against it. Me, being a bonehead, tend to quickly rise from the table (don't have a bench) to get something and would forget I had the thing on. With my luck, the whole table would follow me and create quite a disaster, even with Velcro attachments. Funny thing is, this is the first piece I haven't found so far...


We ain't getting any younger Steve, but free food is a good thing to get. Happy to hear the Mossie is getting there and you've put the hammer back in the cupboard. Remember, if you don't find the handrail and scratch a new one, the lost piece will show up after your done with the build. Murphy's Law...Oh, I'm not so sure about a Masterpiece Sir...

Off to mix some paint and then fire up the hissy stick this afternoon. Barring disaster, more to follow later good people...........

Prost
Allen
Guaranteed ... :angry:
 

geegad

Can't cheat fate..
Joined
Mar 7, 2010
Messages
2,477
Points
113
First Name
John
them resin kits look so clean when built with no paint on .and them are some freaky looking half tracks...
 
  • Like
Reactions: JR

JR

Member of the Rabble and Pyromania Consultant
SMF Supporter
Joined
May 26, 2015
Messages
17,301
Points
113
Location
lincs
First Name
John
Flying parts can land anywhere, a favourite place is on your clothing. Of course this can also fall off when you venture into another room . At this point all is lost ! Don't ask how I know :disappointed:
Dude your quite capable of scratching one .
 

Allen Dewire

Proud Rabble Member
SMF Supporter
Joined
Apr 27, 2018
Messages
4,105
Points
113
Location
Bamberg
First Name
Allen
Afternoon All,

Didn't get a lot done yesterday, so more on that below...But first,

And as soon as you have done that the missing piece will appear in the most unlikely place!

Great progress

Thanks Jim, I gave up looking and will make a new one with the Dragon parts. It could be anywhere between here and Aldi.........
I usually find the piece I lost in the most obvious place as I looked everywhere but in the most obvious place! :tongue-out3:

Ain't that the truth Rick. I have found a pinged etch part between my paint bottles on my left, when it pinged off to the right.......
Guaranteed ... :angry:

Yea Steve, like the old Bruce Hornsby song goes, "That's Just the Way It Is, Some Things Will Never Change"........................
them resin kits look so clean when built with no paint on .and them are some freaky looking half tracks...

Well John, like I said earlier, these are very clean and well cast resin kits. Becker's armoring of the French ones definitely made them look odd...........
Flying parts can land anywhere, a favourite place is on your clothing. Of course this can also fall off when you venture into another room . At this point all is lost ! Don't ask how I know :disappointed:
Dude your quite capable of scratching one .

I know about that deal Buddy and it was just your luck. Like I said to Jim, it could be between the table and Aldi and all points in between...

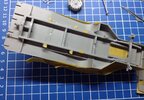
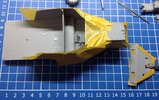
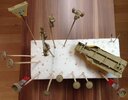
So yesterday, I went about masking off all the glue points and the vehicle pieces. I also masked off the body so I could shoot the interior with a coat,

IMG_3197.JPG
IMG_3196.JPG
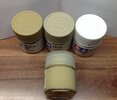
It didn't have to be pretty. Just keep paint off the outside of the body. Next up was the mixing of paint to shoot. I did find an old Tamiya paint bottle that had my mix from previous builds, but I couldn't remember when I made it. I got rid of it and washed out the bottle to use for my new mix. I use 3 colors to make my own dark yellow camo base coat,

IMG_3199.JPG
As I can never remember my mix ratio, I'll post it here for future reference when this bottle is empty. I used 7ml XF-60, 8ml XF-57 and 4ml XF-02 white. An old syringe works well for this. A few plastic balls (don't use metal ones in a glass bottle) to mix it good while shaking and you're all set. I use a 60% paint to 40% IPA ratio in my hissy stick. I draw the IPA and then draw the paint into it. Finger over the tip and shake the hell out of it. I spray it 16psi and it works well for me. I would have shot a coat on them yesterday, but when I wanted to, the wind had picked up and I didn't want to paint myself in the booth. So today, after 15 minutes of hissy, we had this,

IMG_3200.JPG
IMG_3201.JPG
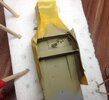
I sprayed a bit thick on the driver's side to get into the nooks and crannies. You can see it's still wet. I also sprayed part of the bed and the inside walls. The rest will get a coat when I do the outside and the mortar assembly. I let it dry and then stripped off all of the masking,

IMG_3202.JPG
IMG_3203.JPG
The oil pan, seat cushion and the rest of the parts will be brush painted the appropriate colors as I go on with the assembly............

Wait!!! What's wrong with the last 2 pics???????

They're so tidy!!!......OMG, Jim, Jimbo, Jigs (choose one) had his birthday a few days ago!!!........Don't tell me he made a wish when he blew out the candles on his cake, and that wish was for me to have a tidy table from now on........Noooooo!!!.....Must remember, must remember, don't open any letters with an address from England on it.......It could be a TBC application!!!......RESIST, I MUST RESIST!!!..........

That's all for now people. I need a nickerchen (lie-down) immediately..........................

Prost
Allen
 
Last edited:

scottie3158

SMF Supporter
Joined
Apr 27, 2018
Messages
12,731
Points
113
Location
Spalding
First Name
Paul
Allen my man that paint mix looks like it works very nicely. All looking very good so far matey.
 

Ian M

Administrator
Staff member
Administrator
Moderator
SMF Supporter
Joined
Dec 14, 2008
Messages
19,750
Points
113
Location
Falster, Denmark
First Name
Ian
That progressed rather quick. Looking good.
 

JR

Member of the Rabble and Pyromania Consultant
SMF Supporter
Joined
May 26, 2015
Messages
17,301
Points
113
Location
lincs
First Name
John
Very nice Dude1. and what a splendid idea to store your mix ratio on here.:thumb2:
 

Allen Dewire

Proud Rabble Member
SMF Supporter
Joined
Apr 27, 2018
Messages
4,105
Points
113
Location
Bamberg
First Name
Allen
Allen my man that paint mix looks like it works very nicely. All looking very good so far matey.

Thanks Paul. I love to use Tammy paints as they stick so good to the surface. I don't prime my kits first and never have unless I want red oxide underneath for weathering. Hell, I didn't even wash the resin before I shot the coat on. Brain fart I guess!!! I've used other dark yellows and they seem to be too prone to scratches and such, when you handle them. How's the Protze and PaK doing my friend???
That progressed rather quick. Looking good.

Thanks too Ian. With not as many parts as your 12-ton, progress is quick once I had made a plan on how to paint as I went along. Hair stick work is next and then assembly...
Very nice Dude1. and what a splendid idea to store your mix ratio on here.:thumb2:

Yea Dude 2, I thought putting it here was a good idea as sometimes I can't remember what I had for dinner last night. With my luck though, when the jar is empty, I will have forgotten that I posted the mix here. Murphy's Law revisited...PM later...
Look'in good dude.

Thanks Buddy. Even though I am retired since January, I still feel guilty if I just sit at the table and play. Weird and I wonder how long it will be before retirement sinks into my melon and I can really enjoy it. Any tips from downtown Ohio Paul???
Very nice Allen, but not a StuG??

Oh 'Admiral' Bob, what can I say. I'm in Dave's GB and I've wanted to build this baby for so long. Hey Bro, I'll make a deal with ya...You throw a StuG on the bench and I'll throw a StuG on my table and we can go crazy on 'em together at the same time!!! You up for it??? Thanks for looking in too Sir...

The weather is crap outside, so it's time to do some hairy stick work on the loose parts. Thanks for all the support and more to follow when I get something done............

Prost
Allen
 

Scratchbuilder

SMF Supporter
Joined
Jul 2, 2022
Messages
1,954
Points
113
First Name
Mike
Hello Younger than me,
See you have been having some fun doing the floor crawl hip hop dance.... Did you check John R's nose, that is where he usually finds his parts - stuck to it... I see the build is coming along since I last looked in and from the original to this, there was some inventivness of converting from one to another with the original vehicle. Looking forward to more of your fine work.
Prost
Older than you.
 
Top