Scratchbuilder
SMF Supporter
- Joined
- Jul 2, 2022
- Messages
- 1,943
- Points
- 113
- First Name
- Mike
I said I would put up my method for cementing etch brass with c/a.
So starting with the tools I use and preperation.
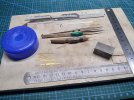
OK, the brass parts have been cut from the fret and cleaned up with some 400 wet n dry paper to get rid of the burrs. The frame part has been bent to shape using a pair of smooth face pliers. And is now sitting in the corner of a 90 degree set, and at this point no c/a has been used.
You can see the slats and rods (only two used), a top that has been warmed over a candle in the centre and a round object used to make a depression for the c/a to sit in.
Also are the only tools I use for asembling the slat armour - a pair of pointed tweezers and half a wooden peg with a pin c/a'd into the end....
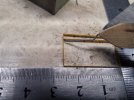
So the first job is to place the first slat into the slot on either side and using the pin applicator add a small dab of c/a at each end to secure the slat. I then clean of the pin on a bit of tissue and go back to the ends and clean off the excess c/a and again wipe off the pin. By now the c/a is starting to set, and here you use the tweezers to straighten up the slat so that it is verticle to the eye and not leaning...
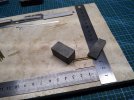
You can use some weights to hold the part square while the first slat hardens, and once this had happened (30 seconds) then you can progress to adding the other slats in the same way....
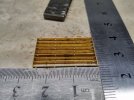
And here we have all the slats in position and all glued.
During this process there will be minute drops of c/a that will 'leak' onto the tile - this is not a problem as this will in fact hold the whole frame in position. Also at this point the top of the frame has been c/a'd into place and here you will get an attachment to the tile - no panic.
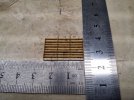
Now the rods have been gently pushed into place, but the thickness of the ruler is stopping them from going all the way through - no problem...
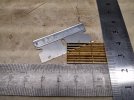
You can now gently slide a single side razor blade/ cutting blade under one corner which will be the main contact point between the frame and the tile... A gentle levering action will get the c/a to release the whole frame....
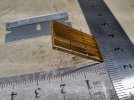
... And a gentle lift with a finger will fold the frame away....
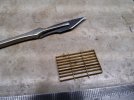
To secure the rods into the frame I use an old No 10A blade, I dip this into the c/a and then touch it to the joint between each rod and the frame ending up with this...
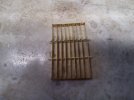
If you look at the top rod you can see the c/a wrapped arounf the rod - to remove the excess I use the pin to 'stroke around the rod and this allows the pin to remove the excess c/a...
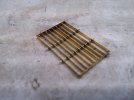
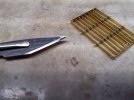
... As you can see above where both rods are now fixed in place and ready for final clean up. The amount of c/a used for 4 frames is this...
And that is it. Take your time from the begining, study the item, look at the pics that come with the etch set and this will give you an idea of what the final shape should be, then sit back and try to work out how the bends will come in sequence, and if unsure then cut a piece of paper with a rough drawing of the piece and fold that into shape, far better than ruining the part, and I talk from experience.....
Any questions, please ask/PM and I will try to set you on the right road...
Cheers
Mike.
So starting with the tools I use and preperation.

OK, the brass parts have been cut from the fret and cleaned up with some 400 wet n dry paper to get rid of the burrs. The frame part has been bent to shape using a pair of smooth face pliers. And is now sitting in the corner of a 90 degree set, and at this point no c/a has been used.
You can see the slats and rods (only two used), a top that has been warmed over a candle in the centre and a round object used to make a depression for the c/a to sit in.
Also are the only tools I use for asembling the slat armour - a pair of pointed tweezers and half a wooden peg with a pin c/a'd into the end....

So the first job is to place the first slat into the slot on either side and using the pin applicator add a small dab of c/a at each end to secure the slat. I then clean of the pin on a bit of tissue and go back to the ends and clean off the excess c/a and again wipe off the pin. By now the c/a is starting to set, and here you use the tweezers to straighten up the slat so that it is verticle to the eye and not leaning...

You can use some weights to hold the part square while the first slat hardens, and once this had happened (30 seconds) then you can progress to adding the other slats in the same way....

And here we have all the slats in position and all glued.
During this process there will be minute drops of c/a that will 'leak' onto the tile - this is not a problem as this will in fact hold the whole frame in position. Also at this point the top of the frame has been c/a'd into place and here you will get an attachment to the tile - no panic.

Now the rods have been gently pushed into place, but the thickness of the ruler is stopping them from going all the way through - no problem...

You can now gently slide a single side razor blade/ cutting blade under one corner which will be the main contact point between the frame and the tile... A gentle levering action will get the c/a to release the whole frame....

... And a gentle lift with a finger will fold the frame away....

To secure the rods into the frame I use an old No 10A blade, I dip this into the c/a and then touch it to the joint between each rod and the frame ending up with this...

If you look at the top rod you can see the c/a wrapped arounf the rod - to remove the excess I use the pin to 'stroke around the rod and this allows the pin to remove the excess c/a...

... As you can see above where both rods are now fixed in place and ready for final clean up. The amount of c/a used for 4 frames is this...

And that is it. Take your time from the begining, study the item, look at the pics that come with the etch set and this will give you an idea of what the final shape should be, then sit back and try to work out how the bends will come in sequence, and if unsure then cut a piece of paper with a rough drawing of the piece and fold that into shape, far better than ruining the part, and I talk from experience.....
Any questions, please ask/PM and I will try to set you on the right road...
Cheers
Mike.


 ; thank you indeed!
