Mosquito wasn’t as flexible in bomb load mix though Pete.Smaller bomb load that a Mosquito I believe.
Pete
You are using an out of date browser. It may not display this or other websites correctly.
You should upgrade or use an alternative browser.
You should upgrade or use an alternative browser.
HKM 1/48 scale B17-G Flying Fortress
- Thread starter BarryW
- Start date
stona
SMF Supporter
- Joined
- Jul 22, 2008
- Messages
- 11,473
- Points
- 113
- First Name
- Steve
This is a myth that needs to die.Smaller bomb load that a Mosquito I believe.
Pete
Some Mosquitoes, relatively few, could carry a 4,000lb bomb to Berlin. There were serious stability issues with Mosquitoes modified to carry the 4,000lb HC bomb, which is why the conversions (of B.Mk.IVs and IXs) were curtailed.
A B-17 E could carry a 4,000 lb load to about 1,100 miles, about the distance from East Anglia to Berlin and back. Later versions could carry up to 6,000 lbs for a similar distance.
The average bomb load per sortie was also higher for the B-17, though I don't have those figures to hand as I'm not at home. From memory, the average load for a Mosquito, even weighted by those that did lift the 4,000lb 'cookie' was a little over 2,000lbs.
Not confusing the Mossie with the Lancaster by chance.
Looks good Barry, but a bit early to tell really.
Looks good Barry, but a bit early to tell really.
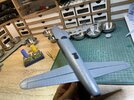
I will post a progress build sometime tomorrow. For now I just had to post this dry fit of the wings together and to the fuselage.
First of all I did spend a fair bit of time cleaning up the fuselage halves and I am sure that the centre seam will need a bit of filling.
As for the wings, well I have done no clean up of these whatsoever and yet they fit together perfectly.
In the picture below it may not look perfect as the halves are not held together but when held in place they are spot on.
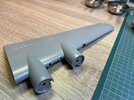
What impressed me most is the dry fit of wings to fuselage. Nothing at all is holding this wing in place but look at what is normally a problem area.
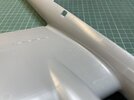
No sign of a join at all on top…
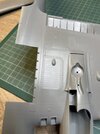
Or on the bottom…
The wings and fuselage half look like a single piece.
Part of the credit must go to HKM’s bayonet fitting system pictured below.
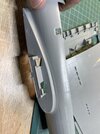
I have not seen better on Tamiya or Zoukei Mura….
First of all I did spend a fair bit of time cleaning up the fuselage halves and I am sure that the centre seam will need a bit of filling.
As for the wings, well I have done no clean up of these whatsoever and yet they fit together perfectly.
In the picture below it may not look perfect as the halves are not held together but when held in place they are spot on.

What impressed me most is the dry fit of wings to fuselage. Nothing at all is holding this wing in place but look at what is normally a problem area.

No sign of a join at all on top…

Or on the bottom…
The wings and fuselage half look like a single piece.
Part of the credit must go to HKM’s bayonet fitting system pictured below.

I have not seen better on Tamiya or Zoukei Mura….
Excellent build and moulding quality on display there Barry. I had to look several times to work out where the wing joint actually was. If the rest of the build fits that well this build will be a pleasure for you.
Andy the Sheep
SMF Supporter
A bit late, as usual  but I'm taking a seat, Barry.
Andrea
 but I'm taking a seat, Barry.
Andrea
I have painted, weathered and added the etch for the cockpit interior. Very little of this will be seen but it was satisfying to do and at least I know that whatever little is glimpsed through the transparencies will look OK.
I am not impressed by the etch set at all. As is so often the case much is unusable but at least what is used does improve the detail not that it’s seen….
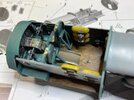
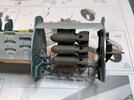
The bomb bay won’t be seen at all of course!
I am not impressed by the etch set at all. As is so often the case much is unusable but at least what is used does improve the detail not that it’s seen….


The bomb bay won’t be seen at all of course!
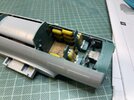
Some good progress here. I have joined the fuselage halves. Fit was OK but I did have a fair bit of filling and sanding to do, for which I used sprue goo in the first instance, finishing off with Mr Dissolved Putty.
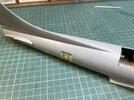
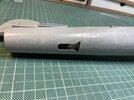
The rescribing was easy enough.
Like so many Far Eastern designed kits there seems to be an assumption that hatched will be left open. Consequently cementing them in place closed does result in some work. The worse was the bomb bay where I had to sand down the inside to get a flush fit. I then used a strip of tape to hold the parts together underneath (it will be permanently lodged in the bomb bay) with another pieces on the outside.
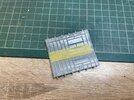
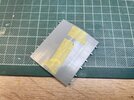
That enabled me to position them and partly cement into place, once the outer tape was removed I was able to finish cementing.
I have also been working on the nose and tail areas.
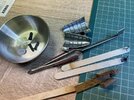
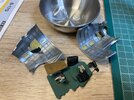


The rescribing was easy enough.
Like so many Far Eastern designed kits there seems to be an assumption that hatched will be left open. Consequently cementing them in place closed does result in some work. The worse was the bomb bay where I had to sand down the inside to get a flush fit. I then used a strip of tape to hold the parts together underneath (it will be permanently lodged in the bomb bay) with another pieces on the outside.


That enabled me to position them and partly cement into place, once the outer tape was removed I was able to finish cementing.
I have also been working on the nose and tail areas.


Coming along nicely Barry. I assume the nose and tail walls are not visible once assembled? Bad move from the kit manufacturers to add part numbers to The surface detail otherwise. Totally unnecessary on a modern kit really.
True, it’s their logo, but none of this will be seen hence not bothering to remove it.Coming along nicely Barry. I assume the nose and tail walls are not visible once assembled? Bad move from the kit manufacturers to add part numbers to The surface detail otherwise. Totally unnecessary on a modern kit really.
Jim R
SMF Supporter
Coming together really well. Certainly nothing which is not easily sorted. Cockpit looks great. The wing to fuselage fit is often difficult to deal with but this is perfect 

Andy the Sheep
SMF Supporter
A nicely detailed cockpit and a neat build, Barry.
It's incredible the difference in cockpit space between USAAF and RAF bombers; a Lancaster bomb aimer would have needed a map not to get lost in the nose of a B17!
It's incredible the difference in cockpit space between USAAF and RAF bombers; a Lancaster bomb aimer would have needed a map not to get lost in the nose of a B17!

I have attached the tail pieces and the cockpit roof.
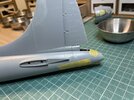
The fit of both was OK. I will have a little filling and sanding on the tail.
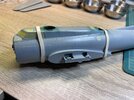
I am holding the roof on with electric bands. As you can see below there is a gap on one side However, I do t think it’s as bad as it looks and it passes in Once the cement is fully hardened on the other areas I will use c.a. and press the side in and hopefully that will do it, perhaps with only a little extra thin to finish it off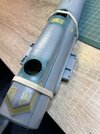

The fit of both was OK. I will have a little filling and sanding on the tail.

I am holding the roof on with electric bands. As you can see below there is a gap on one side However, I do t think it’s as bad as it looks and it passes in Once the cement is fully hardened on the other areas I will use c.a. and press the side in and hopefully that will do it, perhaps with only a little extra thin to finish it off

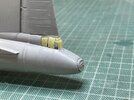
The nose and tail are attached. A good fit with only a little bit of filling and sanding needed.
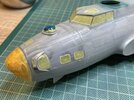
I have used my new MRP scribers for the first time and they are great, very sharp and I recommend them. I thought I would try them out given how their paints are of the very best quality, unbeatable and these tools are up to the high standards MRP have set.
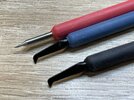


I have used my new MRP scribers for the first time and they are great, very sharp and I recommend them. I thought I would try them out given how their paints are of the very best quality, unbeatable and these tools are up to the high standards MRP have set.

Mickc1440
SMF Supporter
Those scribers look really goodThe nose and tail are attached. A good fit with only a little bit of filling and sanding needed.
I have used my new MRP scribers for the first time and they are great, very sharp and I recommend them. I thought I would try them out given how their paints are of the very best quality, unbeatable and these tools are up to the high standards MRP have se
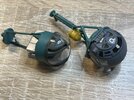
I have been working on the mid-upper and ball turret assemblies and the components are painted. These will need weathering before assembly. The tail wheel has also been painted.
Also I have sprayed a primer coat on the fuselage.
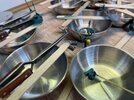
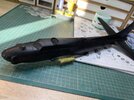
The primer has done it’s job and highlighted some seam areas that need a little more work.
I will get the seams done and finish the turrets before moving on the wing assembly.
Also I have sprayed a primer coat on the fuselage.


The primer has done it’s job and highlighted some seam areas that need a little more work.
I will get the seams done and finish the turrets before moving on the wing assembly.
I have plugged on with the wings, no real problems with just a little filling and sanding.
I have also painted them and finished painting the fuselage, applying the decals. No drama at all really. The kit decals are Cartograph from which I used the insignia while the aircraft specific decals came from Kits World, also no issues.
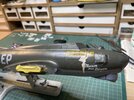
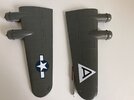
The most observant and knowledgable among you might be able to spot the deliberate error!
I have also painted them and finished painting the fuselage, applying the decals. No drama at all really. The kit decals are Cartograph from which I used the insignia while the aircraft specific decals came from Kits World, also no issues.


The most observant and knowledgable among you might be able to spot the deliberate error!

