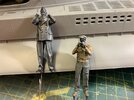
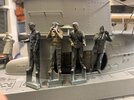
Jack's Border 1/35 U-Boat Conning Tower

Jack L

SMF Supporter
Joined
Jul 25, 2018
Messages
1,008
Points
113
First Name
Jack
Hi Jack, Good to see something really different being blogged and who doesn’t like a U-boat!

Superb work with the upgrades and lights…..keep at it and I’m sure this is going to be a great display piece :thumb2:
That looks very good Jack.
all coming along very nicely Jack looking so good
[ i won,t one ];)
Looking fantastic Jack.
Fabulous work Jack. Love the detail work and the lighting It really brings this kit to life.
Cheers
Paul
Thank you all. Very kind words.

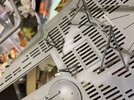
Not making hugely noticeable progress, just small bits and pieces. However can't get my head around this on the torpedo feed. Assume it to be a mistake:
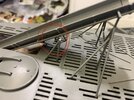
EE994F65-1FB7-4331-9D47-C1BFCB6F8494.jpeg
That supporting bar is supposed to fit into that hole. It can't and it won't. No where near. Assuming I have made the rest up correctly?
 

Tim Marlow

Little blokes aficionado
SMF Supporter
Joined
Apr 27, 2018
Messages
16,813
Points
113
Location
Somerset
First Name
Tim
Clutching at straws…….
Nothing else in the sprue that would do the job? Might be a part for a different version?
 

Jack L

SMF Supporter
Joined
Jul 25, 2018
Messages
1,008
Points
113
First Name
Jack
looking at it like Mark1 said ,the far side the support bar is facing backwards ,by the look of it and
this close side is the other way,,
I do see what you and Mark mean. I’ll have another look tomorrow. Thanks all
 

Jack L

SMF Supporter
Joined
Jul 25, 2018
Messages
1,008
Points
113
First Name
Jack
Ok thanks for the observations, you were all right and it’s supposed to be the other way round. Were I was confused, there should be a protrusion that has snapped off somewhere, so I’ll need to scratch something there which shouldn’t be too difficult, although I was going to paint and weather the slide separately…my need to rethink that now.6C482E94-26DD-4519-9E7F-FF136E054E6E.jpeg
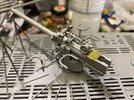
And with the guns made up (I have seen less complicated stand alone kits), that is construction complete. Next step is painting.
3D6F1783-856F-48D9-AC6A-7897112081DA.jpeg
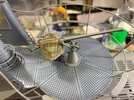
The AA gun was a pain in the arse. I could not get that mesh to fit at all….so some more ‘tactical damage’ has been added.
866A1E0C-F58E-4264-B0A0-E724CE95E7F7.jpeg
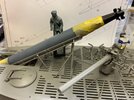
Started painting the torpedo, not a single picture seems to show a consistent colour scheme.
C55CD2A5-FAB2-4FF6-8130-6D3756A45307.jpeg
 

Jack L

SMF Supporter
Joined
Jul 25, 2018
Messages
1,008
Points
113
First Name
Jack
Waiting for some paint from John, so been painting a couple of the figures. Not sure about them if I'm honest. Primed in black, sprayed white from above and then went with a glaze in the respective colours. I don't think it's worked. Found it hard to get the glaze consistency right, it was either 'bubbly' and blotchy, or too think and lost it's transparency. Was not as easy as youtube suggested (as per).B8B0C931-63B1-4774-A4F8-48EB25615042.jpeg
 

Tim Marlow

Little blokes aficionado
SMF Supporter
Joined
Apr 27, 2018
Messages
16,813
Points
113
Location
Somerset
First Name
Tim
Figures look ok to me Jack.
I’m guessing you diluted with water? The blotchy effect occurs because you have over diluted the paint. This is worse with lighter colours because of the white component of the pigment.
Regarding glazes, it’s best to dilute with glaze medium, and use darker colour’s because they work more effectively. If you want to glaze with lighter colours inks are more reliable, but still not great. My hint would be to paint the piece with the lighter colour then glaze it to add the shadows.
 

Jack L

SMF Supporter
Joined
Jul 25, 2018
Messages
1,008
Points
113
First Name
Jack
Painted figure looks fine. I find a drop of flow enhancer and some retarder helps acrylic glazes to cover evenly.
Thanks Jim...had another go using flow improver instead of water. Worked much better!
Figures look ok to me Jack.
I’m guessing you diluted with water? The blotchy effect occurs because you have over diluted the paint. This is worse with lighter colours because of the white component of the pigment.
Regarding glazes, it’s best to dilute with glaze medium, and use darker colour’s because they work more effectively. If you want to glaze with lighter colours inks are more reliable, but still not great. My hint would be to paint the piece with the lighter colour then glaze it to add the shadows.
Yes diluted with water (as per nightshift). The main colour I'm going with is a German Grey, mixed with a tiny bit of tan. Have gone again with some flow improver instead of water and it's definitely worked better. Thank you.

Now comes the battle with skin tones. I want them pretty pale looking, but may have gone a bit too pale with the skipper. The fellow far tight is a better shade. The other two have only had a first coat.

EB449055-8102-4830-8D6F-11147DC170CA.jpeg
 

rtfoe

SMF Supporter
Joined
Apr 29, 2018
Messages
7,518
Points
113
Location
Malaysia
First Name
Richard
Not all that uniform, but not sure that will be noticed when in place. May need a couple more when I see what will and won't be seen.View attachment 470308
Well done Jack. I did the same for my 1/72 Walrus catapult leveling handles...saves time and money. Haven't been on your post lately but had I, would have edged you to do it this way.
To make same size circles I would wrap the wire a couple of times round the dowel and snip along one side.
I bet it was more satisfying making em.

Cheers,
Wabble
 
Top