scottie3158
SMF Supporter
Now that is looking rather splendid mate.
Thanks John. I have a go with the knowledge i can cover 'em up.They look good to me Jack ,the uniform colour looks fine .
As for eyes gave up doing eyes a long time ago ! Just rely on a wash .
I had to get my wee moggy desex when she first come into season as she would yell all night in the yard for days on end
poor little thing,but much happier once done and no yelling all night the neighbor,s cannot get upset,all you need to spend
time with i have one older one 15yrs and a 13mth and a 11mth old moggys need a lot of time with them all
back to this there looking much better the skins looking better as well from before nd do like the uniform colors ,as like John said
oh the pain in doing eyes oh my my ,will leave it at Monica.
cheers Ian!Very nice work on the figures.
thanks Allen!Wow, I think they look good Jack!!! I'm another one who hates painting figs and always have an excuse not to. You dove in and did it and the results are one to be proud of Sir. Now go have a cold one, you deserve it!!!
Prost
Allen
cheers Scottie!nowt wrong with them mate looking very good.
Thanks Jim, will see if I can pull it off without teaching the dog some new words. Mind you she's certainly heard most of them!Figures do you credit Jack. Nice to see the primer go on. A cunning plan - I'm in for one of those!
I had a cunning plan once and Mrs Race put an end to it !
Very nice Jack .
thanks Rick.Nice!
Cheers TimOh I do like that

thanks JimThat's nicely done Jack.
thanks Again Scottie!Now that is looking rather splendid mate.
thanks Paul.This is looking great! The figures are excellent - the draping of their rather tired uniforms is nicely moulded, and you've really done it justice. When figures and model come together, it's going to be awesome. I'd love to see it awash - how about some water effects?
Flow improver is a truly magic ingredient.Thanks Jim...had another go using flow improver instead of water. Worked much better!
DEFinitely! Helps keep tiny amounts of paint flowing on tiny little brushes, instead of it instantly drying out. (Apologies for the thread hijack).Are you folks talking about Vallejo flow improver?......I'm wondering if this can be applied to the smaller scales and still be beneficial.
It seems to have done the job in this case.
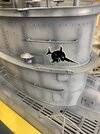
Cheers Rick. I couldn’t do anything other than U96."Das Boot"!! Looks great Jack.
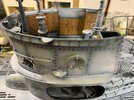
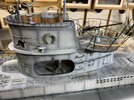
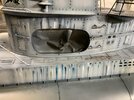
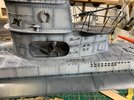
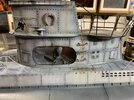
Interesting - let's hope it turns out to just be weird, not stupid!Made the (weird, possibly stupid) decision to go through the weathering in sections. I can't face the tedium of a pinwash all over, then chipping all over, oils etc. will see if that works.
thanks Scottie.Jack,
The oil washes look excellent mate.
Logic is...i can find what looks good as I go and then replicate...maybe?Interesting - let's hope it turns out to just be weird, not stupid!

For FULL Forum access you can upgrade your account here UPGRADE
