Marks mig 21mf Slovakia

Mark1

SMF Supporter
Joined
Apr 17, 2021
Messages
3,554
Points
113
Location
South london
First Name
Mark
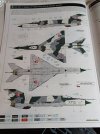
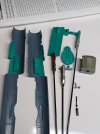
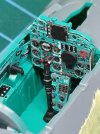
So time for a new build . Eduard 1:48 mig 21mf profipack. 1000002842.jpg1000002846.jpg
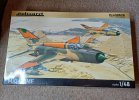
If this builds anything like their 1:72 goes together then im going to enjoy this one.
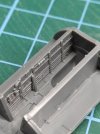
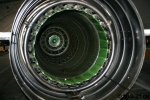
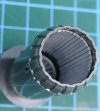
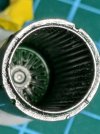
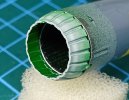
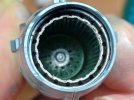
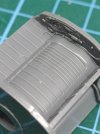
Made a start on wheel housings and the engine. Wheel housings are nicely detailed as the rest of the kit generally is, the exhaust was lacking a bit though so ive had a go and started adding a bit of detail, using 1mm half round rod cut to length and glued around the inside, more to do yet but its a start.1000002845.jpg1000002844.jpg1000002841.jpg1000002840.jpg1000002847.jpgwhat i am trying to replicate is the darker green inner section,the lighter green colour is the grey nozzle or petals i think there called :thinking: on the bottom picture
 

Tim Marlow

Little blokes aficionado
SMF Supporter
Joined
Apr 27, 2018
Messages
16,781
Points
113
Location
Somerset
First Name
Tim
Looks good. I’ve got one of these in another boxing so I’ll keep an eye on this Mark….
 

yak face

Wossupwidee?
Staff member
Moderator
SMF Supporter
Joined
Jun 13, 2009
Messages
12,402
Points
113
Location
sheffield
First Name
tony
Great choice mark , its a fantastic kit , I did this scheme for the mig 21 GB we had ages back but I used the Weekend boxing . I found it a superb kit , very precise fit in places , so much so that you have to be careful not to get any paint on the mating edges as this is enough to make a difference . Looking forward to seeing this one again , cheers tony
 

Mark1

SMF Supporter
Joined
Apr 17, 2021
Messages
3,554
Points
113
Location
South london
First Name
Mark
Cheers for looking in chaps :thumb2:
Nice build rick and cheers for the heads up Tony the 1/72 was a great kit.
 

Mark1

SMF Supporter
Joined
Apr 17, 2021
Messages
3,554
Points
113
Location
South london
First Name
Mark
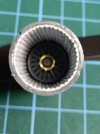
So i have finished off the end of the exhaust by adding a ring of 0.5mm rod to cover the end of the added strips and given it a metal finish something resembling the photo. 1000002855.jpg
And a pic with the nozzle on, tricky to get a decent picture due to the lighting and the gloss finish.1000002856.jpg
 

yak face

Wossupwidee?
Staff member
Moderator
SMF Supporter
Joined
Jun 13, 2009
Messages
12,402
Points
113
Location
sheffield
First Name
tony
Great work mark , just been looking back at my build and one thing I found was that it helps to add the two bulkheads in the middle after youve glued the fuselage together as its easy to get them slightly off centre , which would cause problems getting the seam tight . Also dont cement the exhaust assembly for the same reason , it will stay in place unglued . Hope this helps , cheers tony
 

Mark1

SMF Supporter
Joined
Apr 17, 2021
Messages
3,554
Points
113
Location
South london
First Name
Mark
Great work mark , just been looking back at my build and one thing I found was that it helps to add the two bulkheads in the middle after youve glued the fuselage together as its easy to get them slightly off centre , which would cause problems getting the seam tight . Also dont cement the exhaust assembly for the same reason , it will stay in place unglued . Hope this helps , cheers tony
Cheers Tony :thumb2:
 

yak face

Wossupwidee?
Staff member
Moderator
SMF Supporter
Joined
Jun 13, 2009
Messages
12,402
Points
113
Location
sheffield
First Name
tony
Excellent progress mark , your pre shading is very neat , mine always ends up a bit wobbly , although I too usually obliterate it ! Cheers tony
 

Mark1

SMF Supporter
Joined
Apr 17, 2021
Messages
3,554
Points
113
Location
South london
First Name
Mark
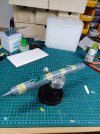
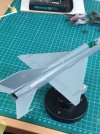
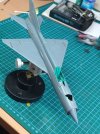
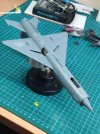
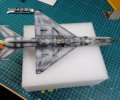
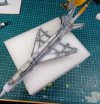
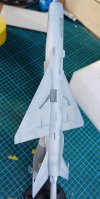
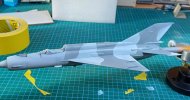
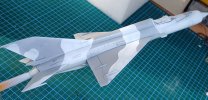
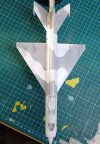
Been busy with the paint,the under side has been painted light grey, the top half has had a coat of white which is the first camo colour ,the bits that needed to stay white have been masked off and the second camo colour, fs36270 grey has been applied. When this is dryed enough it will be masked again for the third colour which is dark grey.1000002958.jpg1000002956.jpg1000002955.jpg1000002957.jpg
 
Top