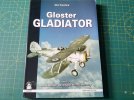
Mikes Gloster Gladiator Mk2, Roden. 1/48

Scratchbuilder

SMF Supporter
Joined
Jul 2, 2022
Messages
2,098
Points
113
Location
Luton
First Name
Mike
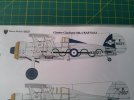
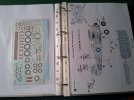
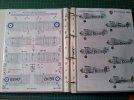
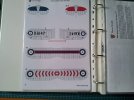
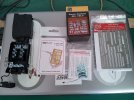
So after the disaster with the Demon, I looked through my stash of wingy things and the last one I built was a Spitfire Mk 22 based on the Eduard offering. And as the requirement was for a bi-plane there was really only two choices, a Swordfish and a Sea Gladiator. And as there is already a Swordfish on the go I chose the Gladiator - but will not be doing the sea version, but a late Mk1.
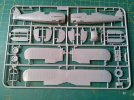
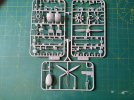
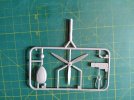
So here are the bits etc.... cue holiday snapszzzzz
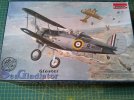
20240114_112408_HDR.jpg
20240114_112447_HDR.jpg
20240114_112502_HDR.jpg
20240114_112528_HDR.jpg
Will not be using these parts above...
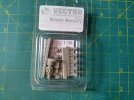
20240114_112543_HDR.jpg
A new donkey...
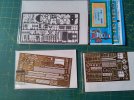
20240114_112624_HDR.jpg
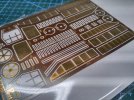
Bit of bling care of Eduard and Part...
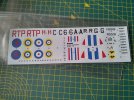
20240114_113230_HDR.jpg
Kit decals - not to be used...
20240114_113021_HDR.jpg
This one possibly...
20240114_113032_HDR.jpg
20240114_113040_HDR.jpg
20240114_113115_HDR.jpg
All from the Pheon Decals sheet...
20240114_112843_HDR.jpg
20240114_112918_HDR.jpg
And a little bit of reading material....
But be warned there are other items on order....
Now off to start the build - wings first....
Cheers
Mike.
 

Steve-the-Duck

SMF Supporter
Joined
Jul 3, 2020
Messages
1,275
Points
113
Location
Medway Towns
First Name
Chris
Well, that's the Gladiator Hat-trick for this thread

And so many pretty stripey chevrony schemes to chose from. I'd go with 87 Squadron meself, though 64 Squadron appeals too
 

Ian M

Administrator
Staff member
Administrator
Moderator
SMF Supporter
Joined
Dec 14, 2008
Messages
19,864
Points
113
Location
Falster, Denmark
First Name
Ian
Quite fancy one of those, I'll follow along if I may.
 

rtfoe

SMF Supporter
Joined
Apr 29, 2018
Messages
7,566
Points
113
Location
Malaysia
First Name
Richard
Hi Wibble, looking forward to see some modifications ala similar to your armoured heavies. Pulling up a chair and brought some tit bits to munch...prawn crackers and banana fritters.

Cheers,
Wabble
 

Scratchbuilder

SMF Supporter
Joined
Jul 2, 2022
Messages
2,098
Points
113
Location
Luton
First Name
Mike
Update,
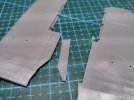
Wings now from under the knife.
20240114_143922_HDR.jpg
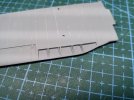
So the idea is to show the flaps down and the first job was to remove the sections... I was going to cut around the flap itself, but as I could replace the removed rim I chose to chop the lot off....
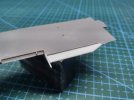
20240114_144857_HDR.jpg
.... And a new part was cemented into place.... Then i took a long hard look at the etch offerings and did away with the plastic sheet which was the replaced with a piece of 10thou...
20240114_145147_HDR.jpg
.... which will make a backing for the etch offerings - part#61 replaces the rim of the outer flap part of the wing, and #60 does the same for the flap itself. Just look at those ribs - scarey....
20240114_145304_HDR.jpg
And this is where I am today, will be putting a saw along the aeirleron opening...
So now all four flaps are complete.
More later.
Mike.
 

Allen Dewire

Proud Rabble Member
SMF Supporter
Joined
Apr 27, 2018
Messages
4,122
Points
113
Location
Bamberg
First Name
Allen
Wow, Olderthanme goes wing thingy!!!......And he's already off into the scratchy world on it too...Nice work on the flappies Mike!!! So whatcha gonna do with the steering fin???...

Prost
Youngerthanyou
 

Scratchbuilder

SMF Supporter
Joined
Jul 2, 2022
Messages
2,098
Points
113
Location
Luton
First Name
Mike
Come on Youngerthanme.... Give an old bloke a chance, at least I did not go with the scale where you have to have arm extensions just to read the instructions... Steering fin???... It took me long enough to work out there were not any tracks or a turret, counted the wheels and thought there were another 16 missing, thought there was a missing page in the instructions, just as well they put numbers on the bottom of the pages.....
Now off to play with the 1.1 cooker, as I have no real sense of smell, she came running in the kitchen the other night and asked if I could smell anything burning, turned off the cooker right in the middle of my ham and cheese omelette which was just getting to the fluffy stage.... When inspected the terminal block where the wires come in off the wall at the back was happily melting away... So the new one has arrived and now off to play....
Take care
Olderthanyou.
 
  • Wow
Reactions: JR

Scratchbuilder

SMF Supporter
Joined
Jul 2, 2022
Messages
2,098
Points
113
Location
Luton
First Name
Mike
More goodies arrived today, so now spoilt for choice. I should add that I ordered this lot before I discovered the already stashed items shown at the beginning - but hey!ho! I could build another Gladiator later.
20240118_113802_HDR.jpg
The black thing on the left is the new terminal block, which has since been fitted and all seems well...
Cheers
Mike.
 

JR

Member of the Rabble and Pyromania Consultant
SMF Supporter
Joined
May 26, 2015
Messages
17,428
Points
113
Location
lincs
First Name
John
Unfortunate about your tea Wibble, I've warned you before about using the 6 inch nail as a fuse.

Now concerned about this change to WINGY things, have you no shame ? That PE looks frightening by the way.

Wobble, who
refused a ride in a Army Air Core whirly thing as it looked unsafe.
 

Steve-the-Duck

SMF Supporter
Joined
Jul 3, 2020
Messages
1,275
Points
113
Location
Medway Towns
First Name
Chris
Maybe it's because I use steel rod for rigging meself, but I DO like those rigging kits. Though the one Iput on my Dragon Rapide needed some minor fit adjustments one side
 
  • Like
Reactions: JR
Top