Hi guys,
So a few months ago I've also bought a 3d resin printer and have been trying to get some things successfully printed in my small amount of spare time...
I got the 'Anycubic photon D2' and like most people new to resin printing it was a bit of a struggle but I think I'm getting the hang of it now.
So I got this idea to print mr Potato head from 'Toy story' as a Christmas present for my brother, as he already has a few characters from this movie behind his desk and the potato-toy sold by Disney just doesn't look like in the movie...
I stumbled onto this video on Youtube, where 'Zedabyu Creations' adapts a free 3D model which you can download in the description of this video.
So I downloaded the Blender-model myself and although the model looks good at first sight, I spend a lot of time modifying the model for my printer.
-Adapted his ears, shoes and hollowed it like in the movie
-Adapted his mustache and nose
-Cut the potato in half to fit on my printer, made holes for all his parts
-Made a hatch in his back
My printer doesn't have a large build-plate, so I had to print the model in multiple print-sessions ...
...
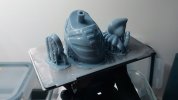
Print of one ear, shoe, nose with mustache and two eyebrows :
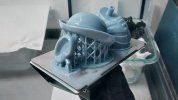
Print of one ear, hat and shoe :
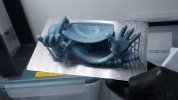
Print of two eyes, two arms and his backdoor with text "Happy 2024 bro"
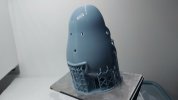
Print of the front-part of the potato, had to cut the thing in half because it didn't fit... (about 7hours30min print time...)
Print of the back of the potato...
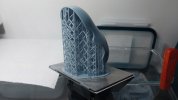
All the parts need a lot of cleaning with IPA (Isopropyl alcohol), I made the arms hollow to avoid trapping uncured resin inside...
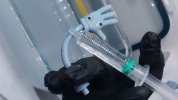
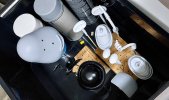
This was a quick test-fit after cleaning, the model is about 15cm (5,9") high
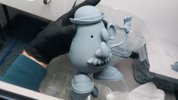
Next all the parts need a lot of sanding to remove support-marks etc...
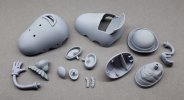
In the computer the cutting line was perfect but it did take some time to sand and clean the parts to make those halves fit well, I glued them together with superglue and used this as a filler too.
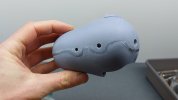
The bleed-holes in the arms were also filled with superglue and some baking-powder. This cures the superglue immediately so I can continue working.
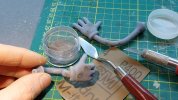
An idea I took from the first YT video : drilling 2mm holes and gluing 2mm magnets into the eyebrows makes it possible to place them onto the face, while 2 bigger magnets on the inside attract the eyebrows. This was a real pain to install because the magnets inside the head liked 'each-other' much more, so in the end I super-glued the magnets inside the head and then the eyebrows can pivot on their magnet on top of the face...
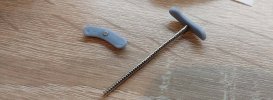
After all the sanding I glued the parts onto sticks with hot-glue for painting...
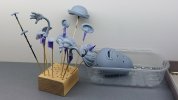
I primed them with spray cans, those have better scratch resistance then my acrylic Vallejo primers
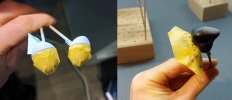
Masking the (white primer) eyes and (black primer) mustache with Tamiya tape...
For the colors I used Vallejo acrylic paints, Bf109 'Sand yellow' for the potato, for the shoes I used 'Royal blue' mixed with 'white', for the ears 'Red' mixed with 'white' to get pink and then some small bit of blue to make it more purple, the nose is an orange mix, lips where hand-painted with 'flat red', for all the other parts I used the airbrush ...
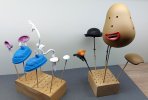
Painted the pupils onto the eyes and then (next day) carefully sprayed a satin-varnish in light coats with the spray-can to increase the scratch-resistance of the Vallejo paint.
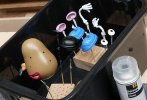
Next I stuck all the parts into the potato, even made him a cardboard-box like you can see in the first movie (marker and colored pencils, quite therapeutic actually )
)
His backdoor fits nicely when 'closed', but sometimes falls out when opened, the hinge should have been made a bit more thigh.
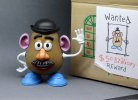
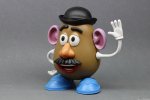
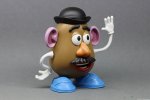
The only model I finished this year... And he's ready for transport!
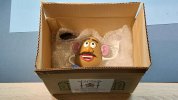
It was a fun project but so much more work then I thought it would be,
Also the resin printing is a REAL MESS, a lot more then some of the youtube videos let you believe
Hope you guys like it,
Thanks for reading & kind regards
Cheers
Steven
So a few months ago I've also bought a 3d resin printer and have been trying to get some things successfully printed in my small amount of spare time...
I got the 'Anycubic photon D2' and like most people new to resin printing it was a bit of a struggle but I think I'm getting the hang of it now.
So I got this idea to print mr Potato head from 'Toy story' as a Christmas present for my brother, as he already has a few characters from this movie behind his desk and the potato-toy sold by Disney just doesn't look like in the movie...
I stumbled onto this video on Youtube, where 'Zedabyu Creations' adapts a free 3D model which you can download in the description of this video.
So I downloaded the Blender-model myself and although the model looks good at first sight, I spend a lot of time modifying the model for my printer.
-Adapted his ears, shoes and hollowed it like in the movie
-Adapted his mustache and nose
-Cut the potato in half to fit on my printer, made holes for all his parts
-Made a hatch in his back
My printer doesn't have a large build-plate, so I had to print the model in multiple print-sessions
 ...
...Print of one ear, shoe, nose with mustache and two eyebrows :

Print of one ear, hat and shoe :

Print of two eyes, two arms and his backdoor with text "Happy 2024 bro"

Print of the front-part of the potato, had to cut the thing in half because it didn't fit... (about 7hours30min print time...)

Print of the back of the potato...

All the parts need a lot of cleaning with IPA (Isopropyl alcohol), I made the arms hollow to avoid trapping uncured resin inside...

This was a quick test-fit after cleaning, the model is about 15cm (5,9") high

Next all the parts need a lot of sanding to remove support-marks etc...

In the computer the cutting line was perfect but it did take some time to sand and clean the parts to make those halves fit well, I glued them together with superglue and used this as a filler too.

The bleed-holes in the arms were also filled with superglue and some baking-powder. This cures the superglue immediately so I can continue working.

An idea I took from the first YT video : drilling 2mm holes and gluing 2mm magnets into the eyebrows makes it possible to place them onto the face, while 2 bigger magnets on the inside attract the eyebrows. This was a real pain to install because the magnets inside the head liked 'each-other' much more, so in the end I super-glued the magnets inside the head and then the eyebrows can pivot on their magnet on top of the face...

After all the sanding I glued the parts onto sticks with hot-glue for painting...

I primed them with spray cans, those have better scratch resistance then my acrylic Vallejo primers

Masking the (white primer) eyes and (black primer) mustache with Tamiya tape...

For the colors I used Vallejo acrylic paints, Bf109 'Sand yellow'
 for the potato, for the shoes I used 'Royal blue' mixed with 'white', for the ears 'Red' mixed with 'white' to get pink and then some small bit of blue to make it more purple, the nose is an orange mix, lips where hand-painted with 'flat red', for all the other parts I used the airbrush ...
Painted the pupils onto the eyes and then (next day) carefully sprayed a satin-varnish in light coats with the spray-can to increase the scratch-resistance of the Vallejo paint.

Next I stuck all the parts into the potato, even made him a cardboard-box like you can see in the first movie (marker and colored pencils, quite therapeutic actually
 )
)His backdoor fits nicely when 'closed', but sometimes falls out when opened, the hinge should have been made a bit more thigh.


The only model I finished this year... And he's ready for transport!

It was a fun project but so much more work then I thought it would be,
Also the resin printing is a REAL MESS, a lot more then some of the youtube videos let you believe

Hope you guys like it,
Thanks for reading & kind regards
Cheers
Steven
