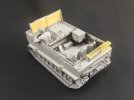
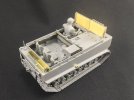
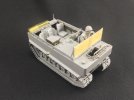
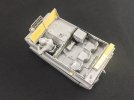
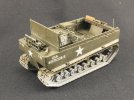
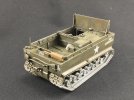
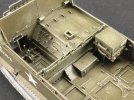
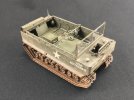
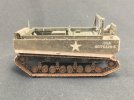
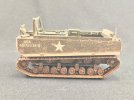
Quickie: Takom M29 Weasel

Jakko

Way past the mad part
SMF Supporter
Joined
Apr 28, 2018
Messages
10,837
Points
113
First Name
Jakko
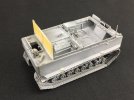
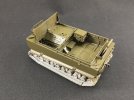
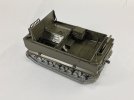
The model is now finished:

IMG_0181.jpegIMG_0182.jpegIMG_0183.jpegIMG_0184.jpegIMG_0185.jpeg

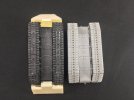
The holders for the framework of the canvas tilt were not too bad after all. I annealed them with a cigarette lighter while they were still on the fret and then bent them around a piece of thin steel tubing. That went reasonably well, but I think that for a future kit I’ll look for material that’s easier to bend than brass.

The grille over the exhaust is still loose, as are the seats and the driver, and the windscreen wipers are also to be attached, all to ease painting. There are three parts I didn’t install: the cable between the two parts of the radio, because it pinged away and I couldn’t find it anymore, and two etched parts (TP12 and TP13) that go inside the grille at the front. It’s totally unclear from the instructions where and how these actually go, but this photo shows them well (in the yellow circles):
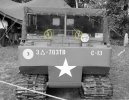
achterhoekw2009_52.jpg
(source)

The reason I skipped them is because they’re etched parts of about 3 mm long and 0.5 mm wide, with a section of under 0.5 × 0.5 mm that has to be folded over at right angles to the main part. I gave up trying to do that after a while. Because I’ve wanted to build the model straight from the box, I didn’t replace them by plastic strip, which I would if I were building this “for real” ;)

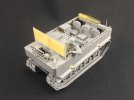
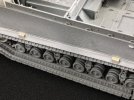
And because I was taking pictures of the completed model, I dug up my part-built LZ M29C for some quick comparison shots:
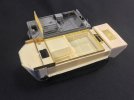
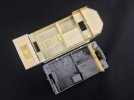
IMG_0189.jpegIMG_0188.jpegIMG_0187.jpeg

I still need to hold a ruler or calipers to them, but at first sight their dimensions seem to be quite close.
 

Scratchbuilder

SMF Supporter
Joined
Jul 2, 2022
Messages
1,946
Points
113
First Name
Mike
Jakko,
Just caught up on your build and see you are overcoming the problems.
Tracks, now that the body is in place if you did not know it, the problem of the tracks running out of true cannot be seen.
Comparing your build with the kit - again if we could not see it, we would not know, what is it 2mm and I bet your measurment is correct knowing how much you look into/research your builds.
Time for paint....
Mike
 

Jim R

SMF Supporter
Joined
Apr 27, 2018
Messages
13,751
Points
113
Location
Shropshire
First Name
Jim
Ready for paint so well done. Some pe parts are ridiculous. So tiny and requiring impossible bends.
The two weasels do look very similar
 

Jakko

Way past the mad part
SMF Supporter
Joined
Apr 28, 2018
Messages
10,837
Points
113
First Name
Jakko
Just caught up on your build and see you are overcoming the problems.
It’s not a difficult kit, but it is one with rather tricky areas that make it not for the novice modeller, IMHO. I joked on another forum that LZ’s Weasel kits say “suitable for advanced modellers” on the box front, and that this one should have, “not suitable for modellers used to Tamiya kits” — and I stand by that :smiling3:

Tracks, now that the body is in place if you did not know it, the problem of the tracks running out of true cannot be seen.
Nor the roadwheels. Many are are wonky and not properly aligned, even two on the same axle, but because the track teeth straighten them out fairly well it’s not obvious and so not much of a problem. Of course, for the next one I have the even bigger advantage that there will be a track skirt over most of it, so I can just bodge some supports together that hopefully will line everything out much better.

I bet your measurment is correct knowing how much you look into/research your builds.
TBH, I did not do much research into this one at all, other than what I already knew from when I was building the LZ kit. It probably helped a lot that I photographed a real M29C in detail back then, of course :smiling3:

Some pe parts are ridiculous. So tiny and requiring impossible bends.
This kit definitely suffers from that. It’s a good example of how modern design and mouldmaking technology allows kit designers to create parts that are effectively impossible to build, at least for the vast majority of modellers.
 

Jakko

Way past the mad part
SMF Supporter
Joined
Apr 28, 2018
Messages
10,837
Points
113
First Name
Jakko
Sprayed some primer onto the model today:

IMG_0196.jpeg

First time I tried Badger Stynylrez, and I think I don’t quite have the hang of it :sad: I shook the bottle well, like it says, then chucked it into my airbrush and sprayed it, but it was like I had put milk into it instead of paint. I didn’t bother trying to cover the whole model, I just wanted primer on the etched bits, but look:
IMG_0198.jpeg

After it dried, you can still see the brass colour through it, even though I gave it several thin coats like the bottle says. I think I’ll just skip straight to spraying olive drab after this, trusting that not handling the model too much will keep the paint covering the brass parts :smiling3:
 

scottie3158

SMF Supporter
Joined
Apr 27, 2018
Messages
12,722
Points
113
Location
Spalding
First Name
Paul
Jakko,
It looks to me to be far to thin. But I never prime I just use the black pre shade to cover any etch.
 

Jakko

Way past the mad part
SMF Supporter
Joined
Apr 28, 2018
Messages
10,837
Points
113
First Name
Jakko
That’s what I was thinking too, but like I said, I shook the bottle what I thought was quite well … Maybe the pigment has mostly congealed at the bottom, though? Perhaps I should give it another try after shaking it even more thoroughly, perhaps after seeing what I find out if I put a cocktail stick into the bottle.
 

scottie3158

SMF Supporter
Joined
Apr 27, 2018
Messages
12,722
Points
113
Location
Spalding
First Name
Paul
That’s what I was thinking too, but like I said, I shook the bottle what I thought was quite well … Maybe the pigment has mostly congealed at the bottom, though? Perhaps I should give it another try after shaking it even more thoroughly, perhaps after seeing what I find out if I put a cocktail stick into the bottle.
I tend to put a ball bearing in the bottom of the bottle to give the bottom a good stir.
 

Jim R

SMF Supporter
Joined
Apr 27, 2018
Messages
13,751
Points
113
Location
Shropshire
First Name
Jim
Strange that Jakko. I have not had a problem with Stynylrez. In fact I usually thin it slightly so I can spray at a lower pressure.
 

Jakko

Way past the mad part
SMF Supporter
Joined
Apr 28, 2018
Messages
10,837
Points
113
First Name
Jakko
I tried again, stirring it with a cocktail stick before shaking it, and spraying far thinner coats than before. This seems to have worked reasonably well, in that it covered better, so I went with it. Next, I put on a coat of Mr. Aqueous Hobby H78 Olive Drab (2):

IMG_0207.jpeg

… but this photo is very deceiving :sad: It is an excellent example of how camera apps on phones and tablets screw with the colours, because on my iPad and iMac screens, this looks a lot different from the actual model. So I decided to take a second photo:

IMG_0208.jpeg

For this, all I did was lift up the model, put a sheet of white paper down and replace the model. Nothing changed about lighting, camera app settings or anything. This one does look pretty close to the colour on the real model (again, on my iPad’s screen, where I could compare the two easily).

And that’s not the end of it :sad: My bottle of H78 was almost empty, but I thought I could probably get enough out of it to spray the model. But no, it ran out when I still needed to paint the right-hand side of the hull (where I should note that I never intended to spray the running gear and lower hull OD: they will get a coat of mud colour later on). As I had expected this, I ordered some more recently, but when I opened one of those new bottles, the colour inside immediately looked different to the old one … It proved hard to photograph, but:—

IMG_0201.jpegIMG_0205.jpeg

In both of these, the bottle is next to the colour that came out of it. The one with the logo moulded into the cap is the new one. You can see the difference in the photos, but it was more obvious in the flesh, so I ended up respraying the whole model in the new colour — which is what you can see in the first two photos in this message.
 

Jim R

SMF Supporter
Joined
Apr 27, 2018
Messages
13,751
Points
113
Location
Shropshire
First Name
Jim
Quite a journey to get on a base coat. Still it looks fine now.
As for colour in photos and on screens - I find it a nightmare.
 

Jakko

Way past the mad part
SMF Supporter
Joined
Apr 28, 2018
Messages
10,837
Points
113
First Name
Jakko
There’s no point trying to match colours to screens or on-screen photographs to real colours, no. Most of the time it doesn’t bother me, but the difference now was so great that I decided to experiment with another background to see what that would do.
 

Jakko

Way past the mad part
SMF Supporter
Joined
Apr 28, 2018
Messages
10,837
Points
113
First Name
Jakko
Last week, I put a dark wash over all of the OD (Army Painter Strong Tone, thinned down) and last night, did some quick drybrushing with Revell 45 Light Olive:

IMG_0275.jpegIMG_0276.jpeg

Oh yeah, and I painted the exhaust a basic rust colour. That needs a little more work before I can add the guard over it. Meanwhile I applied the decals:

IMG_0277.jpegIMG_0278.jpeg

Just the first option from the instructions, which give two in OD and two with white snow camouflage over the OD. I didn’t feel adding like that, though. There should be a star on the rear of the hull, but because the shovel and axe are glue to that, the decal wouldn’t want to slide under them, so I didn’t bother adding it. If you leave the tools off until after painting, it would be easy to add, and also if you only glue the tools on by their locating points. By the way, the instructions tell you to paint the tools in wood and metal colours, which is wrong: they would have been OD on the real thing.

There are also lots of decals for inside:

IMG_0279.jpeg

Some are tricky to apply, not to mention to get them the right way up. I’m not quite sure I got the decals for the radio the right way up: the instructions have the front panel drawn upside down in step 13, so is the orientation of the decals shown the correct for the panel as drawn or if it were the right way up? I don’t know, and I didn’t feel like doing the research, so I took the second option.
 

Scratchbuilder

SMF Supporter
Joined
Jul 2, 2022
Messages
1,946
Points
113
First Name
Mike
Primer, had the same result myself but with Vallejo primer. I think we must have got hold of a bad batch.
Love the Weasel work you have done.
Mike.
 

Jakko

Way past the mad part
SMF Supporter
Joined
Apr 28, 2018
Messages
10,837
Points
113
First Name
Jakko
By now I’ve painted the undercarriage and weathered the vehicle:

IMG_0291.jpeg

I first painted the whole lower hull, suspension and tracks with Tamiya XF-52 Flat Earth, followed by a wash of that over the upper hull (but inside only where people would put their feet) and a wash of X-9 Brown over the lower parts to represent wet mud. I then took an old toothbrush and put a drop of airbrush-ready sand-coloured paint on it, then pulled a cocktail stick over it to create paint spatters everywhere I figure mud would come off the suspension:

IMG_0292.jpegIMG_0295.jpeg

On the hull sides, I aimed to get them going diagonally forward from the track, except at the rear where the track would throw them vertically as well.

That done, I drybrushed the outside of the track with matt black and painted the running surfaces of the outer roadwheels in the same colour, and also the parts of the track in contact with the wheels. This is because I think these areas are where the mud would quickly get removed, and because on the real thing, the whole track was rubberised — including the steel track plates — but only the outer and inner wheels had rubber tyres.
 
Last edited:

Scratchbuilder

SMF Supporter
Joined
Jul 2, 2022
Messages
1,946
Points
113
First Name
Mike
Now parked on a muddy Bastogne street while the driver nips into the bar for a quick beer....
 

Jakko

Way past the mad part
SMF Supporter
Joined
Apr 28, 2018
Messages
10,837
Points
113
First Name
Jakko
Thanks all :smiling3: The driver will be in the front seat, so I guess he’s waiting for his para buddies to get back from the local estaminet in Bastogne.
 
Top