Revell 1/24 BMW M3 DTM 2012 " Bruno Spengler "

Dave Ward

Still Trying New Things
SMF Supporter
Joined
Apr 27, 2018
Messages
8,661
Points
113
Location
South Gloucestershire
First Name
David
revell bmw m3.jpg
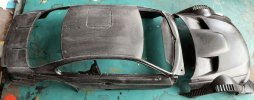
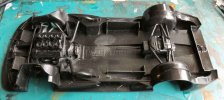
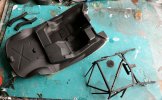
This was bought several years ago, as a part built bargain model, from ebay. The chassis was made OK, but the bodywork had been painted very badly. This was a gamble, which I put into my stash, realising it would take some work to correct. Having worked on the Revell Ferrari F1 car, I've decided to pick this up, and give it a go!
The best way, albeit the most long winded method, is to rub the paint back with wet sanding sponges. I've done a trial on the painted bonnet, and it looks perfectly feasible. I've checked the other parts, and they seem to be complete - a few still in sealed bags, and the all important decals look to be perfect.
Dave
 

Jim R

SMF Supporter
Joined
Apr 27, 2018
Messages
13,743
Points
113
Location
Shropshire
First Name
Jim
Hi Dave
Well you certainly don't make life easy for yourself. You're up for a challenge. The only issue with sanding, I imagine, is the danger of losing detail.
I'll watch you progress with interest.
Jim
 

Dave Ward

Still Trying New Things
SMF Supporter
Joined
Apr 27, 2018
Messages
8,661
Points
113
Location
South Gloucestershire
First Name
David
Hi Dave
Well you certainly don't make life easy for yourself. You're up for a challenge. The only issue with sanding, I imagine, is the danger of losing detail.
I'll watch you progress with interest.
Jim
Jim,
yes, losing detail is a downside, but these cars are very aerodynamic & don't have many external features - luckily the wing mirrors, rear wing etc haven't been fitted - it's not something I'd care to do with a tank!
Dave
 

langy71

SMF Supporter
Joined
Apr 27, 2018
Messages
1,559
Points
113
Location
Nottingham
First Name
Chris
Jim,
yes, losing detail is a downside, but these cars are very aerodynamic & don't have many external features - luckily the wing mirrors, rear wing etc haven't been fitted - it's not something I'd care to do with a tank!
Dave
Is it not possible to 'strip' the paint using something like oven cleaner, or is it way to hard to even attempt this ?
 

Dave Ward

Still Trying New Things
SMF Supporter
Joined
Apr 27, 2018
Messages
8,661
Points
113
Location
South Gloucestershire
First Name
David
Is it not possible to 'strip' the paint using something like oven cleaner, or is it way to hard to even attempt this ?
Yes, but it's too messy - and I don't have anything to hand at the moment! Sanding the paint back is something I can do on my lap, whilst watching TV ( with a newspaper to catch the bits! ). I don't have a deadline to meet, so the cheaper, but longer way is how I'll do it :smiling4:
Dave
 

langy71

SMF Supporter
Joined
Apr 27, 2018
Messages
1,559
Points
113
Location
Nottingham
First Name
Chris
Yes, but it's too messy - and I don't have anything to hand at the moment! Sanding the paint back is something I can do on my lap, whilst watching TV ( with a newspaper to catch the bits! ). I don't have a deadline to meet, so the cheaper, but longer way is how I'll do it :smiling4:
Dave
no probs mate
 

Dave Ward

Still Trying New Things
SMF Supporter
Joined
Apr 27, 2018
Messages
8,661
Points
113
Location
South Gloucestershire
First Name
David
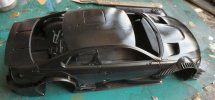
I made a start on the longish task of rubbing back the poor paint job. I finished off the bonnet, using a 320 grade emery cloth wet.
DSCF3282.JPG
The main body work has had the initial rub down, with 180 grade paper, now I'll move onto the finer grade - I may have made the finish too shiny, I want a little surface roughness to allow te primer to key in.
DSCF3276.JPG
The chassis & engine has been assemble & part painted ( extended wheel arches............. )
DSCF3278.JPG

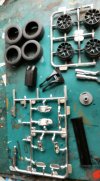
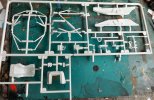
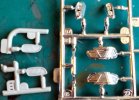
Fair number of parts are loose - I haven't decided whether to strip the chrome sprue back some are headlamp reflectors, so it may not be necessary.
DSCF3279.JPGDSCF3280.JPG
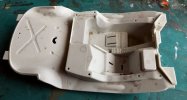
The cab interior hasn't had any work done on it.
DSCF3281.JPG
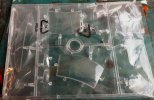
Clear bits still bagged
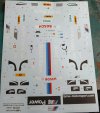
.......and the all important decals - in perfect shape............
DSCF3277.JPG
There is an option to leave the bonnet loose, but the engine is largely covered with air ducting & heat shields, and can't be seen, so I'll concentrate on getting a good finish on the bodywork
Dave
edit - I should have said sanding sponges - not paper!
 
Last edited:

peterairfix

SMF Supporter
Joined
Jul 19, 2012
Messages
7,363
Points
113
Location
Taunton
First Name
peter
Nice work I am looking forward to seeing how the bodywork turns out.
 

langy71

SMF Supporter
Joined
Apr 27, 2018
Messages
1,559
Points
113
Location
Nottingham
First Name
Chris
Really like how the bodywork turned out Dave,
I can totally see what you mean about sanding it down, I must admit I did think it was gonna be a lot of hassle, but you've pulled it off mate...nice one
 

Dave Ward

Still Trying New Things
SMF Supporter
Joined
Apr 27, 2018
Messages
8,661
Points
113
Location
South Gloucestershire
First Name
David
Really like how the bodywork turned out Dave,
I can totally see what you mean about sanding it down, I must admit I did think it was gonna be a lot of hassle, but you've pulled it off mate...nice one
It took about 2hrs, but I was able to do it on my lap, watching the tv. This way you can control exactly how much to take off/leave & remove any surface imperfections at the same time. If I'd done it chemically, you'd have to go round & do that anyway!
Dave
 

Jim R

SMF Supporter
Joined
Apr 27, 2018
Messages
13,743
Points
113
Location
Shropshire
First Name
Jim
Well Dave it looks as if your decision to sand back the poor paint job has worked.
Jim
 

adt70hk

I know its a bit sad but I like quickbuild kits!!!
SMF Supporter
Joined
Sep 4, 2019
Messages
9,506
Points
113
First Name
Andrew
Well done Dave!
 

Dave Ward

Still Trying New Things
SMF Supporter
Joined
Apr 27, 2018
Messages
8,661
Points
113
Location
South Gloucestershire
First Name
David
Decided to remove the chrome plating from the grille parts.................
DSCF3292.JPG
An overnight soak in diluted Tesco Lemon thick bleach left the parts clean. The other parts are reflectors for the lights, and will be behind glass, so they're left chrome.
Dave
 

Dave Ward

Still Trying New Things
SMF Supporter
Joined
Apr 27, 2018
Messages
8,661
Points
113
Location
South Gloucestershire
First Name
David
After laying down a basecoat of Vallejo Model Air Black, and allowing to dry overnight, this morning I've misted on two thin coats of gloss.................
DSCF3293.JPG
That's OK, ready for decals! - I'll seal them all with a couple more coats of gloss after.
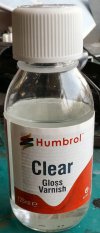
I've tried various brands of acrylic gloss varnish, and not been very impressed! I gave this a try - I'd tried this a long time ago, can't remember why I stopped!
DSCF3294.JPG
Goes on very nicely at 1bar, 0.3mm nozzle, very easy clean up. It says you can recoat in 20 minutes, but I've left a couple of hours, just to be safe. Got the car phase going strongly at the moment - I've got two more on the starting grid ( but that may change! )
Dave
 

Dave Ward

Still Trying New Things
SMF Supporter
Joined
Apr 27, 2018
Messages
8,661
Points
113
Location
South Gloucestershire
First Name
David
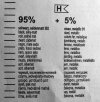
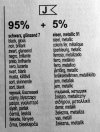
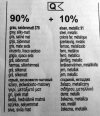
One of the really poor things about Revell models is the crappy paint references! All paints are related back to the Revell paint range ( and nothing else ). If a desired colour isn't in the range, then they give a witches' brew to mix it, using their paints.
The interior of the BMW M3 is called out in essentially 3 colours
DSCF3296.JPGDSCF3297.JPGDSCF3298.JPG
The top two are the same, only one is satin, the other gloss - the bottom one is a greyish version. Mixing these - well how do you mix 95/5 for a small amount?. I'm going to spray this thing a black grey & use gloss/satin varnish to pick out H & J & then pick out Q using a gunmetal.....................
DSCF3295.JPGThis has been primed black, the roll cage is able to to be made up loose, so that all the fittings can be added before closing up, there are a fair few bits & decals & quite a lot of detail painting needed...................
Dave
 
Last edited:

adt70hk

I know its a bit sad but I like quickbuild kits!!!
SMF Supporter
Joined
Sep 4, 2019
Messages
9,506
Points
113
First Name
Andrew
Coming on very nicely Dave. Agree about Revell instructions. My recent Huey had the same mixture instructions.
 

langy71

SMF Supporter
Joined
Apr 27, 2018
Messages
1,559
Points
113
Location
Nottingham
First Name
Chris
Never really liked the way Revell force you to stay with their own paint range, instead of giving you alternative paint codes..
This alone has stopped me buying Revell kits from time to time..
 

Dave Ward

Still Trying New Things
SMF Supporter
Joined
Apr 27, 2018
Messages
8,661
Points
113
Location
South Gloucestershire
First Name
David
Never really liked the way Revell force you to stay with their own paint range, instead of giving you alternative paint codes..
This alone has stopped me buying Revell kits from time to time..
Chris,
don't let that put you off! - if I have that problem I go on Scalemates, find the same model by a different maker, look at the instructions & crib the detail paint numbers, doesn't have to be the same scale either. Then it's a matter of Equivalent Tables, or more likely have I got anything similar in the paint box! Revell also rebox other makers' kits, so it's a matter of finding the original instructions.............
Dave
 
Top