Revell 1/72 VIIc U-boat Static to surface runner build

T

tigertc

Guest
Hi all, made a start on my Uboat today. I won't bore you with the kit details as they are well documented on this and other sites.

I intend to use as much of the original kit as possible and only add parts i can make myself or rob from fubar'd kits.

.Anyway down to business.

.First step- Figure out how she will be powered.

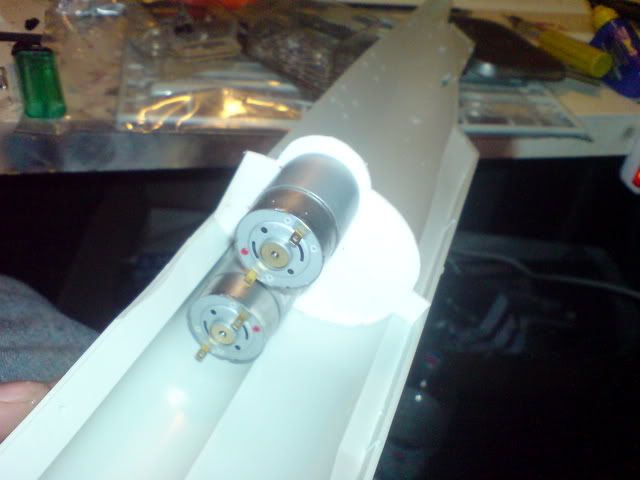
.I had 2xrs 380 motors left over from a Bandai 1/15 Tiger build ages ago that werent powerfull enough for the tank, i am thinking they will be more than adequate to power propellers!

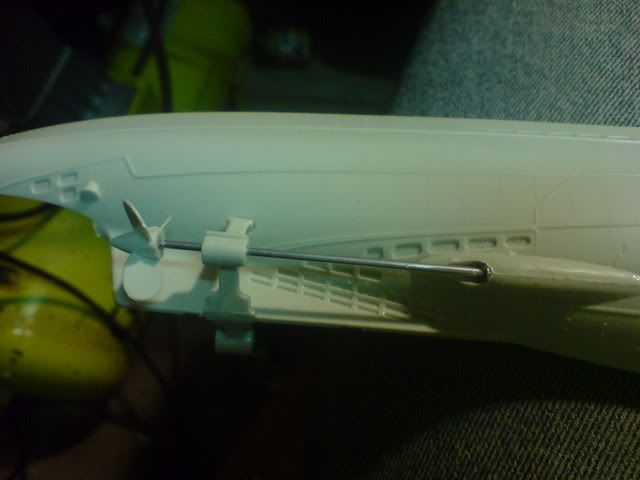
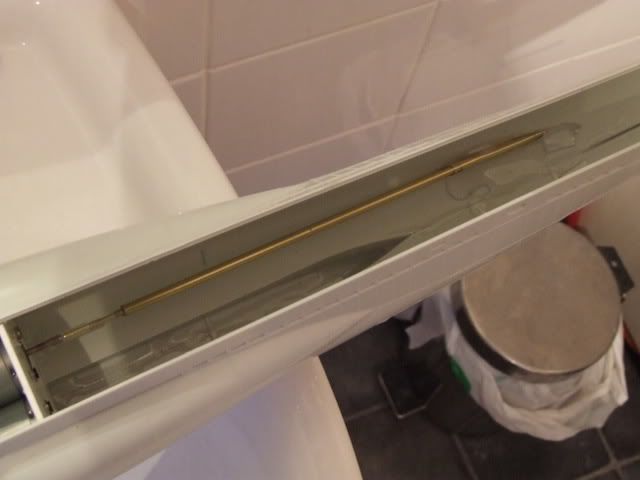
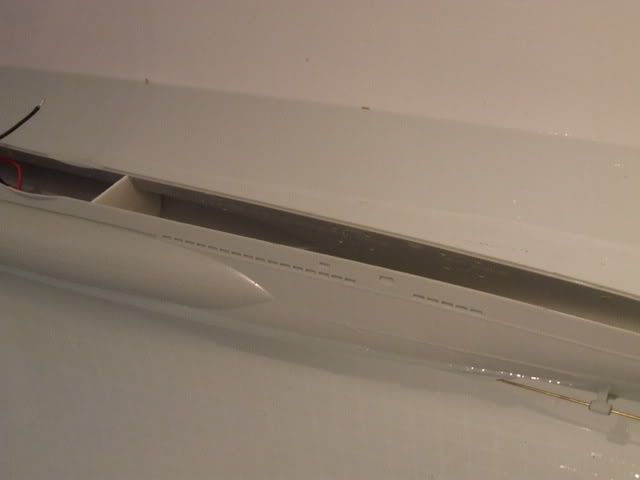
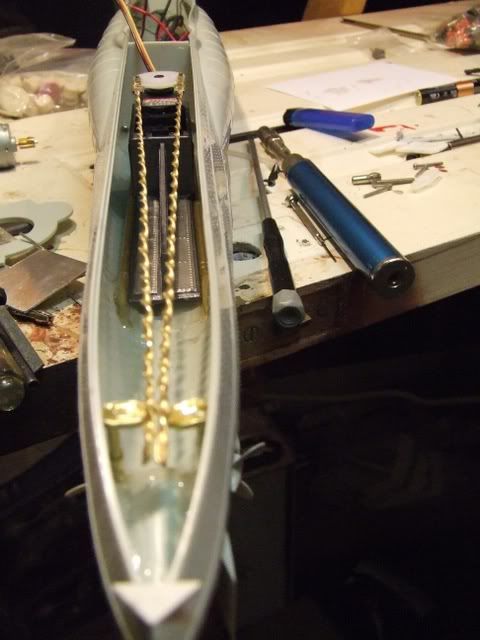
.I started by making a copy of the rear bulkhead? out of plasticard and fitting the motors. Then test fitting the bulkhead, I am hoping that the motor shafts will not be too out of line with the propshaft exit holes, they dont look that far out.

.
DSC00144.jpg
 
T

tigertc

Guest
first blunders!!!

Today revealed that my positioning of the motors was way out for alignment with the propshafts and would have probably made the boat top heavy. I therefor set about making a new bulkhead and lowering the motors. To get a better idea of were the motors should be I drilled and reamed the propshaft exit holes until the propshaft aligned with the rear support and also a nice snug fit for the propshaft casing.

.
DSC00146.jpg


.Although it looks slightly out in the picture, it is only due to the shaft resting on the inside rim of the brass shaft case. Once the nylon end is fitted, it will be central and perfectly aligned.

.
DSC00149.jpg


.I wanted to keep the model as accurate as possible and was pleased that very little of the propshaft casing will be visible.
 
Last edited:
B

Bunkerbarge

Guest
Tiger before you get too far you need to do some ballast trials in the bath. This model actually needs quite a lot of ballast and the best place for it is as low as possible. I put lead strip inside the models keel but lead shot or even sand epoxied in would be just as effective.

Those motors are significantly heavier than mine so will have quite an effect on the ballast so, along with all the other gear especially batteries, need to be accounted for. I would get your hull together now and have a play in the bath to see just what you need.

The exposed shafts are the only way to go and look so much more realistic than fitting full length tubes. She's coming along very nicely.
 
T

tigertc

Guest
Thanks Bunk

... for the advice. I have now glued the hull together. ready for ballast testing tomorrow.

I seem to remember you posting a link to where you obtained your prop shafts & propellers (I maybe mistaken on this). I have read your build thread and cannot seem to find it. I was going to use some 4mm brass pipe to go with the stainless 2mm rods i have but i cant seem to make a good enough seal for the tubes.

Any chance you could post a link to where you got your props and shafts from?
 
Last edited:
B

Bunkerbarge

Guest
SHG Model Supplies

I bought the bits from here but the web site has been "Under Construction" for months now. There is a contact e-mail posted though and there is a phone number on the Info page.

They can supply the nice little brass props for you but if you have the shafts and tubes you can make up a couple of close fitting plastic bushes yourself. You simply want a tight fit in the ends of the tube, or a smear of epoxy, and a 2mm hole drilled through the centre. Mine is filled with a light oil, anything heavier and my motors won't turn but yours should be a lot more powerfull anyway, and I've not had a leak yet.

For couplings the Robbe rubber tube type are perfect and run really smoothly. Once again your motors might be a bit too powerfull for them but leave yourself room and you could fit UV joints at a later date if you had to.

To be honest you may find your motors a bit on the powerfull side, mine are actually small servo motors and push the model at scale speed plus a bit. Yours have the potential to be a bit over the top so I would experiment with the voltages and hence battery pack configurations before committing to them. You may find that six volts will be plenty so maybe a 4 x "C" cell pack might give you a decent life plus a suitable voltage to prevent excessive speeds.

I would have a good play around in the bath er sorry test tank, before going much further!
 
T

tigertc

Guest
There's me trying to file down some sprue to fit in the shaft tubes....EPOXY!!!!

*feels real stupid.

What size props do i ask for when i mail them ?

Cheers bunk!
 
B

Bunkerbarge

Guest
Just tell him they are for the Revel U-Boat, he knows what you want. I assume your 2mm shaft is threaded M2 so he can supply with an M2 internal thread.
 
T

tigertc

Guest
Cheers BUnk'.

I mailed him and he hasnt got back to me. I wanted to crack on with it so i managed to scratch up some small brass tube which luckily enough fits the hole in the plastic props that came with the kit perfectly. So i will probably glue them on.

I have managed to finish the propshafts and seal them in with epoxy. And perfectly aligned they are too (Impressed myself i have !)

DSCF2939.jpg


Once the propshafts had dried it was on with some water testing for ballast.

DSCF2943.jpg


I ran out of heavy things small enough to fit in the hull. After twoo 7.2v battery packs it was still riding to high. I will phone round my mates to see if any of them have any spare roofing lead i can chop up. My plan will be to make some moulds the same shape as the keel and fill them with lead.

No leaks by the way!!... the shiney stuff in the top picture is the epoxy...(Honest!)
 
T

tigertc

Guest
Update time!

To be honest i can't believe how smoothly this build appears to be going. Last few days i have been figuring how to fit the servo for steering. I wanted to put it in the centre section and make the entire centre section water tight. But as i am not intending sailing her in the rough and so long as any water entry ponits to the insides of the servo are above the water line i decided to place it in the rear compartment. Mainly because if i decide to put more gizmos and gadgets in i will have plenty of space in the middle (smoke machine, moving deck gun etc). I have also decided to do a bit of "steam punking" to the interior, just a bit of detailing really to make it a bit more interesting.
DSCF2992.jpg


The above picture is of the servo housing. Made from 3mm plasticard, painted with steel metal coat and embellished with aluminium plate (Marks & Spencer organic chicken tray!!!) I will be adding more detail to make it look like some kind of freaky steam contraption :smiling3:

DSCF2994.jpg


I think the twisted brass steering rods are a nice touch, although not attached at the moment i dont think this will be a problem. I intend to plate the entire interior in M&S special alloy plate!
 
B

Bunkerbarge

Guest
Be carefull Tiger, think of the weight!! All your steam punking will affect the final trim quite a bit.

There again it will look quite realistic as it submerges.....just the once!!
 
T

tigertc

Guest
Fininished! One Revell surface runner

First off a full bath test to see how long i'll get off the battery and secondly, leakage!

Managed to get 40 minutes off a 3100mah nimh pack. Considering its powering two motors at full ahead, I'm thinking not too shabby!!

On to the pics. I've never been very good at the whole weathering thing. But I am pleased with the outcome considering its all hand painted Tamiya acrylics.

All i need to do now is give her a designation and a maiden voyage.

Maiden Voyage will hopefully happen this tuesday at Rowntree Park in York.
 
H

herrmill

Guest
Did your Type VIIc/41 see her maiden? I've got one in the box still & am thinking of doing the same to run with my Flower corvette.

Chuck
 
T

tigertc

Guest
\ said:
Did your Type VIIc/41 see her maiden? I've got one in the box still & am thinking of doing the same to run with my Flower corvette. Chuck
.Yes, the pictures are in my gallery.

.I am really happy with the way she turned out. The twin rs540 motors (low revs/hi torque) give a good scale speed and she looks great on the water. One thing to bare in mind, these require a serious amount of ballast to get them to sit anywhere near the waterline.

..

I am about to start on the 1/72 Revell Gato. I am just saving up the money for a WTC so i can make the next one dive.
 
Top