M
magpie
Guest
Hi guys.
I've done this on other forums, but you might like a look at my efforts here too. If not, let me know. I won't mind-really!!
I bought a robbe U47 kit and a few extra bits like a 750 engel tank -engel magnet switch-subtech leveler-modelbrass deck etc and I'm getting stuck into wacking it all together in a form that will hopefully float (and sink) one day. I'm new to subs as this is my first one. I've done lots of targets before but not subs. I find them addictive and since I started, I've fallen for them in a big way.:respect1:
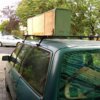
I'll attach some pics of my progress up till now which is at the stage where the WTC is all done and the rear hull is glued on with the prop shafts in. I've modified the WTC seal arrangement too, by doing away with the front tube bolt and putting threaded rods at the top and bottom of the WTC and an alloy bracket that clamps the rear cover shut. I also used a preserving jar silicone seal instead of the O ring as it wouldn't seal well for me. The jar seal works well on testing in the bath and filling the ballast tank to beef up the pressure. I also mounted a servo under the sail with the wires fed through the rear cap via brass rods and soldered on in and outside and then sealed all over. It looks like it'll work alright. (Fore hydrovane servo). The brass deck plates are being attached with shock cord and will have indexing points made from bits of brass plate through ABS strips . I'v done the rear one and it looks OK. It should make opening them easy I think. I also added a (not scale) hatch to access the lower nut on the bracket as I want it to be easy and fun to use. There's a pic of my sub box on the car too. These subs are very long and I need room in the car for mum's electric wheelchair. I'm her carer as she's had a stroke and isn't mobile without it. She loves model boats too!
I hope I haven't posted too many pics.
I'll post more as I go.
Jason
View attachment 13488
View attachment 13489
View attachment 13490
View attachment 13491
View attachment 13492
View attachment 13493
View attachment 13494
View attachment 13495
View attachment 13496
View attachment 13497
View attachment 13498
View attachment 13499
View attachment 13500
View attachment 13501
View attachment 13502
View attachment 13503
View attachment 13504
View attachment 13505
View attachment 13506
View attachment 13507
View attachment 13508
View attachment 13509
View attachment 13510
View attachment 13511
View attachment 13512
View attachment 13513
View attachment 13514
View attachment 13515
View attachment 13516
View attachment 13517
View attachment 13518


