RT-Diorama 1/35 12-Ton Harbor Crane

Allen Dewire

Proud Rabble Member
SMF Supporter
Joined
Apr 27, 2018
Messages
4,105
Points
113
Location
Bamberg
First Name
Allen
Afternoon Good People,

I've been kind of absent lately due to a Mojo dip and some winter blues too. Weeks of dark dreary days without sunshine and always working under the LED lamp has taken it's toll on the remaining few brain cells in my melon. Playing in plastic wasn't cutting it (pun intended) and I thought a change of pace might do the Mojo some good. Fingers crossed!!!...

RT-diorama is a German company that specializes in buildings, bases and accessoires for the diorama modeler. You can check them out here https://www.rt-diorama.de/english/ to see what they offer. I grabbed this kit in a one day Nikolas sale from MBK. I almost bought it at the SMC, last October, but got it much cheaper last week in their sale. It's a true multi-media kit that has no regular plastic parts in it. It consists of laser cut wood, plaster, thick cut paper, thin plastic sheet stencils, chain, cord, and 3D printed parts...

I am hoping to incorporate this piece into a dock scene set on the Mole in 1916-17. It will be lowering a floatplane into the water from the deck of a RR flatwagon. Enough Blah Blah, so here's what we get,
IMG_4292.JPG
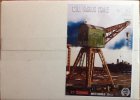
A nice sturdy box with a pic of the item on the cover. Nothing fancy and the kit well packed inside,
IMG_4293.JPG
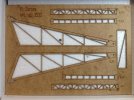
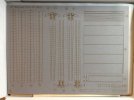
Thicker laser cut paper card pieces with etch imprinted details. If you look at piece #5 (roof), you can see there are only 3 attachment points to nip off,
IMG_4294.JPG
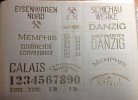
Pre-cut stencils for the lettering of 4 different firms on a flexible plastic sheet,
IMG_4295.JPG
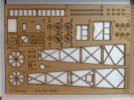
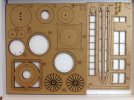
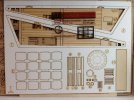
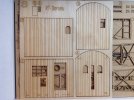
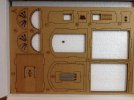
1mm laser cut wood detail pieces and a small sheet of acetate with the windows on it. The next pics are of the laser cut wood pieces. They vary between 1.5 and 3mm in thickness depending on use,
IMG_4296.JPG
IMG_4301.JPG
IMG_4297.JPG
IMG_4298.JPG
IMG_4299.JPG
IMG_4300.JPG
Now you see why I had an interest in a laser cutter/engraver. The details are fine and the parts fit together pretty easy too. I'm just not good at computer programs or math stuff...The 3D printed pieces for detailing,

IMG_4303.JPG
The plaster base that I won't be using,

IMG_4302.JPG
Most all RT-Diorama kits have plaster cast parts, but can be ordered in resin cast parts. It costs extra for the resin cast parts and takes longer for the kit to be shipped. The resin parts are stronger and for those who don't like to work with plaster,

IMG_4304.JPG
The destructions book and the included chain & cord baggy. The destructions are sort of vague and need to be studied well. There is no diagram for the chains and cabling either. Looking at the pics on the last few pages will help solve that prob though.The destructions,

IMG_4305.JPG
On the left page you get the idea of what's needed to build it and painting tip. It's all in English. Another page,

IMG_4306.JPG
A pretty cool kit and I did have a play with it earlier. The sun came out for an hour this morning, so I nipped off some pieces, cleaned the nibs up and did a test fit of the 'Traction Machine' parts,

IMG_4309.JPG
IMG_4310.JPG
It's just stuck together without glue. I'm going to use AK Wolverine PVA to stick it together. The operator's house frame,

IMG_4311.JPG
It slots into the floor and each other to fit together. Pretty easy and has very little play in the joins. One just has to keep it all squared up till the glue sets/dries. One sheet of wood now empty,

IMG_4312.JPG
All of the pieces on this sheet had only 2 attachment points...
That's it for now. I hope you will join me in this endeavor and it helps get rid of my 'Blues'.................

Prost
Allen
 

Jim R

SMF Supporter
Joined
Apr 27, 2018
Messages
13,726
Points
113
Location
Shropshire
First Name
Jim
Now that is something very different. I've not heard of the company or seen a kit quite like it. Sounds fun. Just the thing to give your mojo a boost and kick the winter blues. Interested to see how this develops Allen.
 

Allen Dewire

Proud Rabble Member
SMF Supporter
Joined
Apr 27, 2018
Messages
4,105
Points
113
Location
Bamberg
First Name
Allen
Now that is something very different. I've not heard of the company or seen a kit quite like it. Sounds fun. Just the thing to give your mojo a boost and kick the winter blues. Interested to see how this develops Allen.
I need the boost Jim. Our weather has just been so dark and you always have to have the lamp on. we haven't had a full day of
sunshine for weeks. My batteries are drained and need a solar recharge my friend...
Just looked on the site, and there's some interesting stuff on there that might get me to finish a few diorama ideas...
No. Must. Resist!
Go for it Chris! They have an English importer/seller too. Just navigate on the left column to partners/distributors to find out who it is. I can't remember the name...

Nice, and certainly different. Big, too, at 1/35
What 'plane were you thinking of hanging from it?
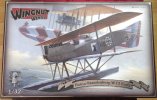
I have 3 candidates in the stash to use with it, but one is too big. These are the possible victims, with one getting built for the Ian's bi-plane GB,
IMG_3981.JPG
IMG_4144.JPG

This one is to large for the crane,
20230325_205417.jpg
I also have the Hansa-Brandenburg W.29 mono-wing floatplane that could be hung from it too...

OOH Allen that looks like FUN!
Thanks Neil! I do need something new to wake up the dead melon cells. I hope this does the trick Sir...

Prost
Allen
 

Steve-the-Duck

SMF Supporter
Joined
Jul 3, 2020
Messages
1,132
Points
113
Location
Medway Towns
First Name
Chris
I was hoping for a Fairey Campania, but there isn't one in 1/32
The UWD is such a nuts looking 'plane, and I heard there only ever was one. A bit huge to hang from the crane though.
The W.12 is wonderfully ugly
 

JR

Member of the Rabble and Pyromania Consultant
SMF Supporter
Joined
May 26, 2015
Messages
17,275
Points
113
Location
lincs
First Name
John
Front row seat please Dude 1.
Looks an interesting project .Coffee please .
 

David Lovell

SMF Supporter
Joined
Apr 27, 2018
Messages
1,496
Points
113
Location
Poole Dorset
First Name
David
Bloody hell they say a change is as good as a rest you seem to have taken that thought by the nether regions ,John wants coffee if OK with you I'll just have some of what your on going to need it to keep up with this one ,joking aside Allen great subject looking forward to this epic. Dave
 

adt70hk

I know its a bit sad but I like quickbuild kits!!!
SMF Supporter
Joined
Sep 4, 2019
Messages
9,496
Points
113
First Name
Andrew
Now that's different! Looking forward to you working your magic on this.

ATB

Andrew
 

Andy T

SMF Supporter
Joined
Apr 26, 2021
Messages
1,956
Points
113
Location
Sheffield
First Name
Andy
That looks like a very interesting and well thought out kit. I look forward to watching you turn it into something amazing.
 

RonGlass

SMF Supporter
Joined
Apr 30, 2018
Messages
618
Points
93
Location
United States
First Name
Ron
Afternoon Good People,

I've been kind of absent lately due to a Mojo dip and some winter blues too. Weeks of dark dreary days without sunshine and always working under the LED lamp has taken it's toll on the remaining few brain cells in my melon. Playing in plastic wasn't cutting it (pun intended) and I thought a change of pace might do the Mojo some good. Fingers crossed!!!...

RT-diorama is a German company that specializes in buildings, bases and accessoires for the diorama modeler. You can check them out here https://www.rt-diorama.de/english/ to see what they offer. I grabbed this kit in a one day Nikolas sale from MBK. I almost bought it at the SMC, last October, but got it much cheaper last week in their sale. It's a true multi-media kit that has no regular plastic parts in it. It consists of laser cut wood, plaster, thick cut paper, thin plastic sheet stencils, chain, cord, and 3D printed parts...

I am hoping to incorporate this piece into a dock scene set on the Mole in 1916-17. It will be lowering a floatplane into the water from the deck of a RR flatwagon. Enough Blah Blah, so here's what we get,

View attachment 497185
A nice sturdy box with a pic of the item on the cover. Nothing fancy and the kit well packed inside,

View attachment 497186
Thicker laser cut paper card pieces with etch imprinted details. If you look at piece #5 (roof), you can see there are only 3 attachment points to nip off,

View attachment 497187
Pre-cut stencils for the lettering of 4 different firms on a flexible plastic sheet,

View attachment 497199
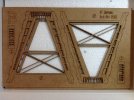
1mm laser cut wood detail pieces and a small sheet of acetate with the windows on it. The next pics are of the laser cut wood pieces. They vary between 1.5 and 3mm in thickness depending on use,
View attachment 497200
View attachment 497201
View attachment 497202
View attachment 497203
View attachment 497204
View attachment 497205
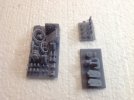
Now you see why I had an interest in a laser cutter/engraver. The details are fine and the parts fit together pretty easy too. I'm just not good at computer programs or math stuff...The 3D printed pieces for detailing,
View attachment 497207
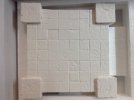
The plaster base that I won't be using,
View attachment 497206
Most all RT-Diorama kits have plaster cast parts, but can be ordered in resin cast parts. It costs extra for the resin cast parts and takes longer for the kit to be shipped. The resin parts are stronger and for those who don't like to work with plaster,
View attachment 497213
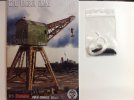
The destructions book and the included chain & cord baggy. The destructions are sort of vague and need to be studied well. There is no diagram for the chains and cabling either. Looking at the pics on the last few pages will help solve that prob though.The destructions,
View attachment 497214
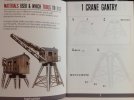
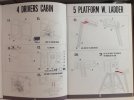
On the left page you get the idea of what's needed to build it and painting tip. It's all in English. Another page,
View attachment 497216
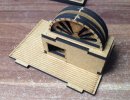
A pretty cool kit and I did have a play with it earlier. The sun came out for an hour this morning, so I nipped off some pieces, cleaned the nibs up and did a test fit of the 'Traction Machine' parts,
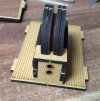
View attachment 497217
View attachment 497218
It's just stuck together without glue. I'm going to use AK Wolverine PVA to stick it together. The operator's house frame,
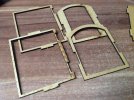
View attachment 497219
It slots into the floor and each other to fit together. Pretty easy and has very little play in the joins. One just has to keep it all squared up till the glue sets/dries. One sheet of wood now empty,
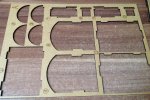
View attachment 497220
All of the pieces on this sheet had only 2 attachment points...
That's it for now. I hope you will join me in this endeavor and it helps get rid of my 'Blues'.................

Prost
Allen
Hi Allen;
I love RT Diorama's stuff, had purchased their Ruined Stalingrad Factory set. Which is +/- 99% plaster, so the weight of it once on its base plate, is enormous. I ended up making copies from foamboard and still used the "softer pieces" window frames etc.
 

Allen Dewire

Proud Rabble Member
SMF Supporter
Joined
Apr 27, 2018
Messages
4,105
Points
113
Location
Bamberg
First Name
Allen
Morn all and thanks for the interest in my madness,

I was hoping for a Fairey Campania, but there isn't one in 1/32
The UWD is such a nuts looking 'plane, and I heard there only ever was one. A bit huge to hang from the crane though.
The W.12 is wonderfully ugly
So true Chris, the UWD was a one shot deal. It was actually used in a bombing raid on the English coast in 1916. It crashed in October 1916 and was written off. The W.12 (and the W.29) are kinda fugly, but the W.12 has very little rigging and should hang nice...

Front row seat please Dude 1.
Looks an interesting project .Coffee please .
Always the best seat my Brother and only the best coffee for you...

Bloody hell they say a change is as good as a rest you seem to have taken that thought by the nether regions ,John wants coffee if OK with you I'll just have some of what your on going to need it to keep up with this one ,joking aside Allen great subject looking forward to this epic. Dave
Thanks Dave and sorry to hear about the Polski Polska getting shelved. I definitely needed a change of pace. Now, if only the sun would shine, I'd be in heaven Buddy!!!...

Now that's different! Looking forward to you working your magic on this.

ATB

Andrew
Thanks Andrew! It took a while to get because all the hobby shops had to close to reorder new stock after your buying spree of late...LOL!!! No magic here my friend, just Wolverine PVA glue, so far...

That looks like a very interesting and well thought out kit. I look forward to watching you turn it into something amazing.
Thank you Andy! I have decided to send it to you for a paint job after it's built, if that's okay? After seeing your work on the Me-110 and now, the Me-410, I don't have a chance in hell to match your wonderful hissy stick skills Sir...

Hi Allen;
I love RT Diorama's stuff, had purchased their Ruined Stalingrad Factory set. Which is +/- 99% plaster, so the weight of it once on its base plate, is enormous. I ended up making copies from foamboard and still used the "softer pieces" window frames etc.
Hey Ron, good to see ya Buddy! Hope you are well. The RT stuff is really nice and well made. You're right about the weight of the plaster though. I have a couple of buildings with bases in the stash and they are rather heavy, kilo wise...

Got a few things to do and then I want to get back to wood working 101 at the table (don't have a bench). Hopefully an update later on today. This kit has me kinda excited and I just want to go at it...

Prost
Allen
 

Waspie

SMF Supporter
Joined
Mar 13, 2023
Messages
2,468
Points
113
Location
Portland - Dorset
First Name
Doug
Well Allen, a dockyard crane. This has to worth a ride on the Magic Carpet Mk 7 to watch. :thumb2: :smiling2:
 
  • Haha
Reactions: JR

Allen Dewire

Proud Rabble Member
SMF Supporter
Joined
Apr 27, 2018
Messages
4,105
Points
113
Location
Bamberg
First Name
Allen
Evening from the Wood Work 101's table,

Just pulled up my chair for this one Allen.
Welcome Ian! Get comfy and glad to have you here...

Well Allen, a dockyard crane. This has to worth a ride on the Magic Carpet Mk 7 to watch. :thumb2: :smiling2:
I hope so Doug. Just don't forget to wear your winter woolies while flying over here. It's getting colder outside now...

I'm in, Graf Allen von Bamberg ;)
Had a look at the RT on-line shop and it's amazing :cool:. Didn't know of its existence. Thank you for the hint.
Your welcome Andrea! Now that you are retired, you have some time to try a kit from them. It could be damaging to the wallet, but hey, it's Christmas time and I'm sure you have been a good boy!!!...

A weatherer's dream. (I think I made a new word up there) Lots of scope for rust etc.
More like a weather's nightmare Colin!!! I'm not to good at that art yet...

Is'it just , and a great word .
Easy Killa!!!...

Thank you kindly Mr race. I think that word might find a place in 'Colin's' dictionary, as opposed to the normal 'Collins' dictionary.
I'm sure it could find a place. It ain't in my Funk & Wagnall's yet......But 'nightmare' is.......

I got too involved with playing and forgot to post last night, so here's what I have done so far. I did glue the Traction Machine house together,

IMG_4314.JPG
The Wolverine PVA works well, but is a bit thick and starts to dry on contact with the parts. You gotta work quickly. Then I started cutting out more parts,

IMG_4313.JPG
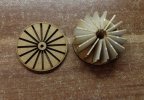
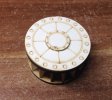
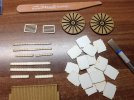
I started to play with the white squares and the 2 wheels and ended up making this,

IMG_4315.JPG
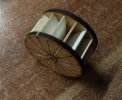
After 20 minutes of jiggling around, I finally got the top piece on and found I had created a water wheel,

IMG_4316.JPG
Here I was thinking I was building a crane and not a paddle wheel floaty thing. Actually, it's the bottom plate of the crane' turntable. You add two white pieces and you have this,

IMG_4322.JPG
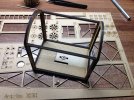
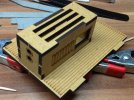
Letting this dry, I assembled the operator's cab frame. Real easy and used a 4 little clamps to hold it together till the PVA set,

IMG_4318.JPG
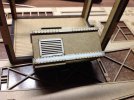
Perfect fit! The parts are well laser cut and fun to assemble.....So far. The other parts I had removed earlier were for the trim and vents on the Traction Machine. They look like this,

IMG_4319.JPG
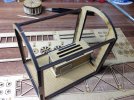
Here it is sitting in place in the cab,

IMG_4320.JPG
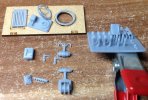
I just need to add the wheels to it and some paint. Too bad you won't see much of it when the wood sidings are added to the frame. I guess I'll have to leave the door open so you get a peek inside. I then went about removing the 3D parts I needed from their plate. My gawd!!!...There were about 20,000 supports to try and cut off. It took well over an hour to get these free,

IMG_4321.JPG
Luckily, I didn't break anything and they still needed clean up. The detail is excellent on these. look at the door handles and notice the keyhole in the plate. I then noticed the U-shaped hooks were not well printed and useless. No big deal. Also note the door hinges I need to cut off too. That's as far as I got last night, so today, I spent a lot of time cleaning the nubs off the 3D pieces and cutting out more wood. I did a test fit of the main boom parts,

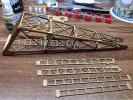
IMG_4323.JPG
Again, it has a nice fit, but will be a little tricky to glue together. The maintenance ladder is a nice touch too. The pieces below the boom are for the cable rollers and add extra support to the boom. Another pic,

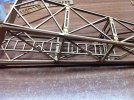
IMG_4324.JPG
A view of the etched in details and the ladder. I guess Rudy had to climb up in the boom to oil the rollers and grease the cables once a month. He probably wasn't amused..................

That's it for this installment of Wood Working 101. Thank you for the comments and for looking in. Have a good one take care folks...

Prost
Allen
 
Top