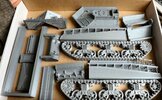
Sherman BARV in 1/35 - 3D printing process & blog

Dave Ward

Still Trying New Things
SMF Supporter
Joined
Apr 27, 2018
Messages
8,653
Points
113
Location
South Gloucestershire
First Name
David
I thought it may interest some of you how the process of printing a 3D model works.............................
Obviously the first thing is to select and find a model! I found a model of the Sherman BARV on Thingiverse ( a free download site ). The model was posted by WindhamGraves. The files are downloaded in a .zip format, containg files both for FDM and resin printing.
The files are in .stl format (Stereolithography ), you use a slicer program to open & process them.....................
prusa.jpg
I use this programme, there are many more, all pretty simlilar - but I'm used to this & I know the whereabouts of the settings I need - there are VERY many parameters you can change, which affect the model in all ways, so I find it's easier to stick with one programme.
When you open the BARV.stl file, this is what you find
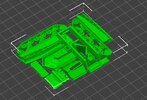
1-100 build plate.jpg
Now this is in 1/100 scale, so I need to upscale by 286% to give 1/35, Howeve this means
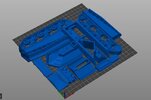
oversize.jpg
.....................too large for the build plate ( you've already set the printer physical parameters ).
You have to cut the parts apart, so you can fit them on the bed. I use Microsoft 3D builder, which is easy to use, but takes a bit of time.
Once you've cut up the bits, you can then use the slicer to position the part on the build plate
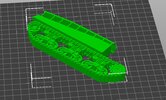
1-35 one side.jpg
The clever bit is the slicer - you set variables, like layer height, infill, support material etc - all of which can vary model to model, and the only way to find out what is the best is to print/
After a few minutes processing..............................
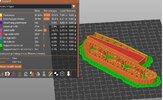
gcode.jpg The bright green being the support material - you can see the predicted time of 10hrs 11 minutes, which can be close , or way out. No red flags in the features - like long periods of overhung perimeters. This has generated a .gcode file, which are the instructions for the printer, these are saved to a micro SD card - the format needed for the printer ( almost all printers use this format )
Each part of the BARV will be processed the same way , and then it's up the printer. You just hope you dont have a power blp midway, or towards the end of the print!
I'll be printing out the first part later today, so hopefully tomorrow I'll be able to put up the result - & show how the support structure is removed ( easily, I hope )
Dave
 

stillp

SMF Supporter
Joined
Nov 17, 2016
Messages
7,224
Points
113
Location
Rugby
First Name
Pete
What does "stealth mode" do? Just print quietly?
Pete
 

Dave Ward

Still Trying New Things
SMF Supporter
Joined
Apr 27, 2018
Messages
8,653
Points
113
Location
South Gloucestershire
First Name
David
What does "stealth mode" do? Just print quietly?
Pete
Yes, it slows things down, reducing print noise, but not a lot - the main noise is the cooling fan on the power supply,but not a lot you can do about that, without dismantling the printer & substuting a fancier, more expensive fan. It's not that noisy, anyway - I certainly can't hear in in my bedroom & even in the same room, you can watch & hear TV OK. If you decide to print at maximum speed, it may be a different matter - I print at a medium speed, which gives me good quality, without a lot of noise. One thing I have done, is mask the light on the printer head - it used to catch my eye when watching the tv!.
Dave
 

Dave Ward

Still Trying New Things
SMF Supporter
Joined
Apr 27, 2018
Messages
8,653
Points
113
Location
South Gloucestershire
First Name
David
The SunLu is about halfway through printing the first part.
I'm using Geeetech Silver PLA - printing at 210C Nozzle & 55C build plate- I've found that gives good results & I've got the settings dialled in & saved in my slicer programme.
It's just a matter of turning the printer on & inserting the micro SD card. Checking that the PLA spool is free to rotate, the build plate us wiped down with IPA to remove any grease. Then selecting the part in the menu & " print ". It takes several minutes for the build plate and print head to warm up before starting. I generally watch the first layers go down, and see that they are sticking well to the bed plate. Then, it's a matter of leaving it to do its' work, I just glance at it occasionally
Dave
 

Dave Ward

Still Trying New Things
SMF Supporter
Joined
Apr 27, 2018
Messages
8,653
Points
113
Location
South Gloucestershire
First Name
David
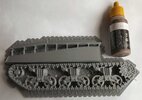
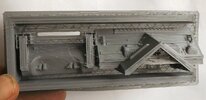
After a few minutes under 10 hours
DSCF4563.JPG
Good clean print - stuck well to the build plate & came off easily, after the build plate had cooled.
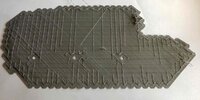
You have to add support material, as the printer can't print in thin air! - on a part like this, which will only have half actually in contact with the build plate ( the tracks actually don't contact the build plate ), there can be problems with the print coming adrift mid-print, so you add a 'raft', which is an overall base that forms a firm foundation - it increase the print time & uses a bit more filament, but it stops failures!
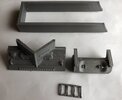
The support material should be easily removeable - PLA is pretty tough stuff, and you can struggle with getting it off, however
DSCF4565.JPG
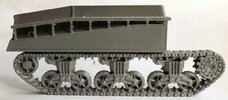
The raft came away in one piece, indicating that I've got the print settings right, A bit of a clean up, removing most of the obvious bobbles & strings - about 10 minutes work
DSCF4564.JPG I won't do the full cleanup until I've got all the parts ready to assemble, as a bit of fettling will be needed & no pont in cleaning stuff up if it's not going to be visible.
Happy with how this has printed, the other side is 3 hours into printing - as it's a mirror of the first side, shouldn't be a problem
Dave
 

stillp

SMF Supporter
Joined
Nov 17, 2016
Messages
7,224
Points
113
Location
Rugby
First Name
Pete
That's come out well Dave - I can see you're getting the hang of the setting.
Pete
 

Dave Ward

Still Trying New Things
SMF Supporter
Joined
Apr 27, 2018
Messages
8,653
Points
113
Location
South Gloucestershire
First Name
David
What causes those spider web like bits?
The supports generated by the slicer make up the grid pattern, the diagonal lines are the 'raft' that is laid down first, for everything else to geab on to..........
Dave
 

Dave Ward

Still Trying New Things
SMF Supporter
Joined
Apr 27, 2018
Messages
8,653
Points
113
Location
South Gloucestershire
First Name
David
The second print finished successfully - I won't bother with pictures, as it is just a mirror image of the first, although, for some reason it took 10 minutes longer! Tomorrow, I'll start on the more challenging prints - I'm fully expecting a few failures with these!
Dave
 

Dave Ward

Still Trying New Things
SMF Supporter
Joined
Apr 27, 2018
Messages
8,653
Points
113
Location
South Gloucestershire
First Name
David
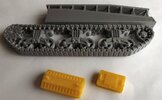
I printed two of the smallesr bits on the Monoprice ( hence the yellow filament ). The supports came away very well from the second print.
DSCF4569.JPG
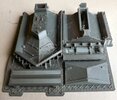
After 5 hours of printing.........................
DSCF4566.JPG
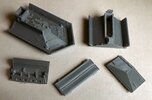
Four pieces printed together on a single raft - I'm not happy printing all these parts so close together, you get a lot of stringing & the quality tends to suffer. However separating the bits & removing the majority of dtrings I have these four bits
DSCF4568.JPG
Bottom bit looks a bit iffy, I'll cut that out from the base model & print it by itself.
The final parts are in the process of printing out ( another 5+ hour print ) - what I hadn't realised until now, was that there isn't a bottom to the model. I can always knock up a plate to cover this, but this isn't a model to pick up & look all round!
There aren't any instructions on how all this fits together, most is obvious, but others, I'll actually not know, until they're actually in my hand
Dave
 

Dave Ward

Still Trying New Things
SMF Supporter
Joined
Apr 27, 2018
Messages
8,653
Points
113
Location
South Gloucestershire
First Name
David
you're really flying with this now Dave!
Of course, that raises the question of what next? I've been looking for a model of a bridgelayer, found a few, but none that look to be actually feasible! - best so far is a Valentine - that may mean using the chassis of a injection moulded Valentine ( I have a VM Valentine in the stash ), but I'm not convinced.. I'm looking for models that aren't really available in injection models - be pretty pointless to print a StuG, or a Tiger or any other of the popular tanks, unless it's a really weird variant - like the Sherman BARV or maybe the Whizbang!
Dave
 

David Lovell

SMF Supporter
Joined
Apr 27, 2018
Messages
1,496
Points
113
Location
Poole Dorset
First Name
David
As I said Dave it all goes straight over the top but I throughly enjoy what you show and share with us how long before we see something painted up or are you just happy with what your doing/learning for the moment. Dave
 

Scratchbuilder

SMF Supporter
Joined
Jul 2, 2022
Messages
1,943
Points
113
First Name
Mike
Dave, Many thanks for this tutorial/lesson, very informative. I am sure that one day you will push me over the edge and into 3D working. I think I just have to take the initial step.
 

Dave Ward

Still Trying New Things
SMF Supporter
Joined
Apr 27, 2018
Messages
8,653
Points
113
Location
South Gloucestershire
First Name
David
The final parts printed out - took an hour longer than predicted - no idea why!
DSCF4570.JPG
Quite a lot of stringing, but nothing that causes problems. After a few minutes............................
DSCF4571.JPG
That's all the bits printed out
DSCF4572.JPG
I;ll get to putting bits together in a day or so - got a few things on at the moment. I found I didn't have any green primer left, so I've ordered some more, I have several other .tanks/vehicles to spray, hopefully in one session ( Terrapin, Mortar Carrier )
Quite pleased how things have printed, I expected to have at least one failure, but no. I just hope that the fit isn't too bad. Essentially what I have now is a limited run kit. Total cost of the filament is around the £3 mark - the total printing time is going to be around the 40 hr mark.
Dave
 

Neil Merryweather

SMF Supporter
Joined
Dec 29, 2018
Messages
4,425
Points
113
Location
London
First Name
Neil
The final parts printed out - took an hour longer than predicted - no idea why!
View attachment 488055
Quite a lot of stringing, but nothing that causes problems. After a few minutes............................
View attachment 488056
That's all the bits printed out
View attachment 488057
I;ll get to putting bits together in a day or so - got a few things on at the moment. I found I didn't have any green primer left, so I've ordered some more, I have several other .tanks/vehicles to spray, hopefully in one session ( Terrapin, Mortar Carrier )
Quite pleased how things have printed, I expected to have at least one failure, but no. I just hope that the fit isn't too bad. Essentially what I have now is a limited run kit. Total cost of the filament is around the £3 mark - the total printing time is going to be around the 40 hr mark.
Dave
How much do your printers cost per hour to run, Dave?
My big one is 300watts so round about 9.3p per hour.
The resin one is 1.85p per hour....
 

Dave Ward

Still Trying New Things
SMF Supporter
Joined
Apr 27, 2018
Messages
8,653
Points
113
Location
South Gloucestershire
First Name
David
How much do your printers cost per hour to run, Dave?
My big one is 300watts so round about 9.3p per hour.
The resin one is 1.85p per hour....
The Sunlu is 350W, but I guess that's when you're printing fancy stuff, bed at 100C & nozzle at 300C, which I wouldn't fancy doing!
Dave
 

Jim R

SMF Supporter
Joined
Apr 27, 2018
Messages
13,731
Points
113
Location
Shropshire
First Name
Jim
That looks to have printed very well. I hope it goes together ok.
 
Top