Tamiya 1/12 Suzuki Ecstar GSX-RR ’20

Ian M

Administrator
Staff member
Administrator
Moderator
SMF Supporter
Joined
Dec 14, 2008
Messages
19,721
Points
113
Location
Falster, Denmark
First Name
Ian
Like that blue
All these fantastic bike builds of late I might have to try one...
 

Mr Bowcat

SMF Supporter
Joined
Dec 29, 2016
Messages
3,647
Points
113
Location
London
First Name
Bob
Afternoon all. :smiling3:

So I've spent a lot of time over the past week on decals. This was quite slow going for some of them as they were multi part and had to be matched up.

52371646446_151a41114c_c.jpg


52372063515_ca47090264_c.jpg


There were also quite a few CF decals for the frame, swing arm and cowl which proved to be a pain as they kept splitting. I find this strange as I used Studio 27 CF for the Kawasaki H2 Carbon and had no issues. Still, they look good when done.

52371872158_d504f09c15_c.jpg


And I had around 20 screw/bolt head decals to install which take an age to lay over the hemispherical bumps on the kit.

52371954444_19d7fa0c72_c.jpg


I'm going to leave that all a couple of days then get the gloss coat down. In the meantime it's back to sticking other bits together.
 

JR

Member of the Rabble and Pyromania Consultant
SMF Supporter
Joined
May 26, 2015
Messages
17,275
Points
113
Location
lincs
First Name
John
Wow, Bob the paint work is superb , as for those decals double wow.
You must have the patience of a saint .
 

Mr Bowcat

SMF Supporter
Joined
Dec 29, 2016
Messages
3,647
Points
113
Location
London
First Name
Bob
Morning all. :smiling3:

Another weekend of painting and decals.

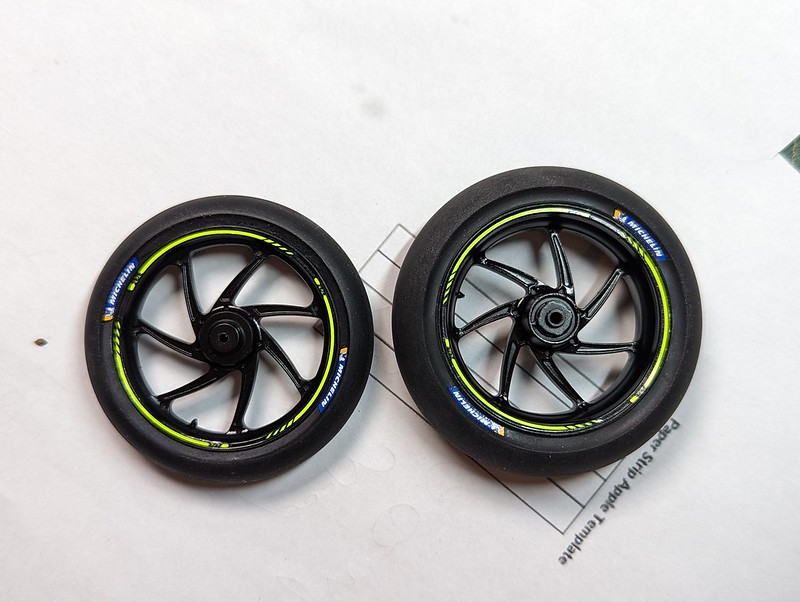
Wheels up first, annoying seam around all the spokes which was tricky to get to the corners of.

52385063946_a1bdff1633_c.jpg


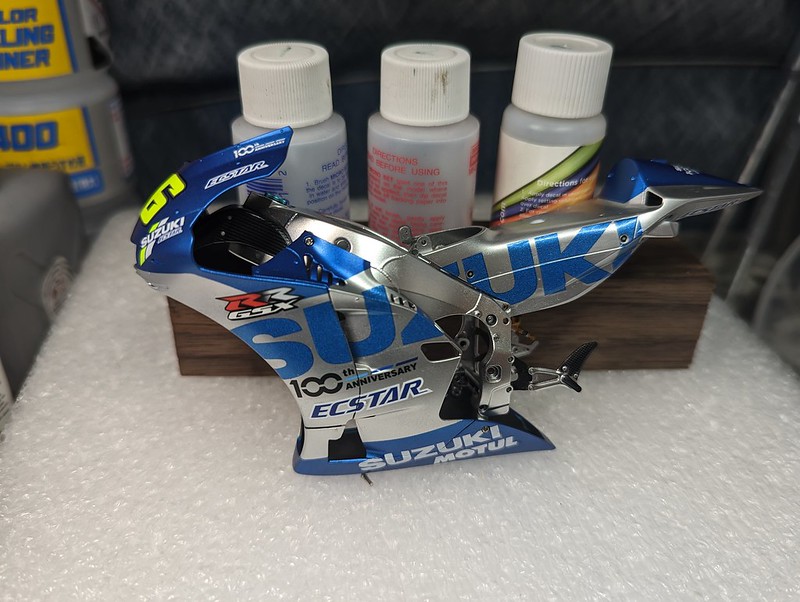
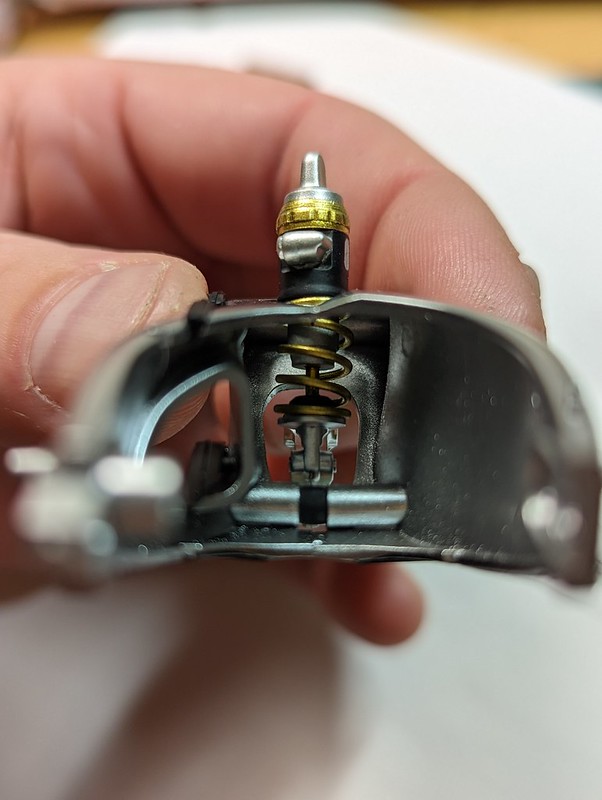
Swing arm is now complete, just need to get the chain painted then the engine and swing arm can get attached to the frame

52385493765_e211613547_c.jpg


52385493750_064bd91ddb_c.jpg


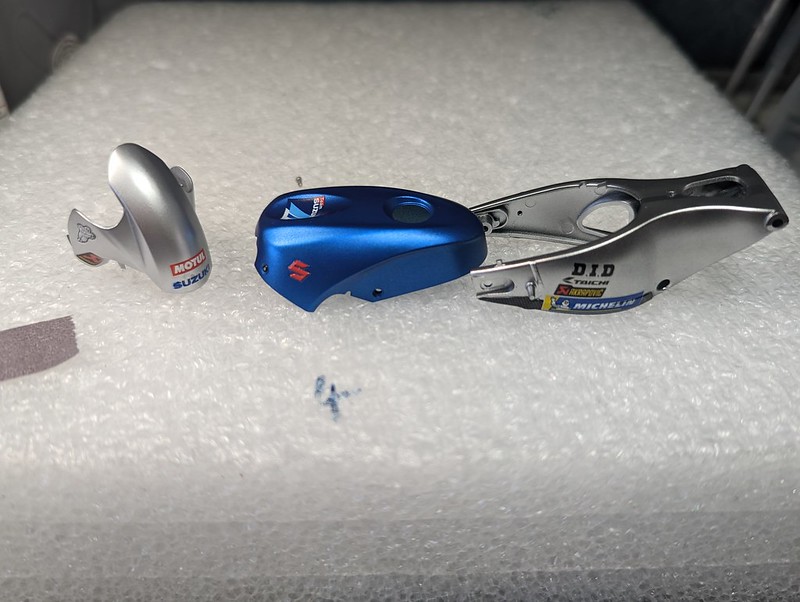
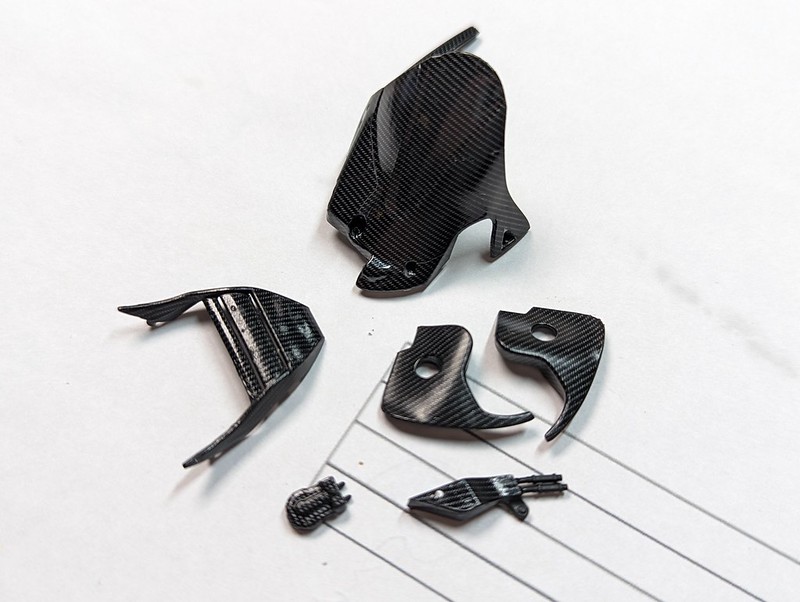
A load more CF parts. I had slightly less problems with these by using hotter water to soften the decals before application, but some of the smaller parts still required liberal use of setting solution and hot air to conform. The part on the left (which I think is a tire/brake cooling duct) alone was 10 separate parts and took an age.

52385063851_2d1711ee3e_c.jpg


And some miscellaneous other bits that I painted while I had the booth running.

52385303923_25b5bbf6e6_c.jpg
 

simontie

SMF Supporter
Joined
Jan 13, 2010
Messages
997
Points
93
Location
Morayshire Scotland
First Name
simon
Dam thats tidy those rim decal’s can be very frustrating but you nailed this swinging arm and damper as well. Looking forward to seeing it complete
simon
 

Mr Bowcat

SMF Supporter
Joined
Dec 29, 2016
Messages
3,647
Points
113
Location
London
First Name
Bob
Cheers gents. :smiling3:

Simon, the rim decals weren't too bad, I cut right up to the decal to remove most of the carrier film so they butted against the rim quite nicely. The tyre decals were another matter, 6 out of 8 split but I managed to piece them together. I only lost one completely, luckily Tamiya thoughtfully provided 2 spares.
 
Top