The 'Junkster' Pod Racer

tiking

SMF Supporter
Joined
Jul 18, 2006
Messages
1,337
Points
113
First Name
Charles
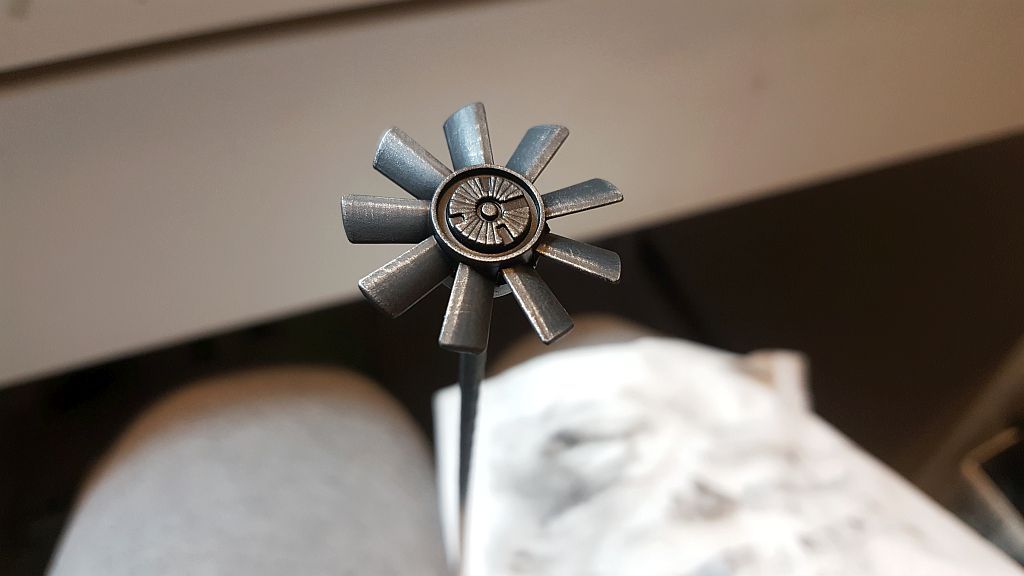
1. The 'Junkster' Pod Racer


Hi all. It's been a while since my last build. I have started on another build taking another break from truck building, while gathering thoughts for my next one. I have several in mind but I am trying to figure out which one to choose and how to proceed. 'Till then, I am working on a pod racer. Yes, another one. For some reason I have a think for these machines. I also planning on a big spaceship build after this build. We'll see. Anyways, Here are pics of the progress so far. We will see how it turns out.


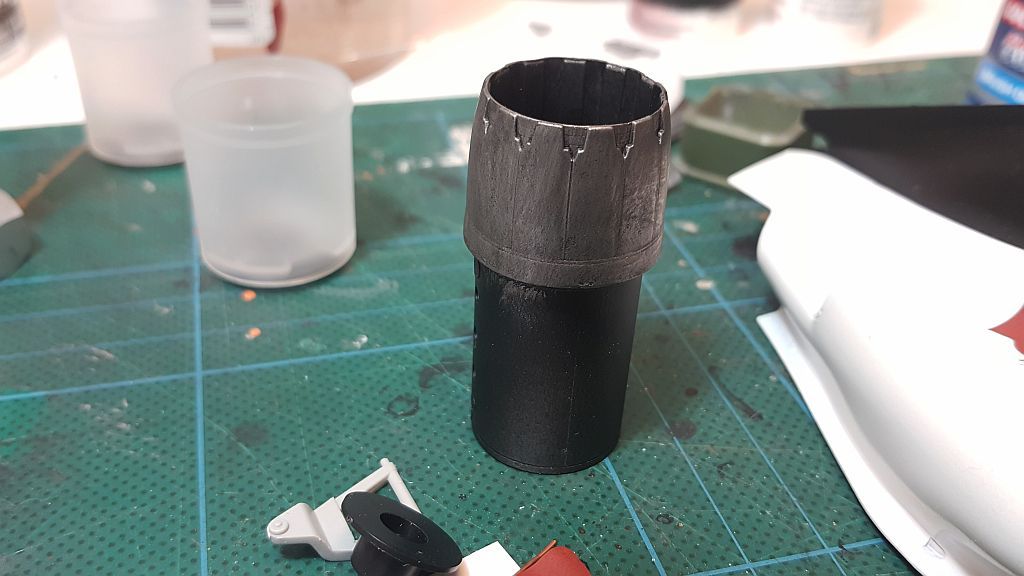
The concept of this build is simple. It is an older model that has been rebuilt from scrap using various metal and machine components, hence, the name, The 'Junkster'. So It is going to be weathered to show the old age and extensive usage. Fits me just right.


-----------------------------


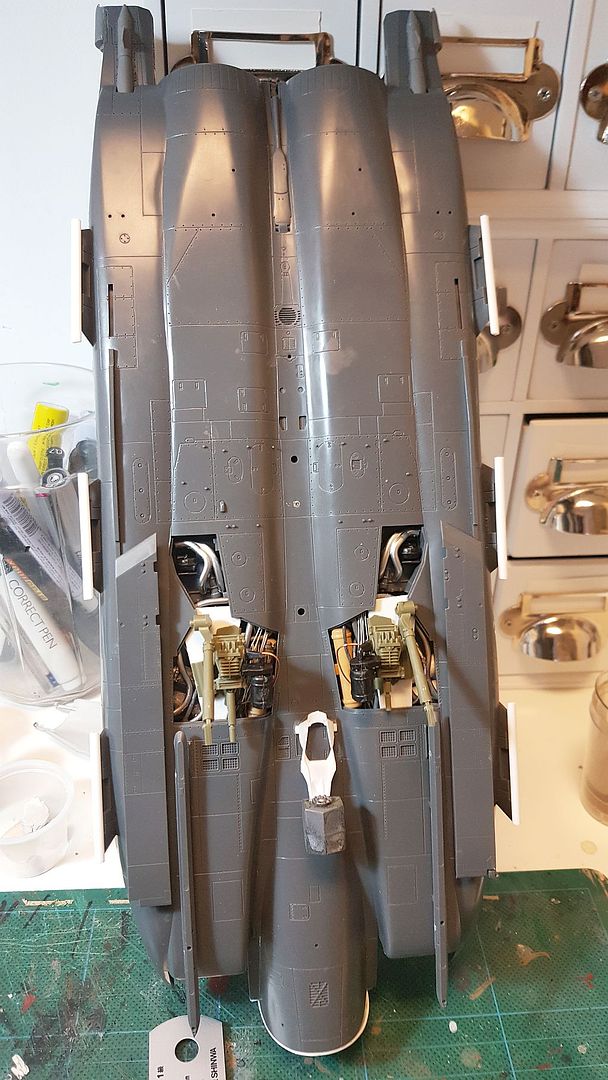
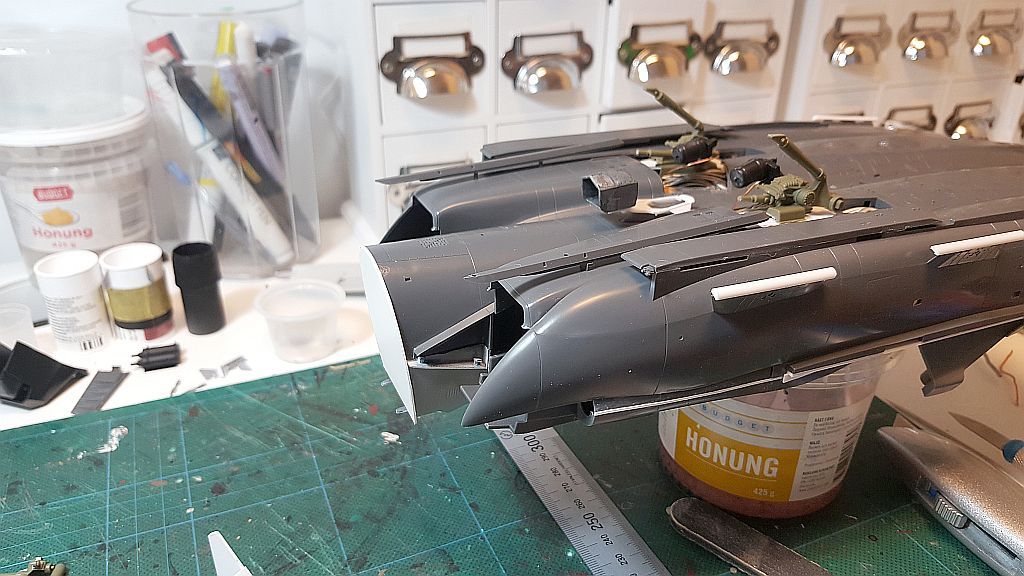
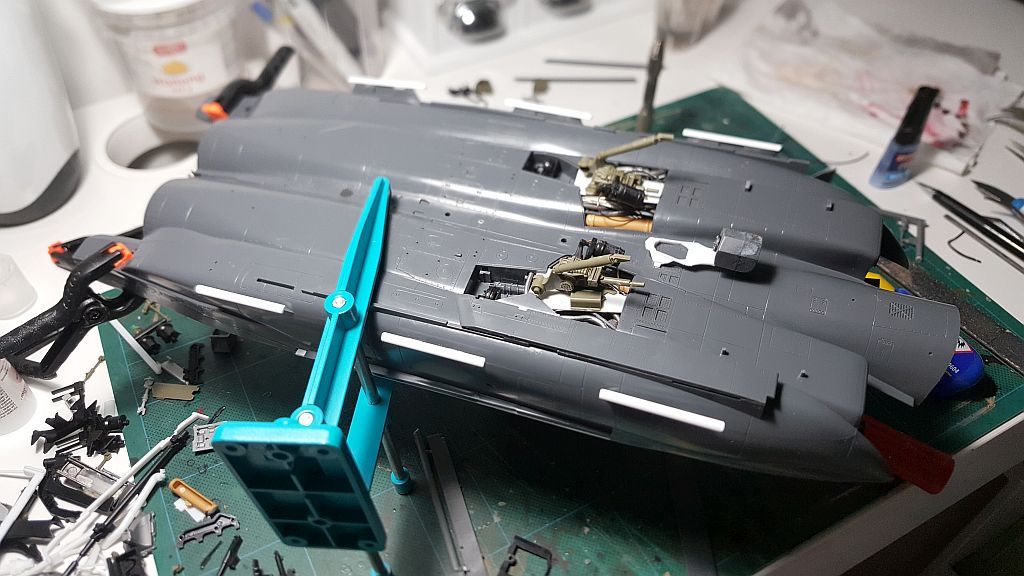
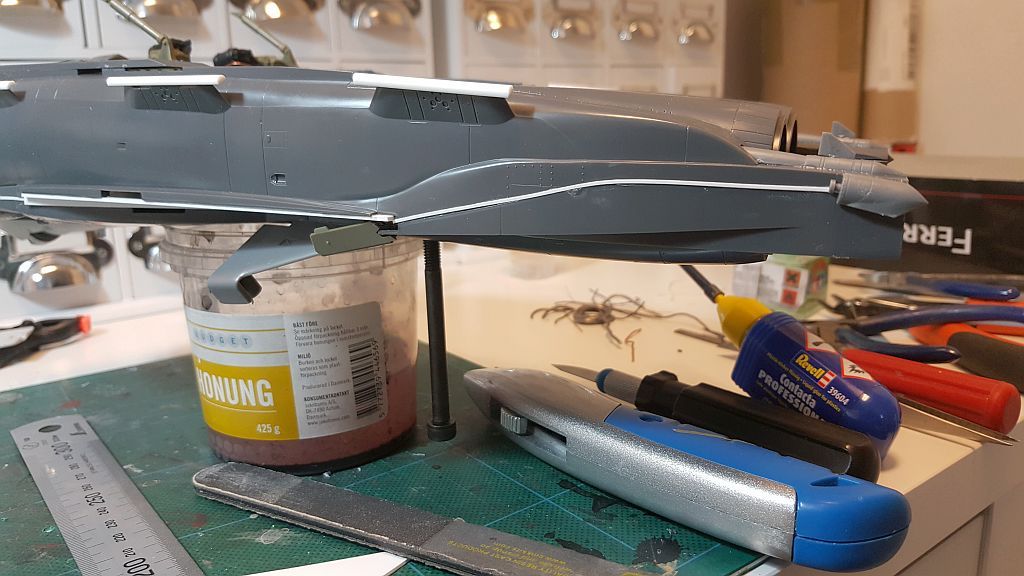
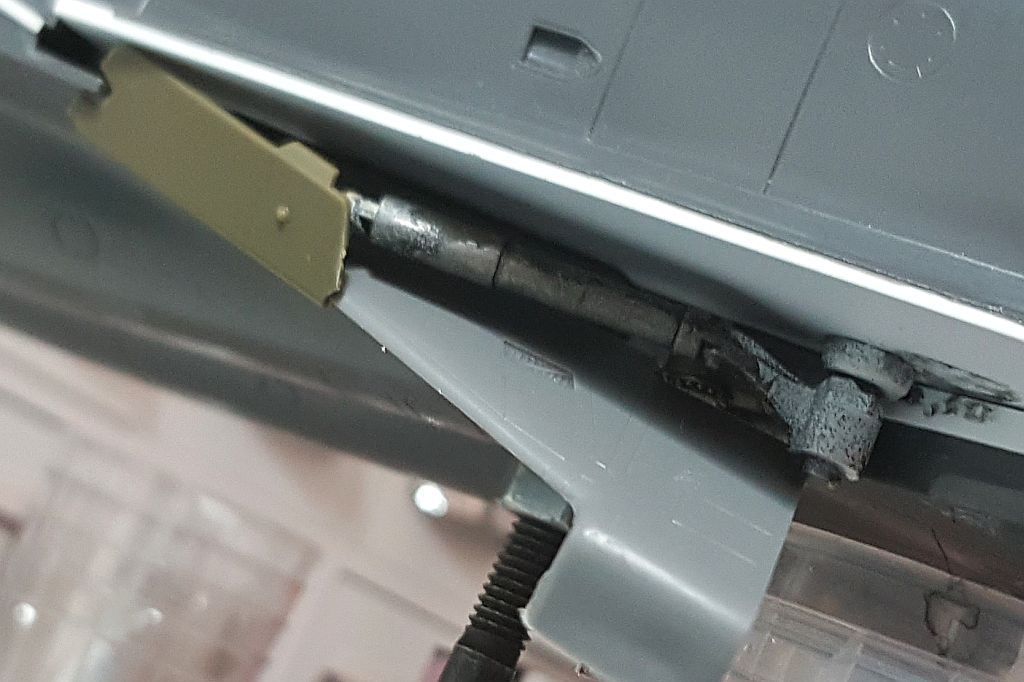
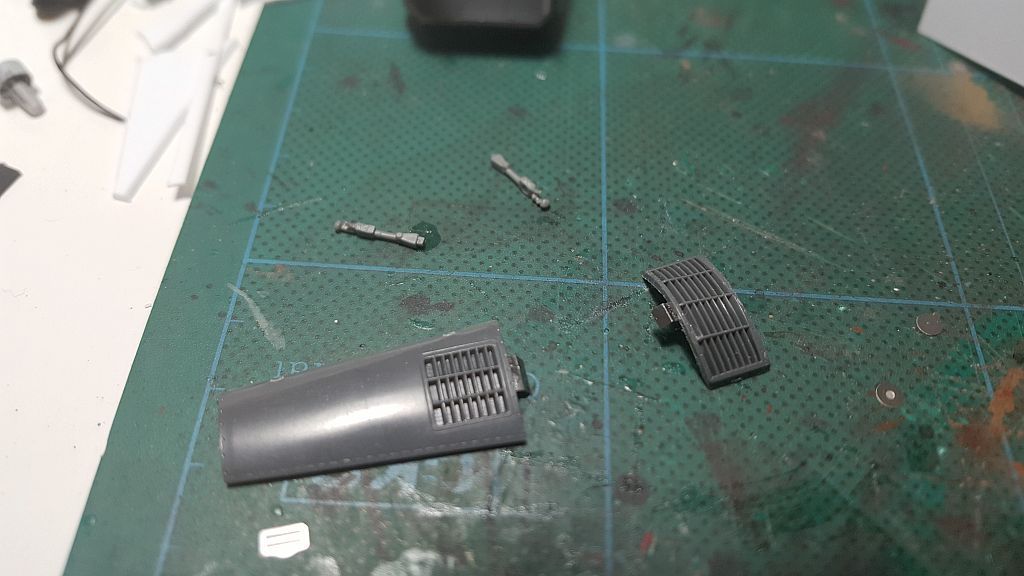
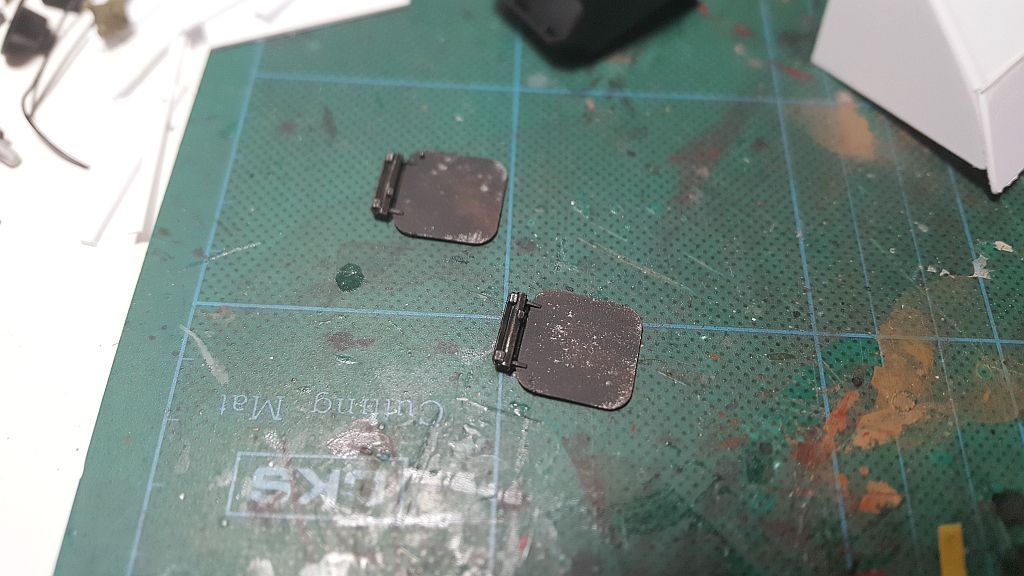
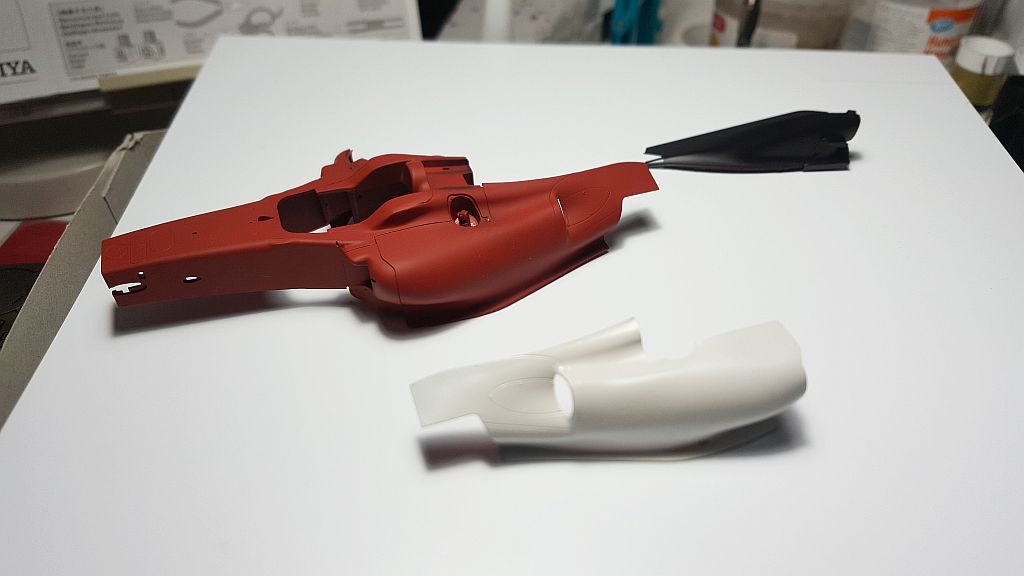
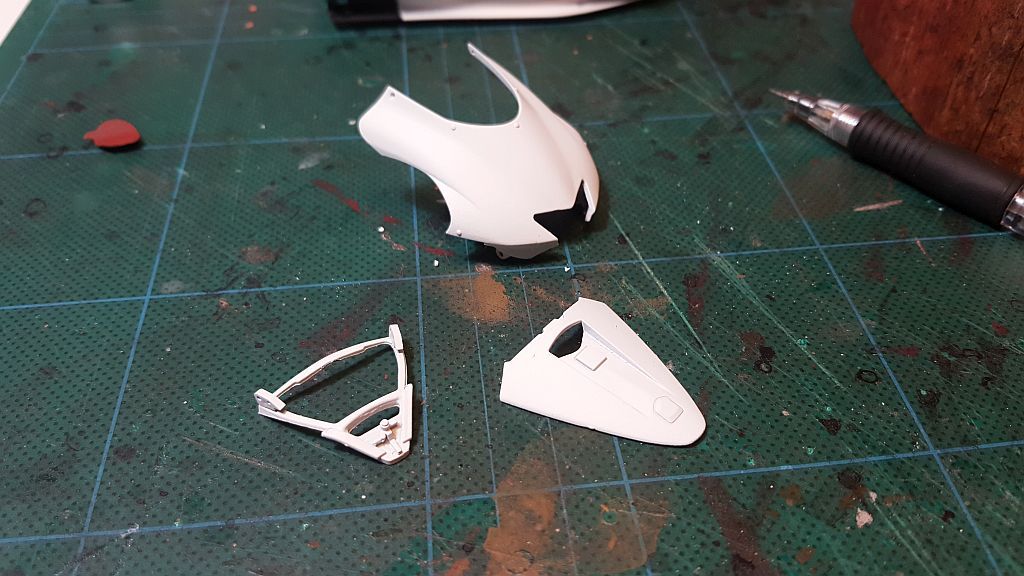
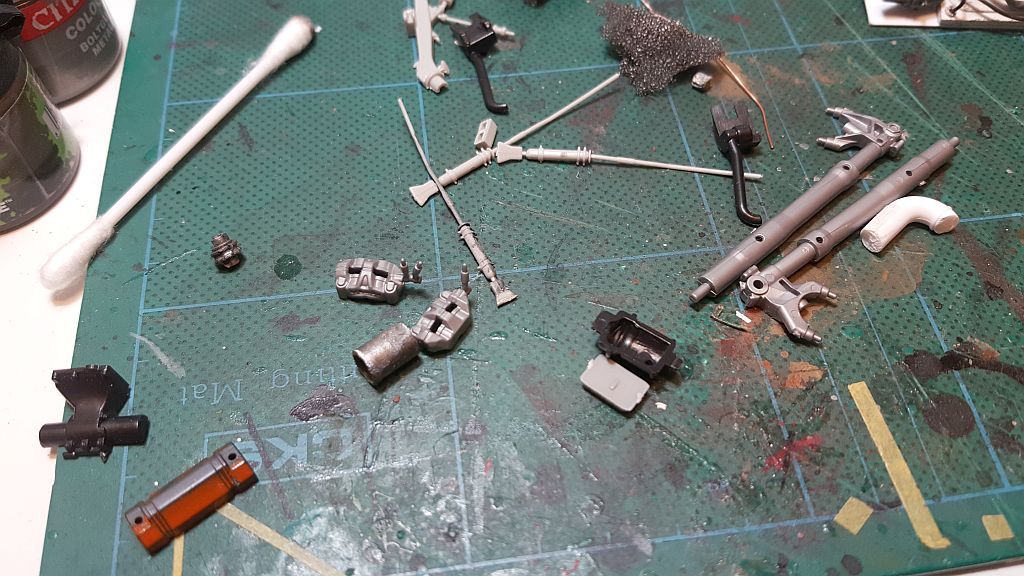
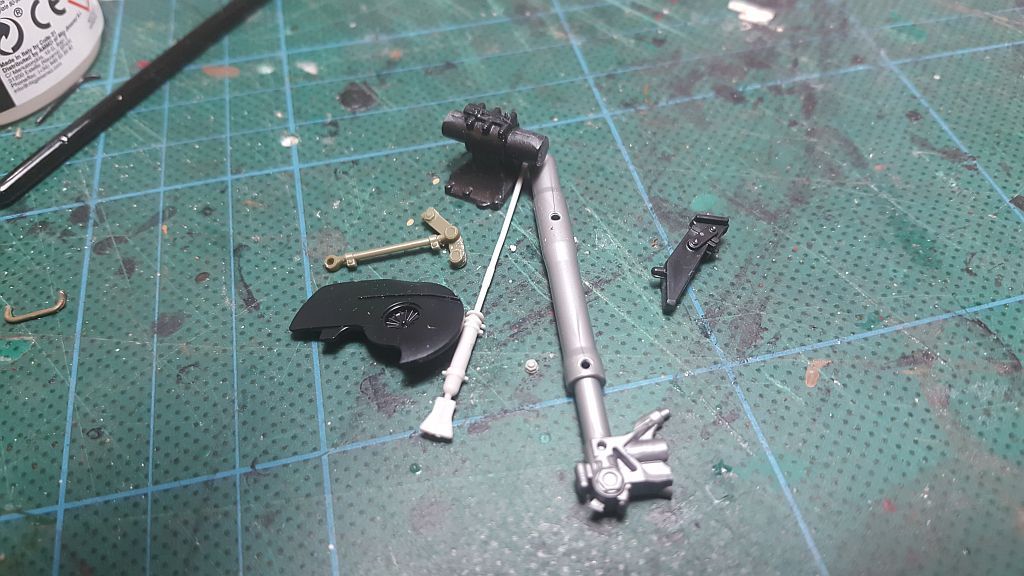
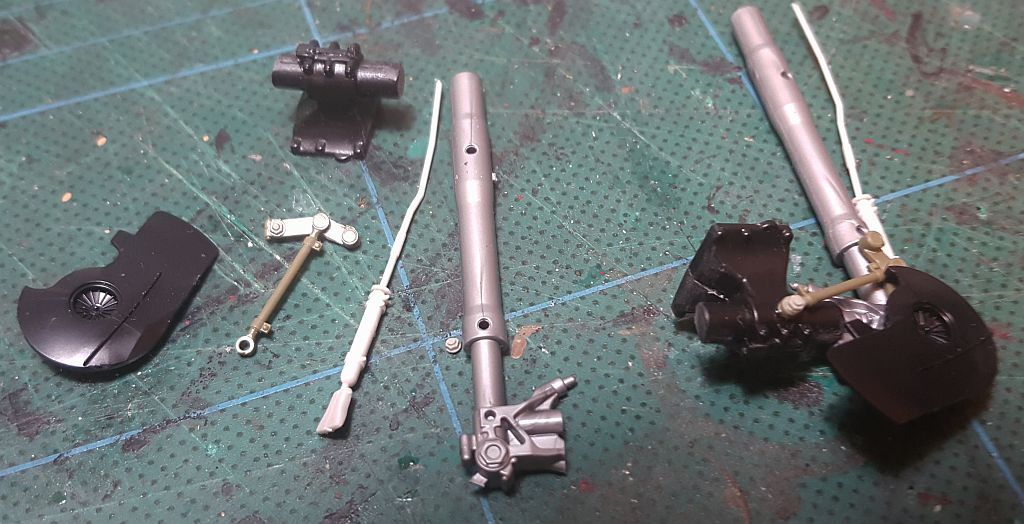
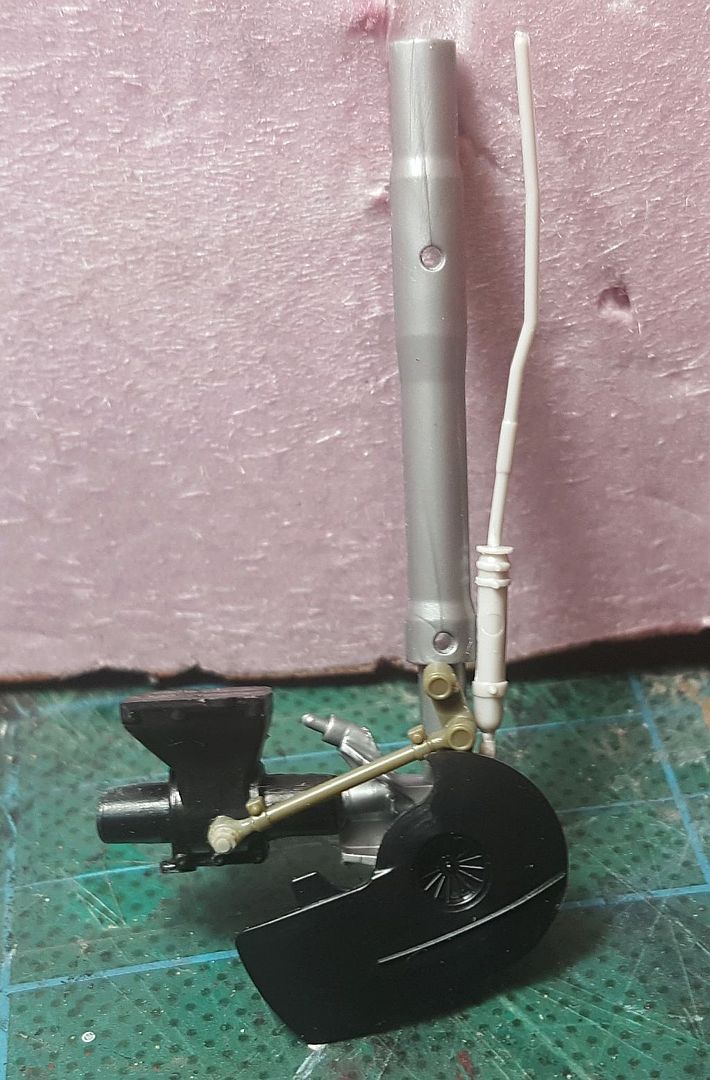
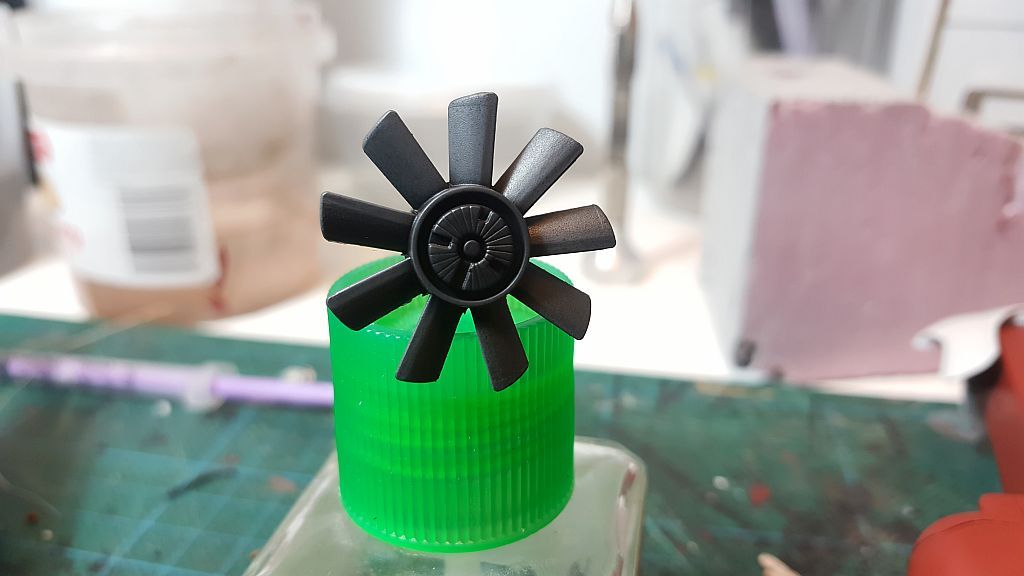
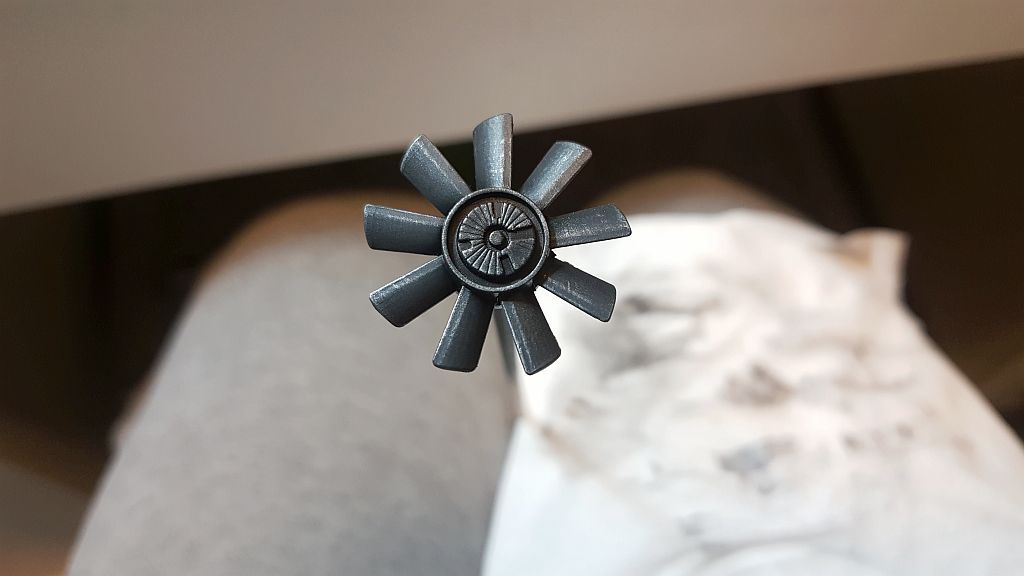
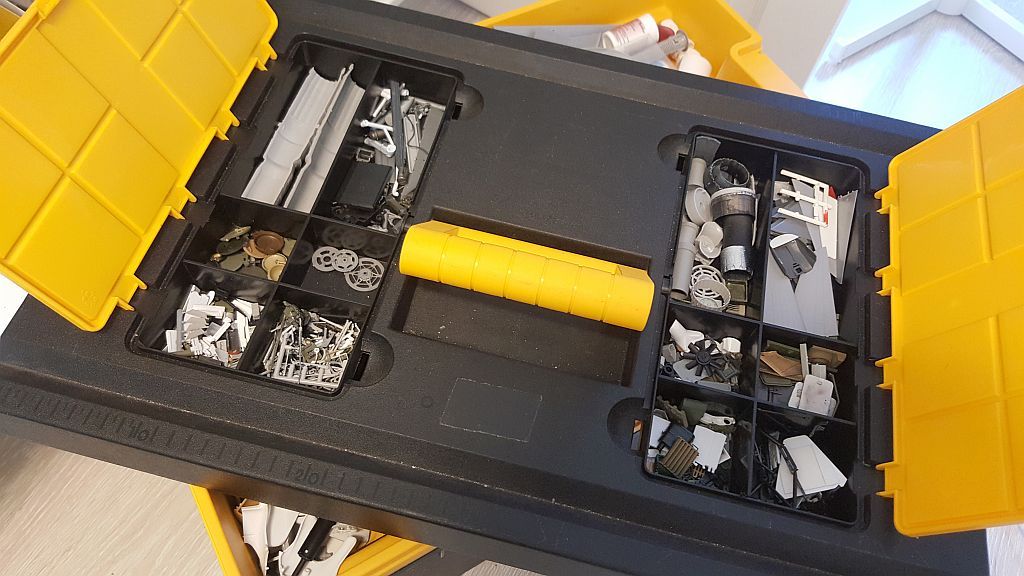
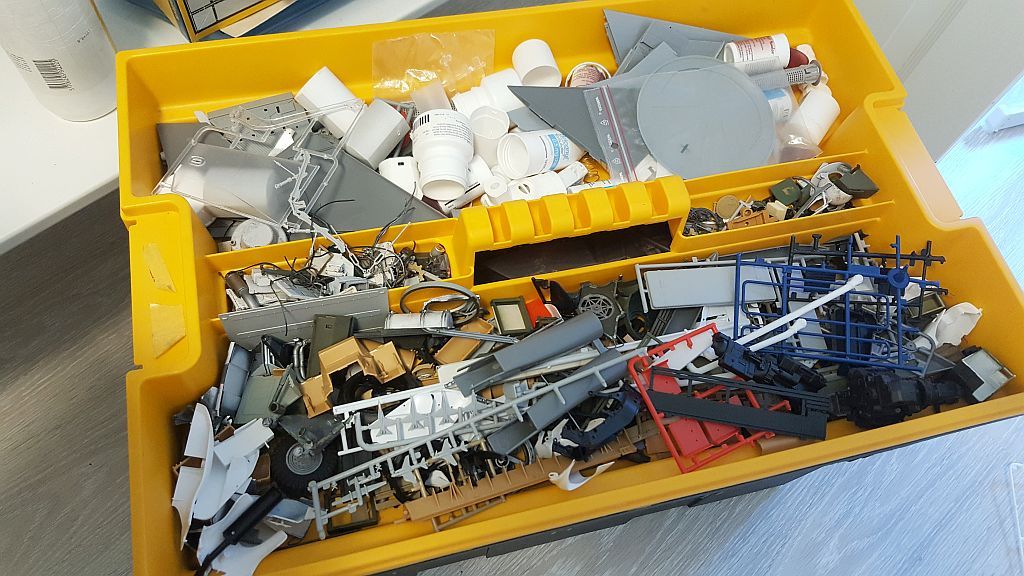
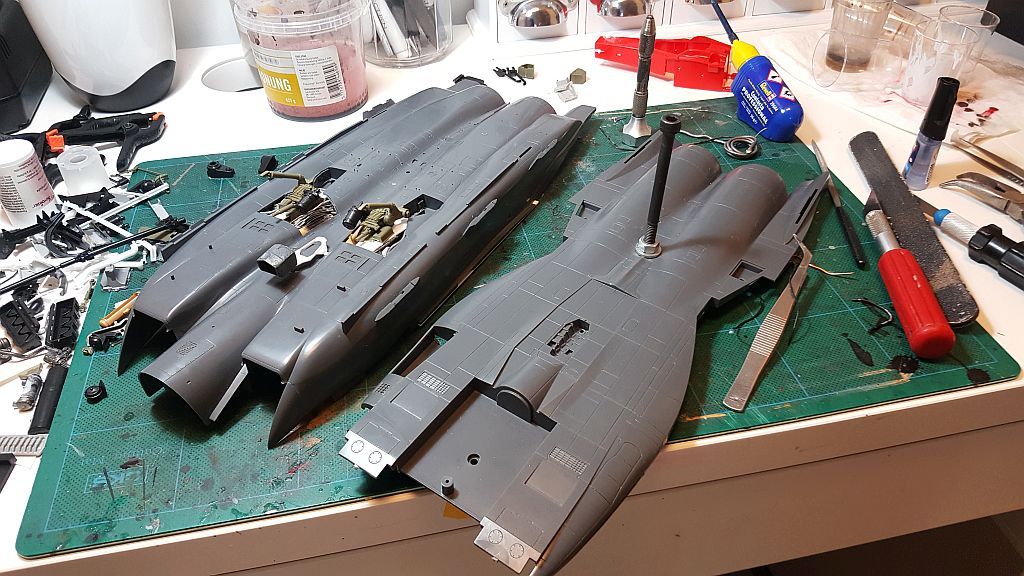
2. Most of you guys may already know what parts I am using here already. It's from a 1/32 F-15E fighter jet. I had no drawings, just planning as I build. I have lots of parts(lots), as you can see in the pics blow:


miscelleneous_parts_zpslknt1ou2.jpg


miscelleneous_parts2_zpsglp0uiw8.jpg


.......................................................................


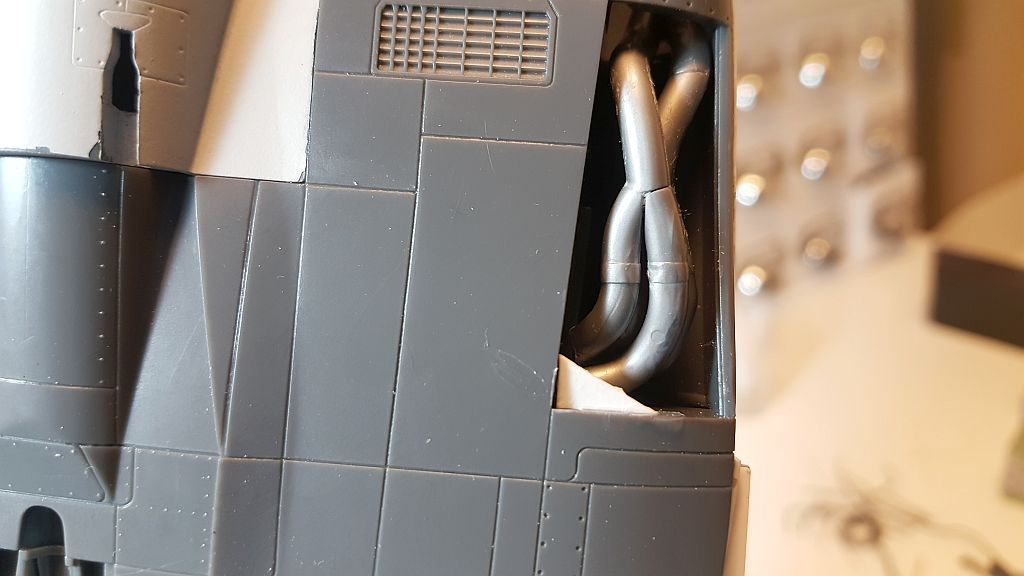
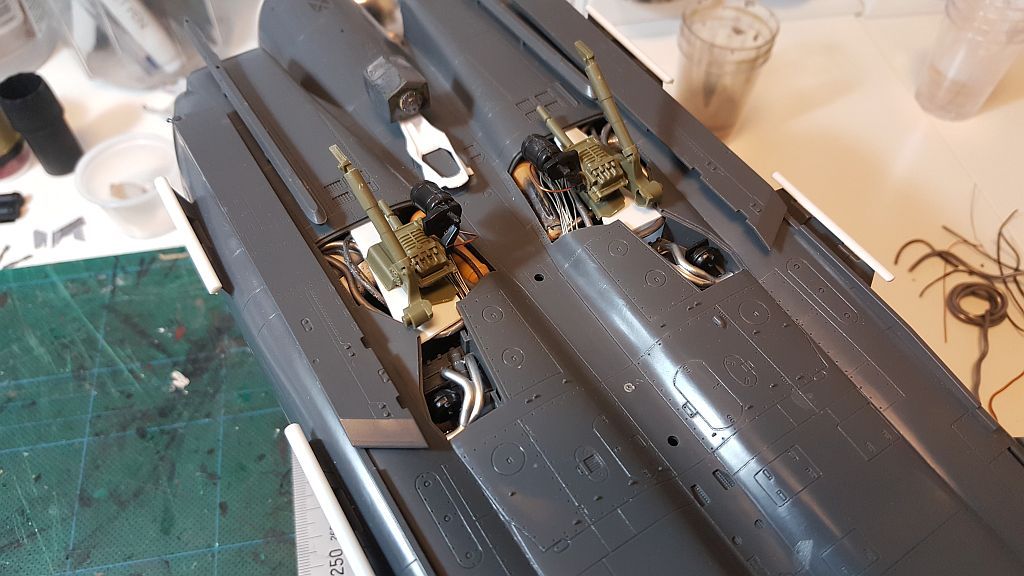
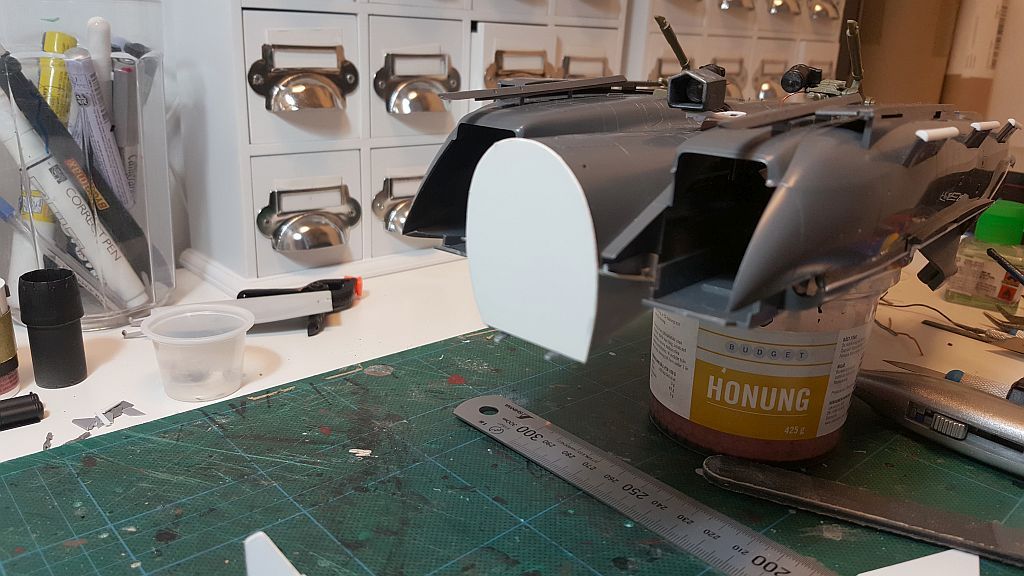
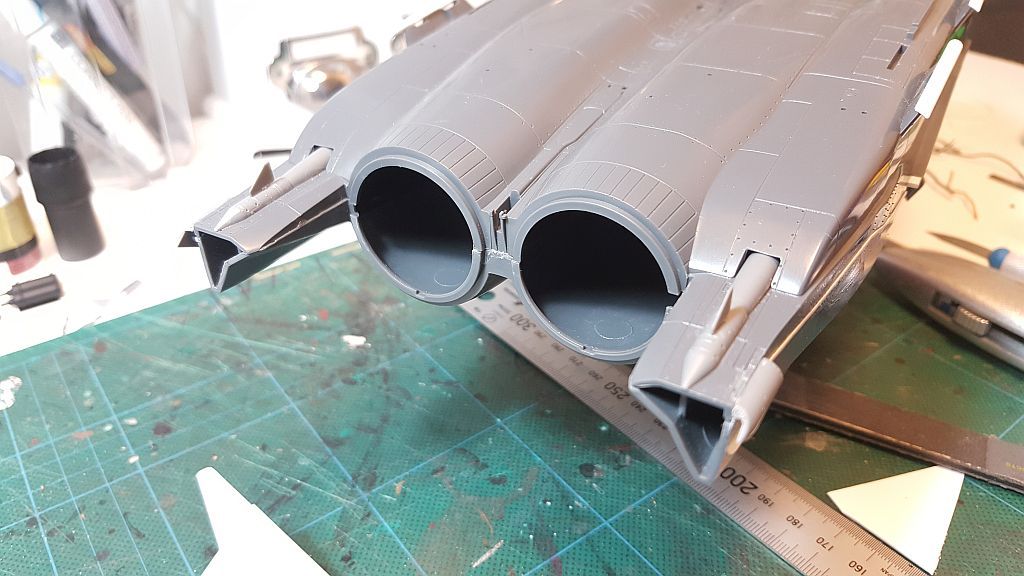
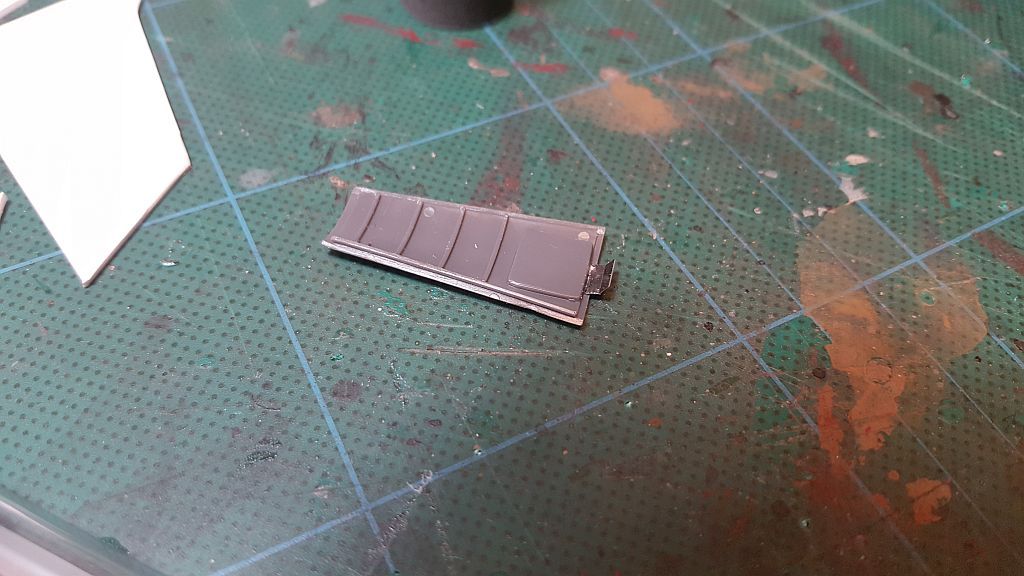
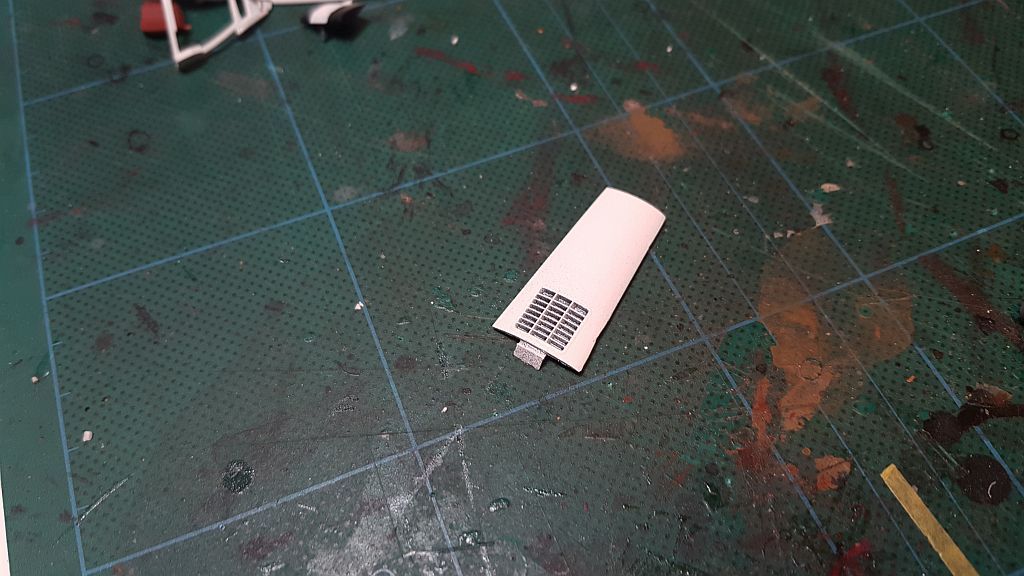
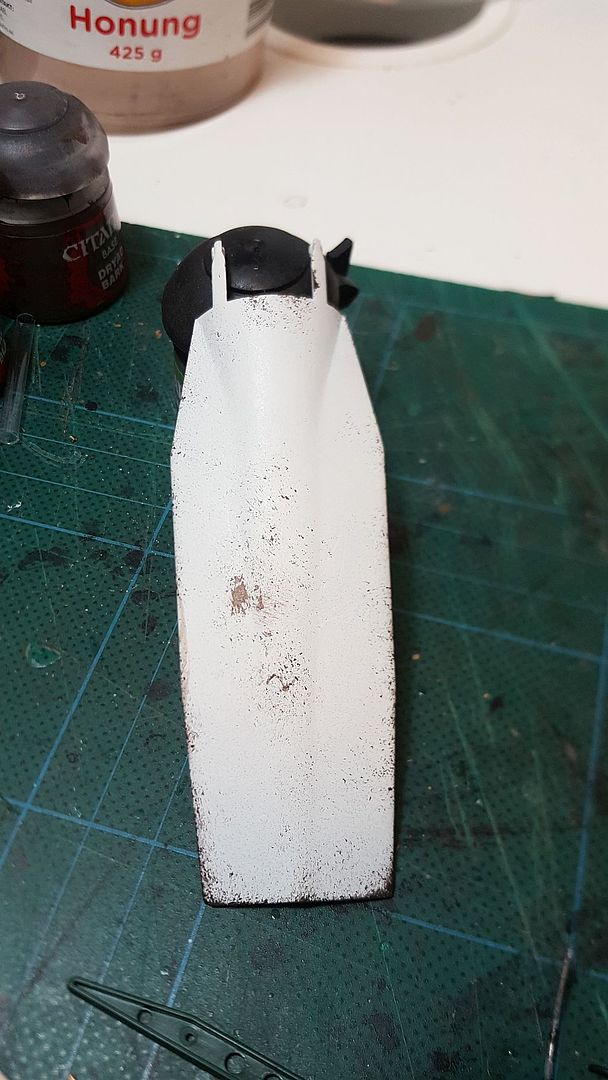
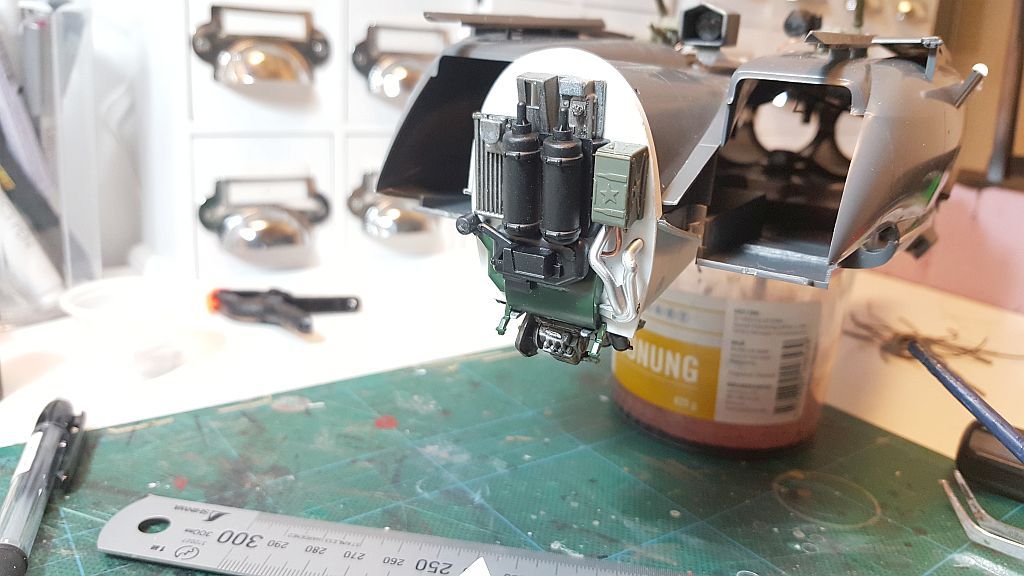
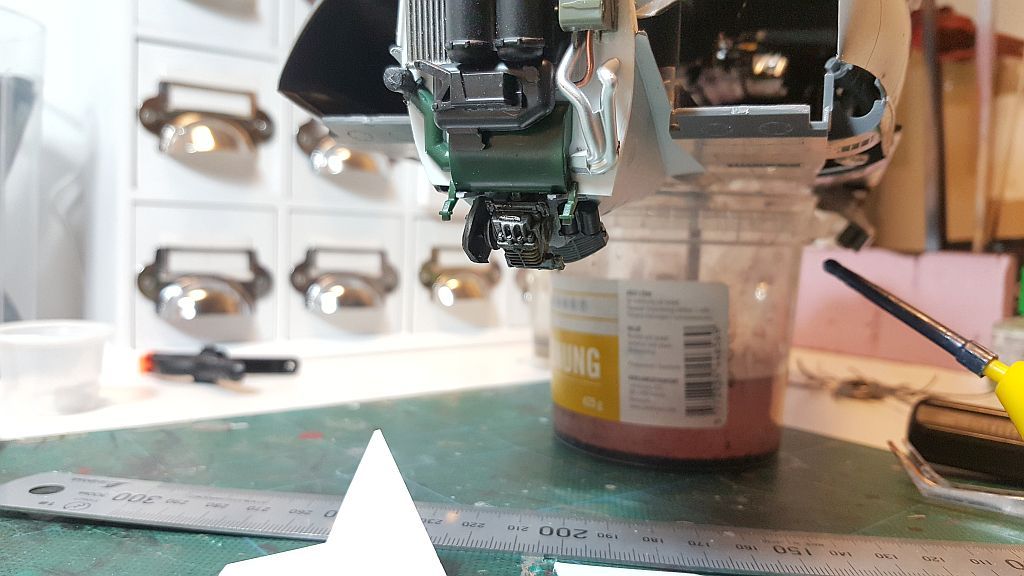
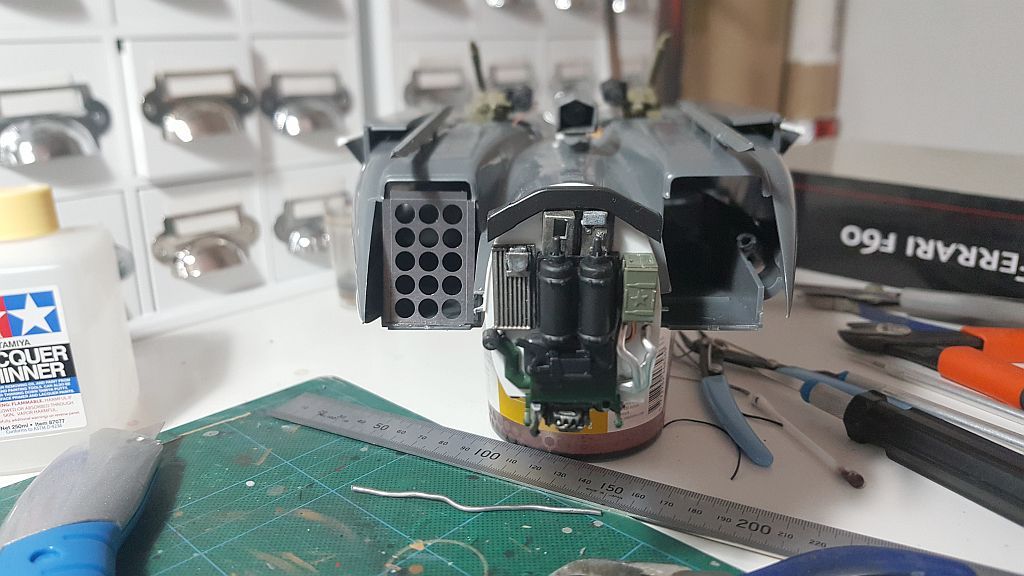
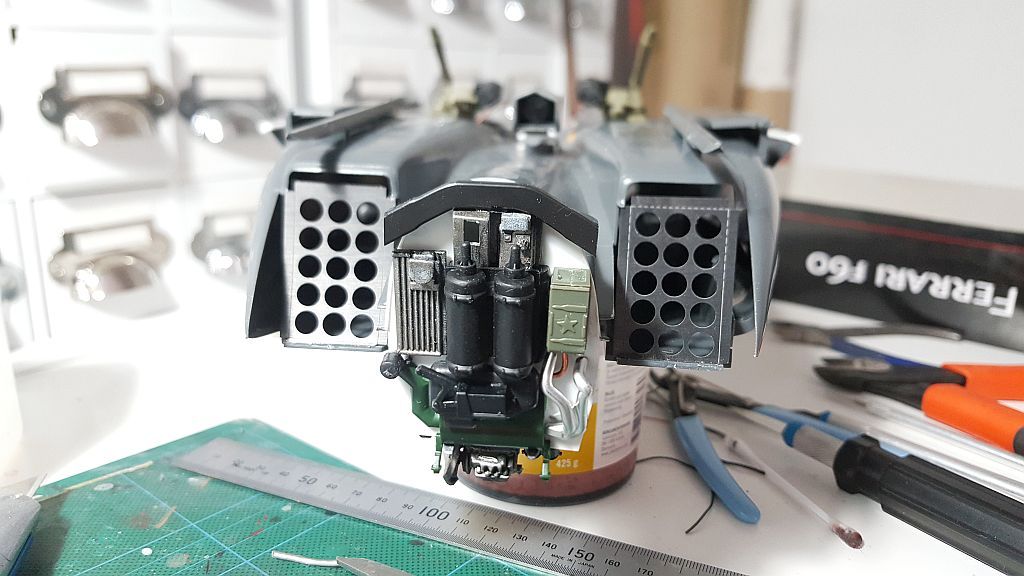
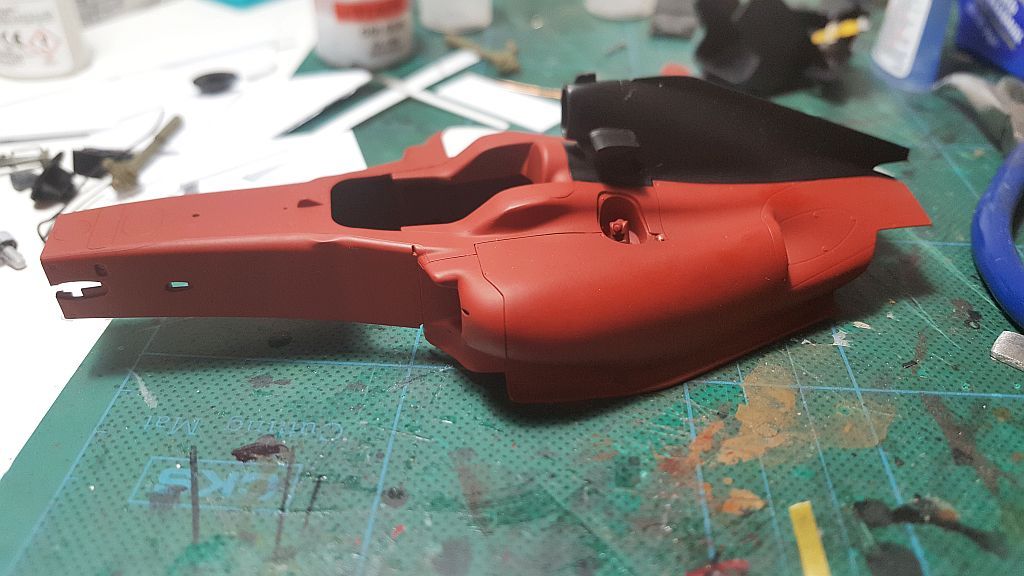
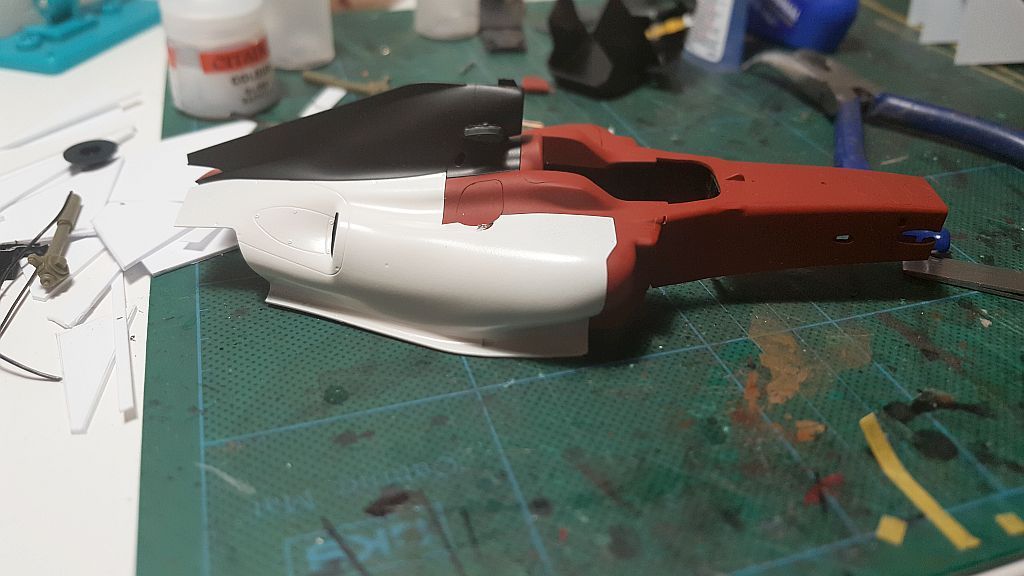
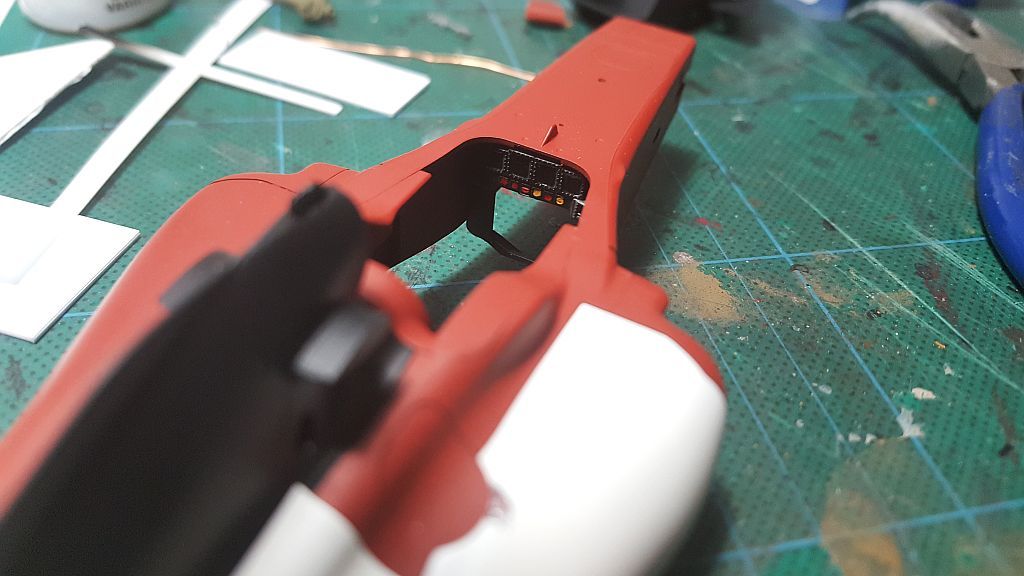
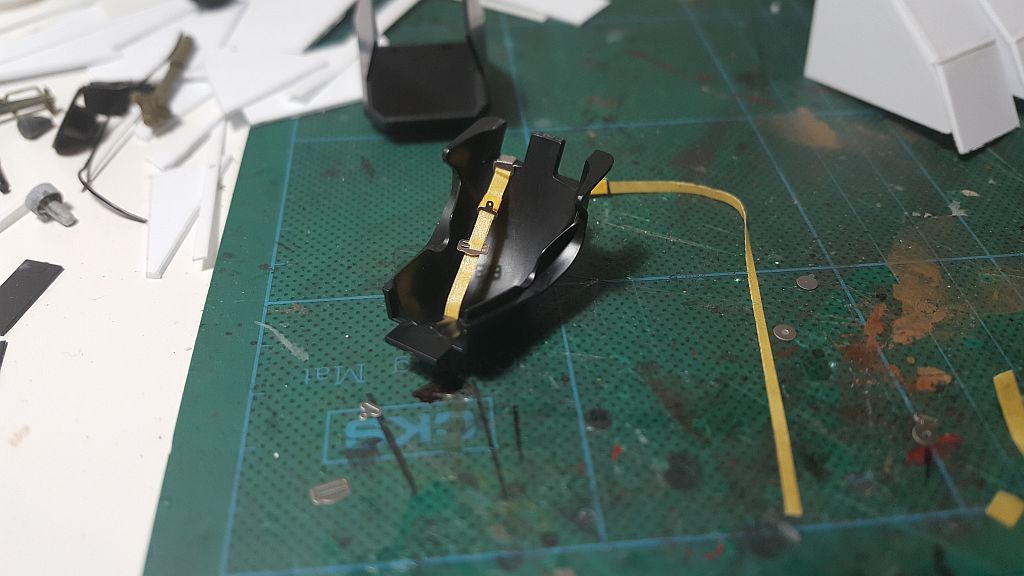
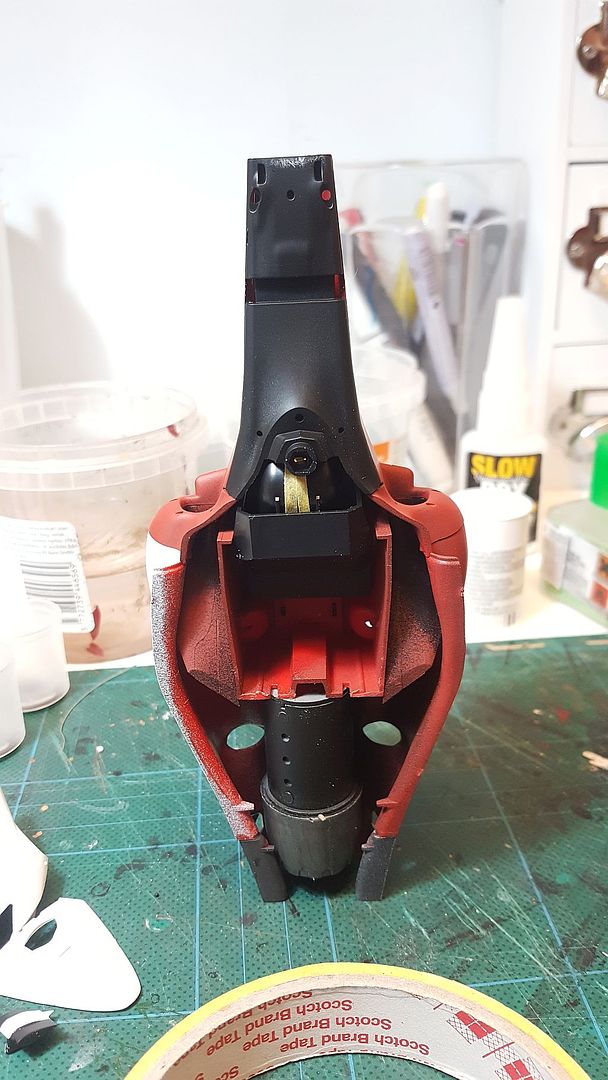
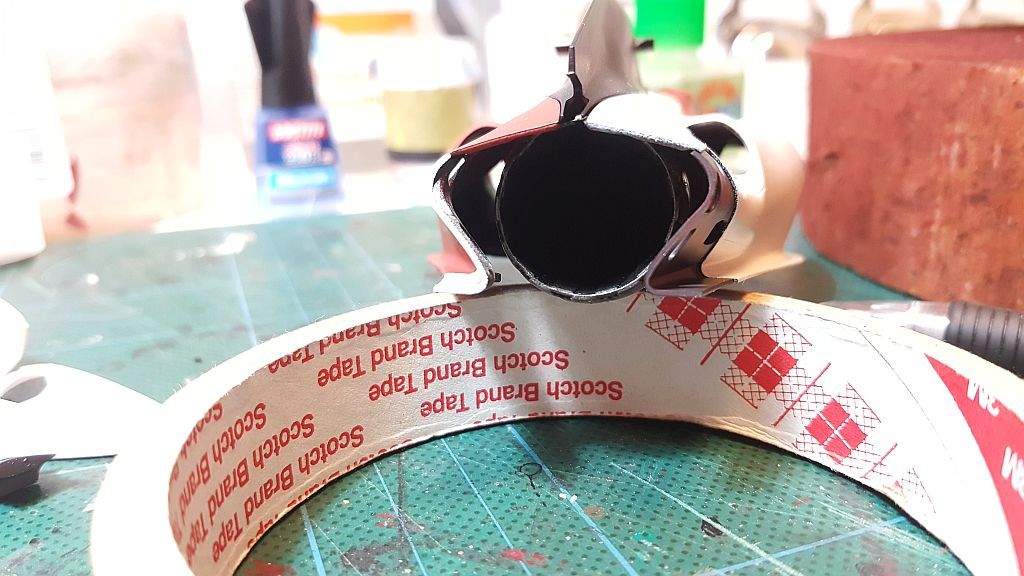
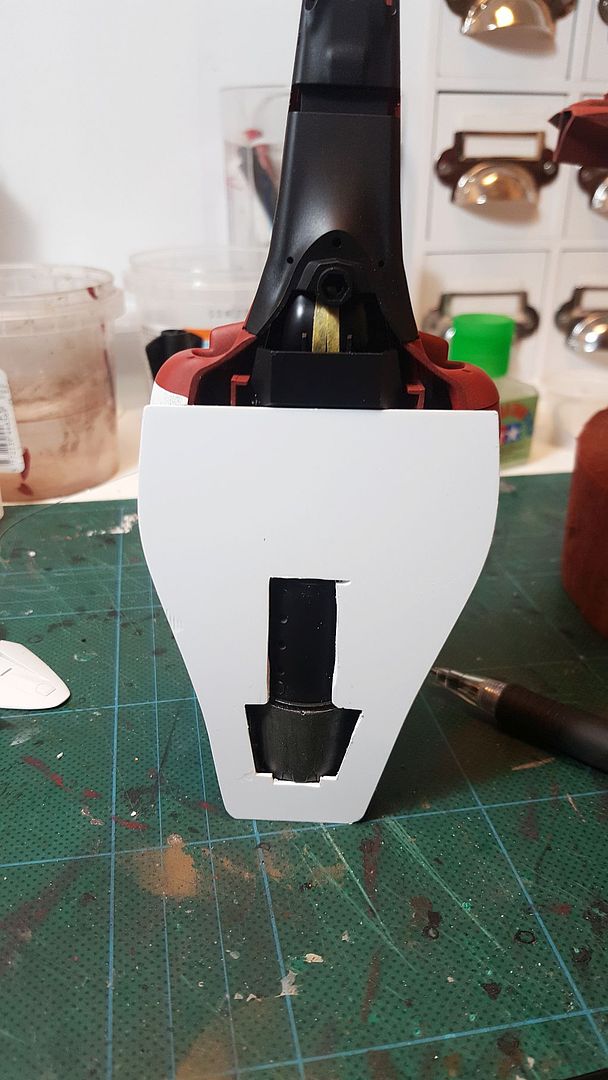
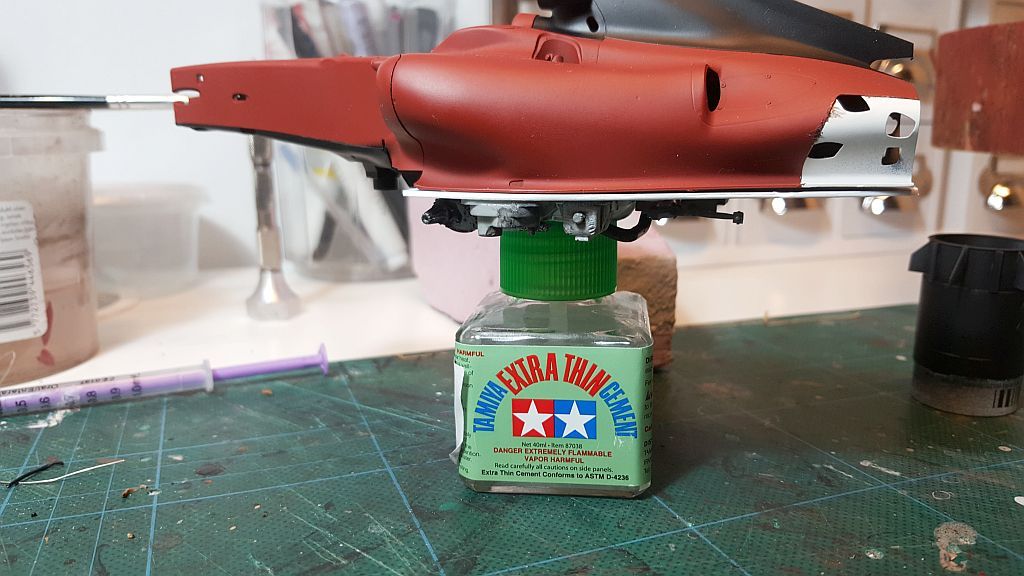
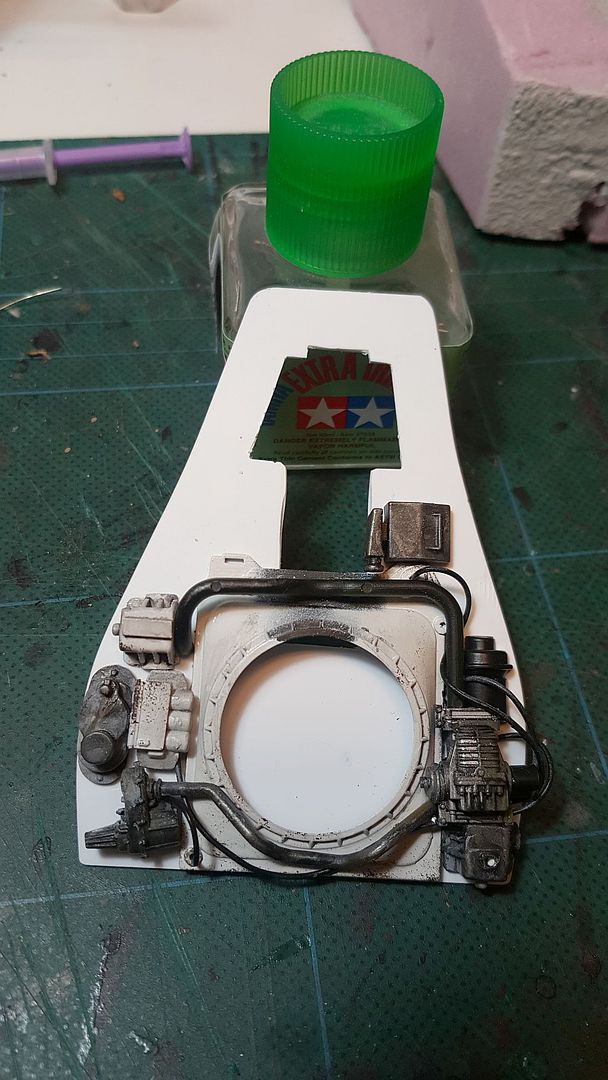
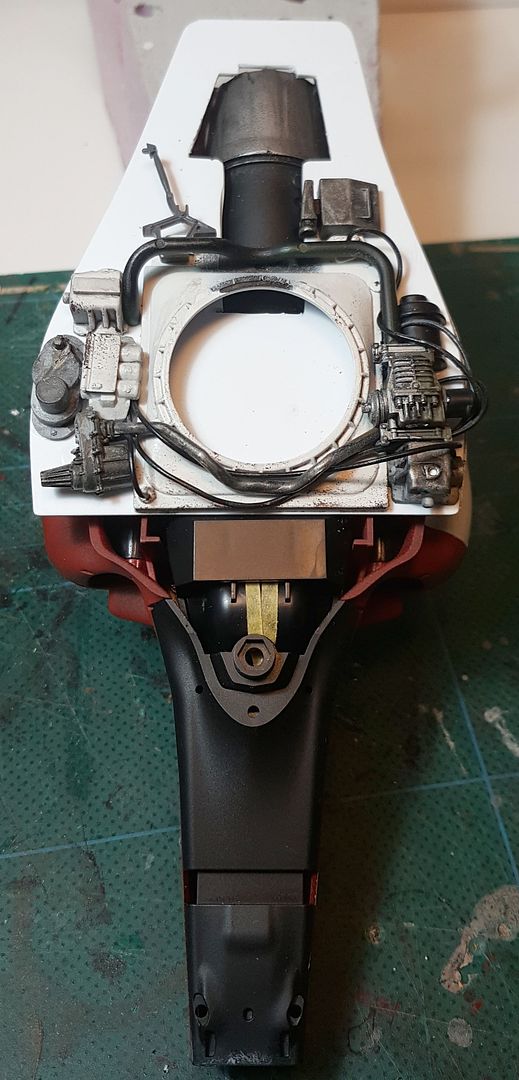
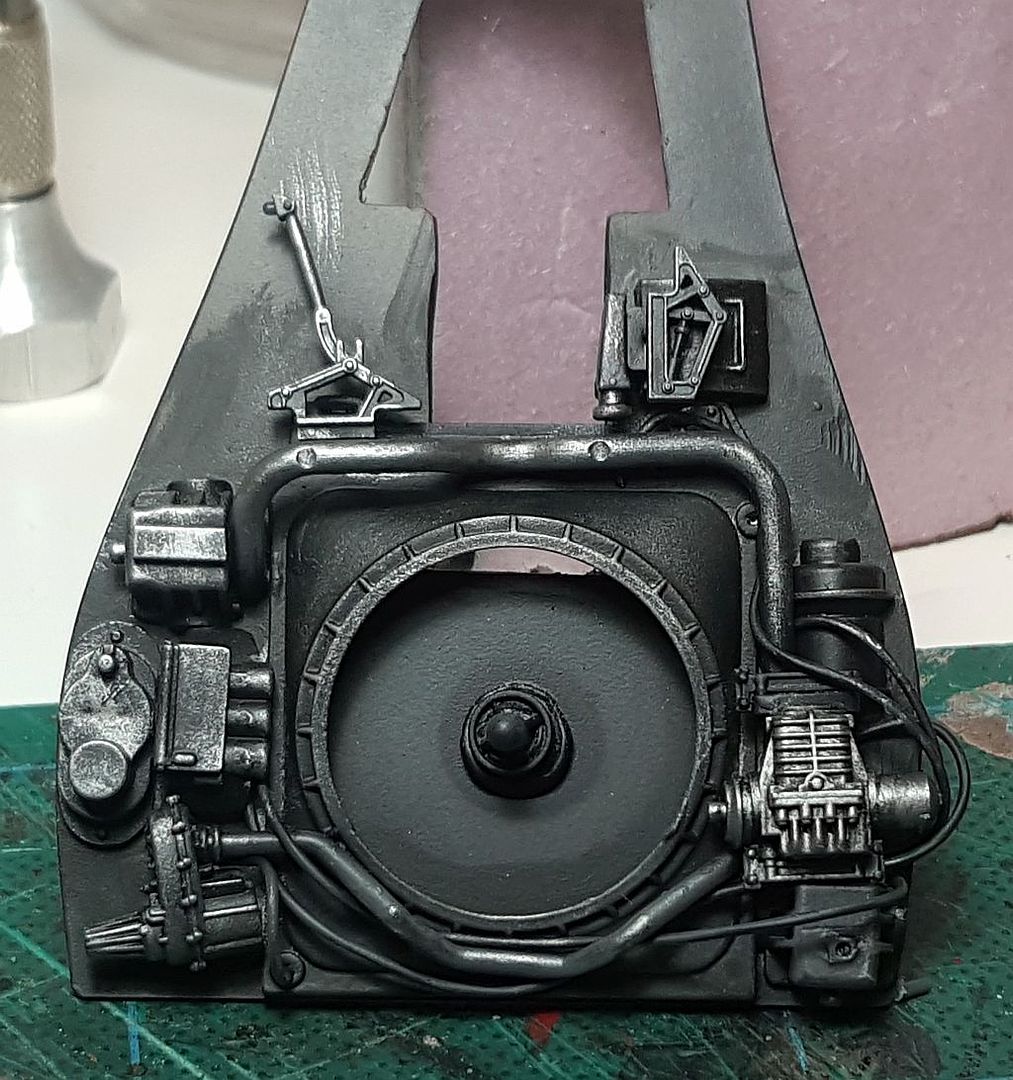
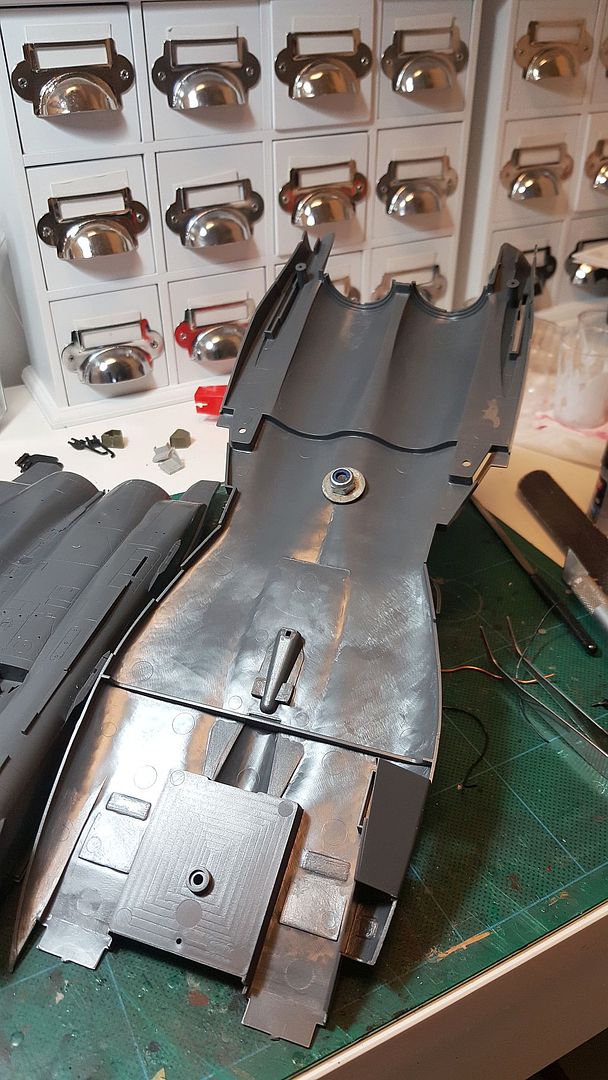
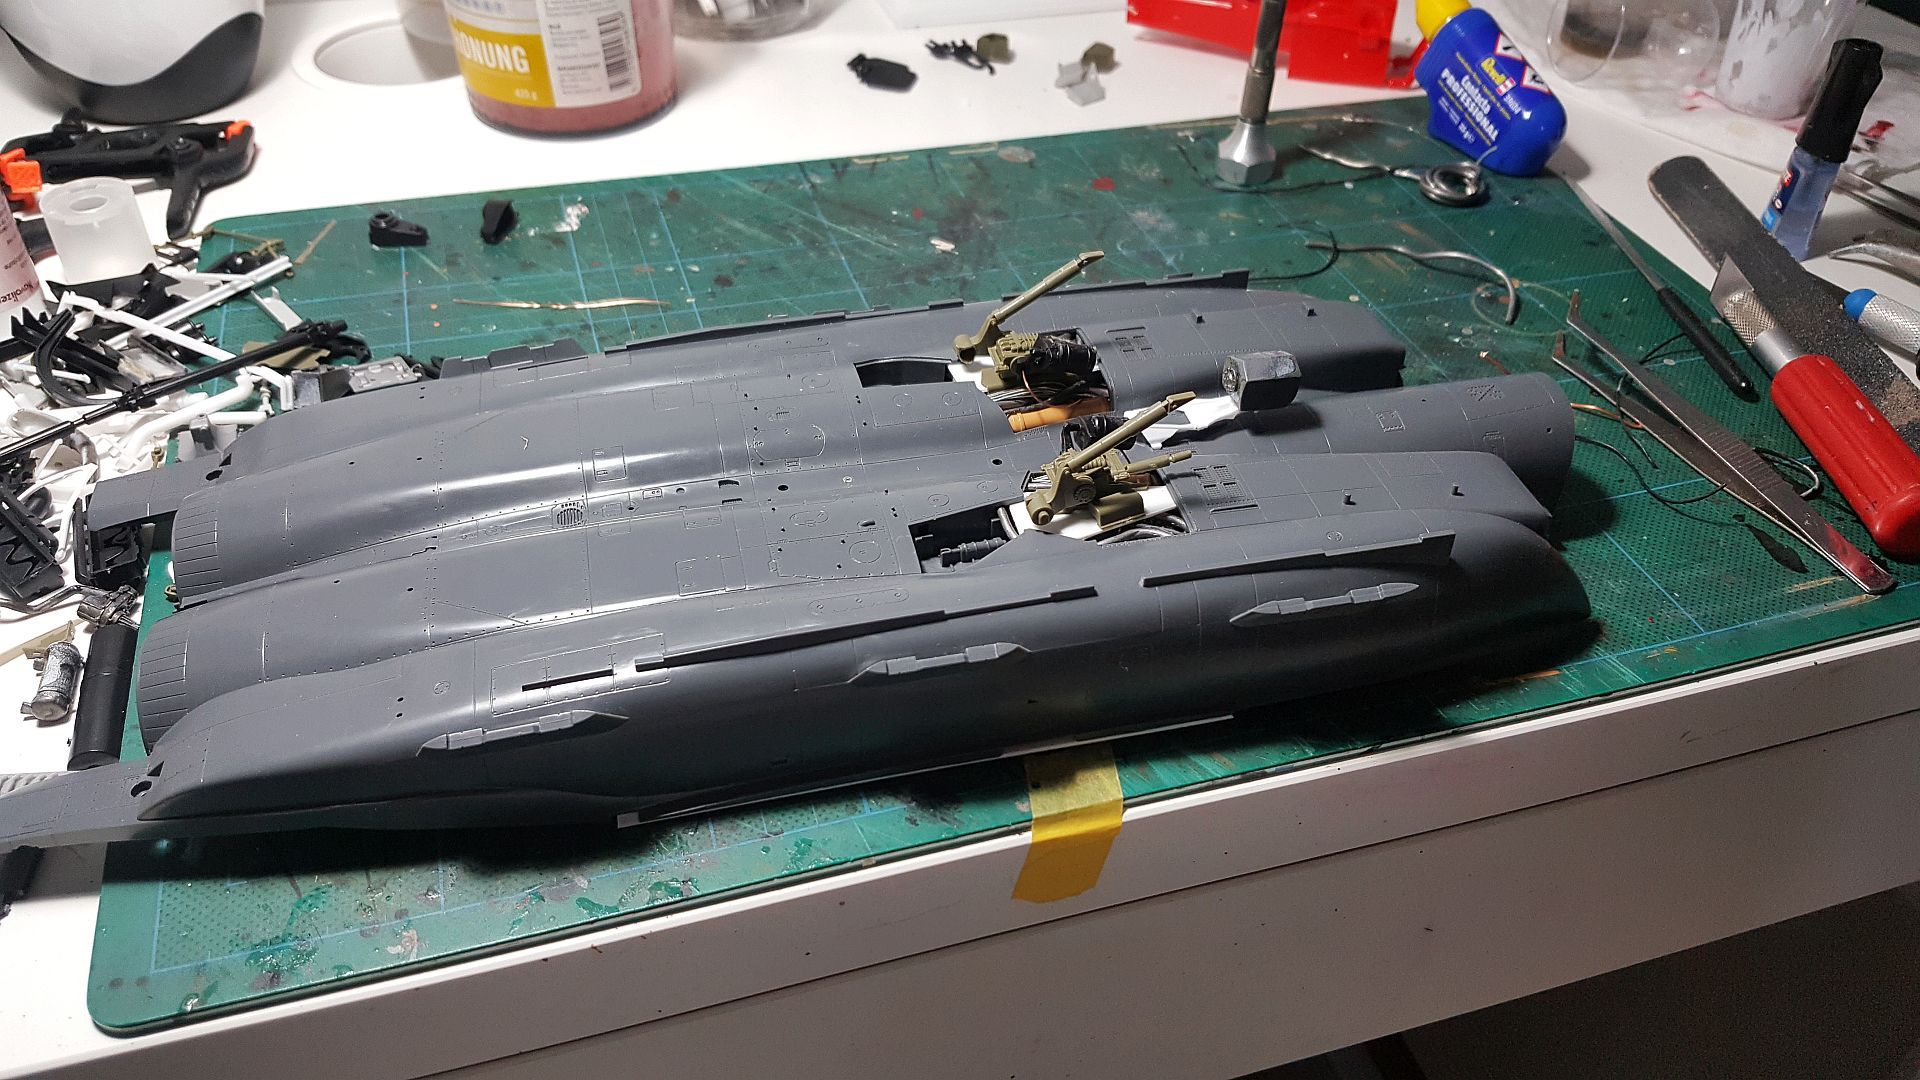
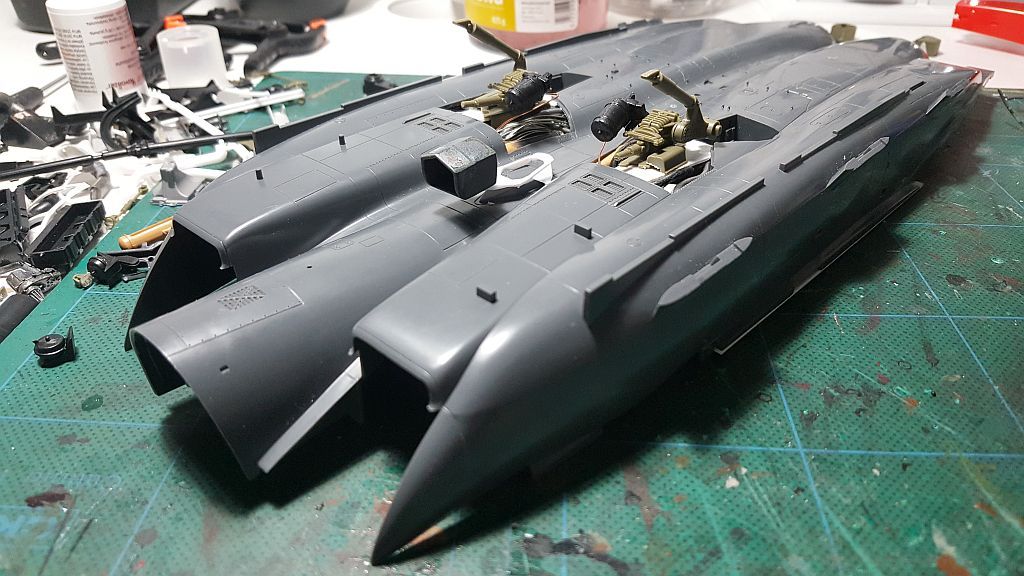
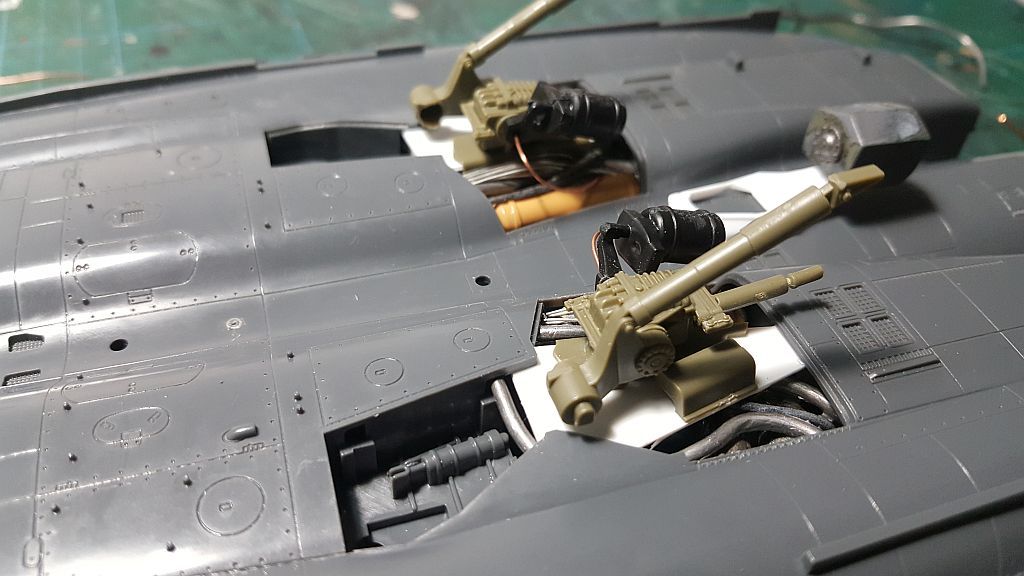
3. This will be the body of the engines. Or should I say the fuselage. As you can see, I've already started adding the details to it. Majority of the parts are taken from other kits. Makes things easy for me, as time is always of the essence.


frame_a_pod_racer_extreme_zpsxllq3sj8.jpg


frame_ab_pod_racer_extreme_zps4xjvbnoo.jpg


pod_racer_extreme_zpsfeti5ywe.jpg


pod_racer_extreme3_zpsfrdfgctn.jpg


pod_racer_extreme2_zpsr0jbhyzh.jpg
 

tiking

SMF Supporter
Joined
Jul 18, 2006
Messages
1,337
Points
113
First Name
Charles
Adding the small details. The small details makes the electro attachments (not sure what they are called. I am just going with the flow) come to life. Added some styrene in certain areas.


pod_racer_extreme9a_zpseztbmioa.jpg


pod_racer_extreme9b_zpsoc0wpzbu.jpg


pod_racer_extreme9_zpsmjfp4mtr.jpg


pod_racer_extreme9c_zpsrqcyx55d.jpg
 

tiking

SMF Supporter
Joined
Jul 18, 2006
Messages
1,337
Points
113
First Name
Charles
I'm going to add some bits and pieces at the rear of the fuselage, to make it look busy.


pod_racer_extreme7_zpsov66xx9n.jpg


pod_racer_extreme6_zps6cf3nbtr.jpg


Added short oval shape styrene on both sides of the fuselage for a total of 6 short lengths.


pod_racer_extreme4_zpssgselw52.jpg
 

tiking

SMF Supporter
Joined
Jul 18, 2006
Messages
1,337
Points
113
First Name
Charles
Some more exterior detailing on the fuselage. Styrene stripping on the sides lading up to the front. Added parts from a missile at both front corner ends of the fuselage.


pod_racer_extreme8_zpshqb1zphb.jpg


pod_racer_extreme10_zpsb5kdzu4d.jpg


Added a couple details under the both sides of the fuselage. I will not be adding a lot of details on the bottom as it will not be easily visible for viewing anyway. I also think the amount of detail on the fuselage already as it is on the underside is just right and does not need too much attention.


pod_racer_extreme21_zps2dg2o29p.jpg
 

tiking

SMF Supporter
Joined
Jul 18, 2006
Messages
1,337
Points
113
First Name
Charles
These will be air and maintainance vent panels, which will be displayed open, to display some of the details inside. These are just the original F-15E doors that came with the original fighter plane, as you plane enthusiast might already know what I'm talking about.


pod_racer_extreme13a_zpswsfw2qak.jpg


pod_racer_extreme13_zpsscip8bvu.jpg


I've already painted on of the panels to test how it will look.


pod_racer_extreme13b_zpsagygnhun.jpg


-----------------------


These particular panel doors were taken from a stryker model. I seem to have lots of these parts lying around back when I was scratch building AFV models.


pod_racer_extreme22_zpsfqqtcagz.jpg


-------------------------


The braking flap. This will be left in the open position as to give the entire model character when it finally placed on its mounting baseboard.


pod_racer_extreme26_zpsfppcpqj4.jpg
 

tiking

SMF Supporter
Joined
Jul 18, 2006
Messages
1,337
Points
113
First Name
Charles
8. Did some more detailing at the rear to cover up that flat piece of styrene I had added to fill the huge gap in the fuselage. Added some bits and pieces to make the rear end look busy enough to keep the viewer interested.


pod_racer_extreme14_zpsimyffcrk.jpg


pod_racer_extreme15_zpsuuzhkr20.jpg
 

tiking

SMF Supporter
Joined
Jul 18, 2006
Messages
1,337
Points
113
First Name
Charles
9. I had to find a way to conceal those two exhaust vents out the back without getting too intricate with the overall look. So I opted to add some sort of vent metal meshes then make some covers to cut direct view into the exhaust. So I came up with these two methods you see in the pics below.


pod_racer_extreme16_zpsmqafzthu.jpg


pod_racer_extreme17_zps22394cnq.jpg


These will be the vents angled downwards. I added a little mechanism to both sides to give the impression that the vents can be folded upwards at right angle for a horizontal exit.


pod_racer_extreme5a_zpsfsbjmytu.jpg


The covers added:


pod_racer_extreme5b_zps3vwberfq.jpg
 

tiking

SMF Supporter
Joined
Jul 18, 2006
Messages
1,337
Points
113
First Name
Charles
I know it is not much of an interesting topic or theme but, it's a build that will not take me lots of time to do. If you are a Star Wars fan then this might interest you but if not; then it might not be of interest. Just consider this a time killer. :smiling3:
 

tiking

SMF Supporter
Joined
Jul 18, 2006
Messages
1,337
Points
113
First Name
Charles
I like the slow subtle ..."looks interesting'' line. :smiling3:
 

tiking

SMF Supporter
Joined
Jul 18, 2006
Messages
1,337
Points
113
First Name
Charles
10. I have already started working on the pod itself. It has already been painted(my apologies. Stress for time). I used a Tamiya F60 Ferrari as the base for my pod. The design was just what I wanted. After all, why go throught the effort of scratch building when avaible models will do half the job for you. For me, what whatever works, use it. That's how the Millinium Falcom was built. The color used is a Automotive base coat reddish color. My choice of color is going to be this color, white and black.


pod_racer_extreme19_zpsdprinr1k.jpg


pod_racer_extreme20_zpsrf0pbjya.jpg


pod_racer_extreme20a_zpssvoclubg.jpg


pod_racer_extreme20b_zpsd0mnqhub.jpg


pod_racer_extreme20c_zpscwdk4yvx.jpg


tiking

SMF Supporter
Joined
Jul 18, 2006
Messages
1,337
Points
113
First Name
Charles
11. I made my own seatbelts by using yellow tape from Tamiya, but we all know its made for Tamiya by scotch brand tape. Very please with it too. I used the one with the smaller width.


seatbelt_prepping_tape_cutting_zpslr9w2lyz.jpg


seatbelt_prepping_zpsuyv12gtw.jpg


seatbelt_prepping3_zpsxejvr3p4.jpg


seatbelt_prepping2_zpsxepiwqkw.jpg


seatbelt_mounted_zpsgjvnsymu.jpg


tiking

SMF Supporter
Joined
Jul 18, 2006
Messages
1,337
Points
113
First Name
Charles
12. These parts will be add around the pilot compartment. These are parts taken from old bike kits. I know. Somtimes I just buys kits that has potential of being doner kits.


pod_racer_extreme24_zpspvqxcaah.jpg
 

tiking

SMF Supporter
Joined
Jul 18, 2006
Messages
1,337
Points
113
First Name
Charles
13. This is gong to be the jet propulsion that will be added to the back of the pod. I got it from another jet fighter doner. See. These doner kits are paying off.


pod_racer_extreme23_zpsqw1coyxu.jpg


How it looks installed. Not looking all that great but inside of this is not so trivial to the end results.


bottom_exhaust_plate2_zpshmry2hto.jpg


pod_racer_extreme23a_zpsurz9vpj0.jpg


pod_racer_extreme23b_zpsmox6fxlw.jpg
 

tiking

SMF Supporter
Joined
Jul 18, 2006
Messages
1,337
Points
113
First Name
Charles
14. Now due to the underside of the jet exhaust not completly clearing the bottom of the pod, it sticks out some millimeters from the base of the pod itself. So I had to find a way to accomodate the bottom plate that will cover the bottom half of the pod. So I came up with this idea. I just took a piece of styrene and cut it according to the curvy design of the bottom half of the pod, and  then measured the width and length of the jet exhaust and cut out the area around where the exhaust will be. The result is what you see below:


bottom_exhaust_plate_zpscxfcu2we.jpg


My free hand cutting was not perfect but all this will be hidden in the final results.


bottom_exhaust_plate3_zpslqcj2ovc.jpg


bottom_exhaust_plate2a_zpsfre5lryu.jpg
 

tiking

SMF Supporter
Joined
Jul 18, 2006
Messages
1,337
Points
113
First Name
Charles
15. Here are the parts that I've laid out, trying to decide what to use for the Electro Attachments on the pod. These will be connected by a long cable to the the engines itself. I wanted something cool, simple, yet high-tech looking. So I had to puzzle the parts to together and this is what I came up with.


pod_electrical_connectors_zpsesrnxsen.jpg


The parts I chose to reprent the Electro Attachments.


pod_electrical_connectors_a_zpsrqlpmszh.jpg


Here are the parts disassembled and assembled just to give you an idea of the pieces involved.


pod_electrical_connectors_c_zpsfd3ygtmj.jpg


Now the assembled piece. There will be one on each side of the pod.


pod_electrical_connectors_bc_zpsn6jvt49q.jpg
 

tiking

SMF Supporter
Joined
Jul 18, 2006
Messages
1,337
Points
113
First Name
Charles
16. Slowly adding the parts to the bottom half of the rod. Choosing odd bits of small components does bring alive the under half of this pod. 


bottom_exhaust_plate4_zpsdfgdw408.jpg


bottom_exhaust_plate5_zpsq1gaqro4.jpg


tiking

SMF Supporter
Joined
Jul 18, 2006
Messages
1,337
Points
113
First Name
Charles
17. Did some painting of the bottom engine half of the pod. I think it's starting to look like a machine rather than lots of plastic. Well, that's just me, trying to be positive. :smiling3:


bottom_exhaust_plate6c_zpshqpihzqv.jpg


tiking

SMF Supporter
Joined
Jul 18, 2006
Messages
1,337
Points
113
First Name
Charles
18. Took the fan from a left over truck build. Since I build trucks, I have a few of these lying around. Painted it black and dried brush it with silver. I am pleased the way it came out.


bottom_exhaust_plate6_zpsedz0c99h.jpg


bottom_exhaust_plate6a_zpszeeskijg.jpg


bottom_exhaust_plate6b_zpsjjq2ra3f.jpg
 
Top