You are using an out of date browser. It may not display this or other websites correctly.
You should upgrade or use an alternative browser.
You should upgrade or use an alternative browser.
Trumpeter 1/35 BTM-3 High Speed Trench Digger
- Thread starter Dave Ward
- Start date
John,looks a class kit that camo looks class if you go for it and the start of all armour kits i hate the most wheels wheels
the running gear is the most tedious part of any tracked build, I like to get it done first, so you can get to the interesting bits. The individual track links are the really boring bits - I get some good music on Spotify and just go into auto mode! The camo version looks good, but I reckon it would distract you from the complexity of the beast
Dave
I get that completely Dave. My 263 armoured car if finished last year would have looked great with the aerial array deployed…..trouble is it would have been far too tall for the cabinet. Looking at the video again, it struck me exactly how useless this think would be in deployment. Apart from your comments about hills and soils, the resulting trench is no good for occupying troops. It is too long and straight. Great for laying pipes and cables, but ineffective for military defence. Any artillery round dropping in the trench would simply expend its destructive force along the works until that force ran out. Usually trenches zig zag to contain explosions and minimise this effect.……still a great looking piece thoughTim,
I'm seeing how the model goes, I don't have to make a decision about bucket wheel up, or down until near the end of assembly. One of the major problems with showing the beast in operation is the sheer size needed, not only long & wide, but deep as well..............
Dave

Last edited:
Caustik Filth
SMF Supporter
That's a wild beast in action Dave, looks like it's picking up your mojo flow already, even with ya airflow blow out!
Keep it comin!
Keep it comin!
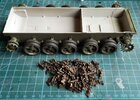
Having separate tyres for the road wheels certainly speeds things up, no careful painting, or tedious masking!
View attachment 466021
Road wheels glued - Sprockets & idlers dry fitted, ready for the track links - I've desprued half of the links, ready for the dreary job of assembling the runs.
Dave
I don't know why all kits aren't made with separate tyres. Manufacturers nowadays seem to think that breaking kits down into 47 zillion parts is the future. Adding the 20 extra parts in this kit is such a marginal difference to the total of 770.
It wouldn't surprise me to find that one day a manufacturer has done a version of this with individual links for all the chain drives!
A couple of hours' steady work has broken the back of the track marathon - I've done both bottom runs, the links round the sprockets & idlers, a few runs for roadwheel/sprocket/idler & made a start on the top runs.
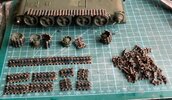
As a wind-down, I've taken all the links off the sprues. I'll finish off the top runs & prime all the tracks. Had enough for today, time to sit back & relax. Hopefully the chassis will be complete tomorrow & I can move up to the more rewarding bits....................
Dave

As a wind-down, I've taken all the links off the sprues. I'll finish off the top runs & prime all the tracks. Had enough for today, time to sit back & relax. Hopefully the chassis will be complete tomorrow & I can move up to the more rewarding bits....................
Dave
Valeron
SMF Supporter
An interesting looking beast. I'll be following this with interest.
Mike
Mike
Instead of using my normal use of Tamiya Extra Thin, I decided to give this a try ( passed on from my brother, who couldn't get on with it ).

It's very thin & has a tiny brush applicator. Initially I was quite happy, but after assembling track runs & allowing to dry, I found that they were very fragile & came apart with minimal handling. I reverted back to my usual TET! The Mig glue will be OK on bits that aren't handled during assembly - not these...................
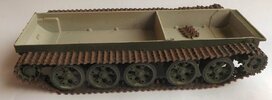
By using the sharpest sprue cutters, there will be no clean up on the links. They fit together well ( not workable ) & stay put until the glue is applied.
The chassis still has some tow cables to add, but they will be put on in the final assembly - this can now be put aside & tomorrow I'm moving onto the cab.
Dave

It's very thin & has a tiny brush applicator. Initially I was quite happy, but after assembling track runs & allowing to dry, I found that they were very fragile & came apart with minimal handling. I reverted back to my usual TET! The Mig glue will be OK on bits that aren't handled during assembly - not these...................

By using the sharpest sprue cutters, there will be no clean up on the links. They fit together well ( not workable ) & stay put until the glue is applied.
The chassis still has some tow cables to add, but they will be put on in the final assembly - this can now be put aside & tomorrow I'm moving onto the cab.
Dave
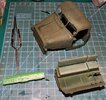
The cab appears, not many parts, but painting will be a bit tricky, as there are decals not only for the dashboard, but for placards on the cab rear wall
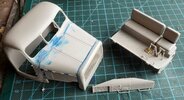
The MiG Ammo blue cement is very thin & goes through a joint in a flash!
I commented in an earlier post that the engine was incomplete without a cooling system - this was spotted on Scalemates.............
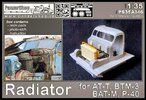
Can't say I'm interested, - there is also a massive Voyager PE set for the BTM-3 - at £42 + p&p - looks a little over the top!
Dave

The MiG Ammo blue cement is very thin & goes through a joint in a flash!
I commented in an earlier post that the engine was incomplete without a cooling system - this was spotted on Scalemates.............

Can't say I'm interested, - there is also a massive Voyager PE set for the BTM-3 - at £42 + p&p - looks a little over the top!
Dave
Cab is now finished & can be put aside..............
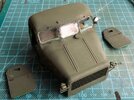
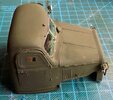
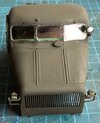
I've left the windscreen wipers off, I may need to mask the windows for final oversprays. I may leave one of the doors open, so they're loose.
I couldn't resist a bit of dry fitting..............
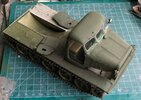 It's big.................. the frame & bucket wheel won't add much to the width, but height & length?
Now onto the really interesting bits!
Dave


I've left the windscreen wipers off, I may need to mask the windows for final oversprays. I may leave one of the doors open, so they're loose.
I couldn't resist a bit of dry fitting..............
 It's big.................. the frame & bucket wheel won't add much to the width, but height & length?
Now onto the really interesting bits!
Dave
This is a complicated kit, and at times the instructions don't seem to reflect the parts, or the best way to assemble them
For all the chain drives ( all made the same way )
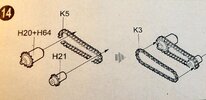
Which would be fine if the sprocket teeth fitted into the chain - but they don't - I trimmed off the teeth in the area where it is in contact with the chain.
The instructions would have you assemble the bucket raise/lower drive as one assembly
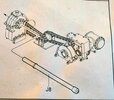
then fit it to the decking...............but there's no positive fit between the parts, apart from the fragile chains, so I'll assemble it on the decking, rather than try to get it right in one piece
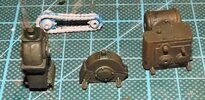
One thing that is thankfully correct is the part numbering - the two large frames look the same, but they aren't, there are subtle differences, so take care to keep the parts separate
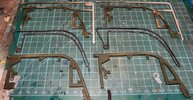
The chain drive ( middle parts ) is sandwiched between the two halves of each side frame - I've prepainted these, as it'd be a tricky job, painting after assembly.
This is a challenging build, but I have to say I'm enjoying it - it's not a shake 'n bake model, far from it, I'm thinking this has really given the mojo a real boost!!
Dave
For all the chain drives ( all made the same way )

Which would be fine if the sprocket teeth fitted into the chain - but they don't - I trimmed off the teeth in the area where it is in contact with the chain.
The instructions would have you assemble the bucket raise/lower drive as one assembly

then fit it to the decking...............but there's no positive fit between the parts, apart from the fragile chains, so I'll assemble it on the decking, rather than try to get it right in one piece

One thing that is thankfully correct is the part numbering - the two large frames look the same, but they aren't, there are subtle differences, so take care to keep the parts separate

The chain drive ( middle parts ) is sandwiched between the two halves of each side frame - I've prepainted these, as it'd be a tricky job, painting after assembly.
This is a challenging build, but I have to say I'm enjoying it - it's not a shake 'n bake model, far from it, I'm thinking this has really given the mojo a real boost!!

Dave
Very nice Dave, and you managed to get those chains off the sprues in one piece. That I would have thought would be one of the hardest parts of the build up to now.

