Right then.
First you are going to need some wire and a pin vice.
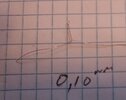
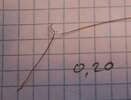
Here I have some 0,2 mm and some 0,1 mm copper wire, The hook in the pin vice is just a bit of 0,8 piano wire. It could be any size you like. Just make sure that the end is smooth so you can take the eyelet off once twisted up.
View attachment 447603
Start by bending the wire into a U over the hook. Do not make a loop!
View attachment 447606
Then grip the ends between thumb and finger. TIGHTLY.
View attachment 447607
Could not hole the wire, the pin vice and the camera, lol.
With the hook in the bend of the wire...
View attachment 447608
Turn the pin vice and the tails will twist together. Five or six turns are more than enough but make them as long as you like. they will need trimming anyway.
View attachment 447609
If you daisy chain them as above, you can make a load and cut them off as needed. Trust me its a lot easier to find the string of them WHEN it falls on the floor, than it is finding a single eye.
IMPORTANT!
Hold the wire as close to the hook as you can when you twist them up, then the eye will be neat and round and the twists even. If you get this:
View attachment 447610
You are holding them to far from the hook and the twist starts from the bottom. Twisting it more to get the eye round and the twists even normally results in a break.

A cup of coffee if that's your thing, a couple of bits of wire and you can knock 50 or so off in no time.
You can make them as thick or thin as you like, just be sure that the hook is beefy enough if you get near the 1mm mark in wire. And softening copper the wire helps.
Good sources for wires:
Any old electrical appliance with a flex, or "soft" cable. As for the fine wire, small electric motors and gauges are a good thing not to throw away.
I will just throw this in while I'm here cable! I got really miffed at the moulded cable in kits ot the string that you sometimes get in for example
Tamiya armour.....
Find some fine wire, 0,1 works good for thinner cables, 0,2 for heavier ones.
As I am doing a rewire, I have loads of odd bits of flex from lights getting changed. The flex is great for this kind of stuff.
Start bu stripping the insulation off:
View attachment 447611
It's a good idea to leave the last cm on as it keeps the strands in one place!
View attachment 447612
Here I am using three strands and making three cords. If making a long cable I use a small electric screwdriver, but I did this one with the pin vice.
Make the three cords by twisting the three strands together. Hold the other end in a plires or a vice and twist CLOCKWISE until the whole length is wound tight.
Take the three cords and put them all on to the hook and hold them firmly, close to the hook. Let the other end be free.. Now twist them together ANTI-CLOCKWISE being sure to maintain a grip on the three (or more) cords. Again wind them quite tight.
You should end up with something like...
View attachment 447613
View attachment 447614
The tighter you can get them twisted the more close the throw.
If you like you can splice loop in the end or just double it back through a passable piece of brass tube and glue (or solder) it in place.
Hope this is helpful to some.
@Bobthestug You asked if I have a photo of them in use.
HMS HOOD 1/200
View attachment 447616
This picture show plenty of them. It also shows what happens when you put a lot of non-stretch thread on one yard arm
Please not this was made before they figured out she had a dark grey bottom! (Grrrr).


")