- Home
- Forums
- Group Builds
- The New Group Builds (2017 on)
- The User Created Group Builds
- 2022 Builds
- Papa 695's D.H. Mosquito GB: July - Dec 2022
You are using an out of date browser. It may not display this or other websites correctly.
You should upgrade or use an alternative browser.
You should upgrade or use an alternative browser.
Tony's Airfix Tsetse 1/72
- Thread starter yak face
- Start date
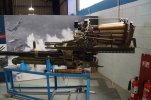
That’s a hell of a gun to put in an aircraft….I wonder who was most scared of it, the enemy or the pilot….Interesting that this version has the cockpit door in the side rather than underneath. I wonder if that was because of the room needed for the Molins loader.
View attachment 459508
Pete
No that was the standard position for the crew door on the FBs pete, on the standard fighter bomber version the 4 cannons were under the floor and obviously on this one the six pounder .Interesting that this version has the cockpit door in the side rather than underneath. I wonder if that was because of the room needed for the Molins loader.
View attachment 459508
Pete
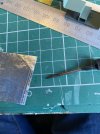
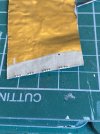
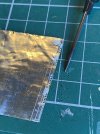
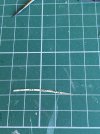
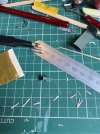
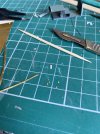
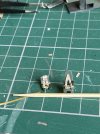
Seat belts - not wanting to spend lots on etch that is not really going to be seen I decided to make them from scratch. Its a method ive used before and gives reasonable results under a closed canopy. First get some wine bottle foil ( gold preferably) . Paint the gold side with the seat belt colour , in this case buff . On the reverse very lightly scribe three or four lines . Use these lines to puncture the foil with a sharp pin to simulate the brass eyelets ( four or five holes close together on the line for the shoulder belts and three or four for the lap ). Turn over and carefully cut the belt to width and rub the raised holes to show the gold of the foil underneath giving the impression of brass eyelets. Glue to the seats the add small pieces of the gold foil to the ends to represent the buckles . End result , a rough approximation of a sutton harness - at this scale through a closed canopy it’ll do . They look a little big but I think thats more to do with the seats being very narrow possibly too small . 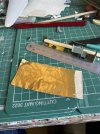
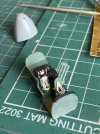
The cockpit has now had the radios and a few cables fitted, the seats and control column have been glued in and its now ready to go in between the fuselage halves.


The cockpit has now had the radios and a few cables fitted, the seats and control column have been glued in and its now ready to go in between the fuselage halves.
- Joined
- Sep 4, 2019
- Messages
- 9,526
- Points
- 113
- First Name
- Andrew
That's brilliant Tony!!Seat belts - not wanting to spend lots on etch that is not really going to be seen I decided to make them from scratch. Its a method ive used before and gives reasonable results under a closed canopy. First get some wine bottle foil ( gold preferably) . Paint the gold side with the seat belt colour , in this case buff . On the reverse very lightly scribe three or four lines . Use these lines to puncture the foil with a sharp pin to simulate the brass eyelets ( four or five holes close together on the line for the shoulder belts and three or four for the lap ). Turn over and carefully cut the belt to width and rub the raised holes to show the gold of the foil underneath giving the impression of brass eyelets. Glue to the seats the add small pieces of the gold foil to the ends to represent the buckles . End result , a rough approximation of a sutton harness - at this scale through a closed canopy it’ll do . They look a little big but I think thats more to do with the seats being very narrow possibly too small . View attachment 459532View attachment 459533View attachment 459534View attachment 459535View attachment 459536View attachment 459537View attachment 459538View attachment 459539View attachment 459540
The cockpit has now had the radios and a few cables fitted, the seats and control column have been glued in and its now ready to go in between the fuselage halves.
Neil Merryweather
SMF Supporter
Genius
Very clever work Tony.. Certainly enhances the effect.
Outstanding work on the cockpit Tony, coming along a treat.
Geoffers
SMF Supporter
Cracking job so far Tony, cockpit is unrecognisable from where you started 
Really like the seatbelt technique too, I’m going shopping later to find some wine with a gold foil top
Geoff.

Really like the seatbelt technique too, I’m going shopping later to find some wine with a gold foil top

Geoff.
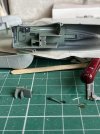
Fuselage now closed up and despite the heavily framed canopy quite a bit is visible. The kit would have you fit the machine guns through the back of the nose before fitting it but this would inevitably lead to them bring broken off during building and paint. I glued a piece of plastic card at the back of the holes and will fit the guns individually after painting.
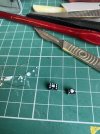
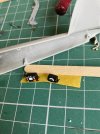
Another area ive been looking at is the nav lights on the wingtips. The kit has them moulded solid - not so much a problem if they were colored green and red light covers but they arent. The ones on the FB XVIII are clear with a red/ green bulb at the front and a clear bulb at the rear. A piece of clear sprue was sanded flat on one edge and holes drilled to simulate the bulbs . Red , green and silver was put into the holes and the clear sprue pieces superglued to the wings after i had razor sawed the solid lights out. Once set the clear sprue pieces were sanded to shape and then it was out with the nail buffers to polish it up to clarity again .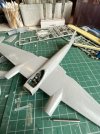
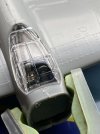
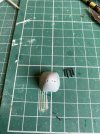
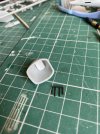
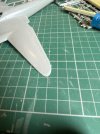
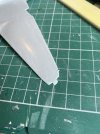
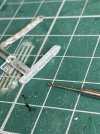
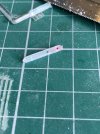
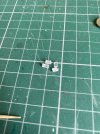
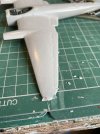
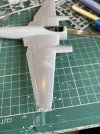
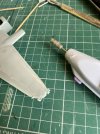
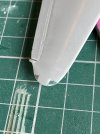
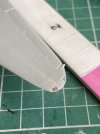
Another area ive been looking at is the nav lights on the wingtips. The kit has them moulded solid - not so much a problem if they were colored green and red light covers but they arent. The ones on the FB XVIII are clear with a red/ green bulb at the front and a clear bulb at the rear. A piece of clear sprue was sanded flat on one edge and holes drilled to simulate the bulbs . Red , green and silver was put into the holes and the clear sprue pieces superglued to the wings after i had razor sawed the solid lights out. Once set the clear sprue pieces were sanded to shape and then it was out with the nail buffers to polish it up to clarity again .


Last edited:
Jim R
SMF Supporter
Those seatbelts are great Tony - and cheap 
Heavens above I hope you don't expect a mere motel like me to produce something as good as this ! Having seen what scale it is mine has none of the kit detail that you have, yet alone the additions.Tony.
Great work .
Great work .
Nice work. The wingtip bulb detail always lifts a build 

scottie3158
SMF Supporter
Some very nice additions, they are what make an ordinary build something special.
Neat work Tony, turing a gem out of an oldie 

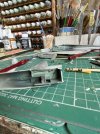
Got the nose fitted and blended in ( carefully so as not to lose the raised detail ) . The engine nacelles have been fitted too , a fair bit of dry fitting and fettling was done to ensure as good a fit as possible ,again so the raised detail wasnt lost if they needed sanding.
Ive been looking at the canopy too, its not quite correct . The mosquito had an internal framework that sits inside the canopy , Airfix have tooled this as raised frames on the outside , plus there are three external frame members that should be there that arent . So out with the scalpel and scrape off the incorrect frames then polish up back to clarity with the trusty nail buffer. . I used adhesive aluminium tape for the missing frames and dipped the canopy in Klear , its now curing in a sealed container to stop any dust falling on it. The inside frame work will be added ( not sure how yet ) before its attached .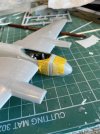
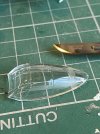
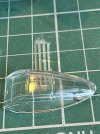
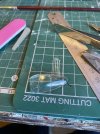
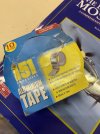
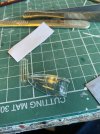
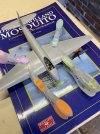
Ive been looking at the canopy too, its not quite correct . The mosquito had an internal framework that sits inside the canopy , Airfix have tooled this as raised frames on the outside , plus there are three external frame members that should be there that arent . So out with the scalpel and scrape off the incorrect frames then polish up back to clarity with the trusty nail buffer. . I used adhesive aluminium tape for the missing frames and dipped the canopy in Klear , its now curing in a sealed container to stop any dust falling on it. The inside frame work will be added ( not sure how yet ) before its attached .


