Airfix 54mm Napoleonic French Line Infantry

Neil Merryweather

SMF Supporter
Joined
Dec 29, 2018
Messages
4,424
Points
113
Location
London
First Name
Neil
Paul, Tim, Doug, Jim, Paul, Mick, Wabble and Steve - many thanks indeed for your lovely comments.

BUT

I just can’t help myself.

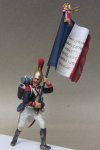
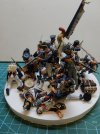
Having FINALLY finished the positively last two figures I started working on the composition, and no matter what I did I just couldn’t make the Deuxieme Porte-Aigle guy work.

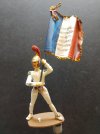
This was my original idea.
Porte Aigle  (2).JPG

He was supposed to be stepping over the downed officer - it kind of works for a stand-alone vignette but I want a really tight and crowded composition and this just needs too much space around it

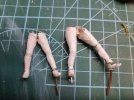
I decided that really only his legs were wrong, so I looked out a new pair of gaitered legs, which meant I had some serious butchery to do, and to an already painted figure. I hated the idea of it but it was driving me mad, so I bit the bullet and broke out the Dremel. Luckily I had stuck his equipment with pva so that all came off without damaging itself or the paint underneath (not that that mattered in the end).
This is what I got

Porte Aigle changed.jpg

In the process though I broke one of the arm joints and the coat tails had to come off and rather than do some crappy re-touching I realised I would rather completely repaint the whole figure. So into the Dettol bath he went - gutted!

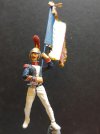
So far so good, but wait- the new legs are Airfix and they’re annoyingly too small for his Historex torso…
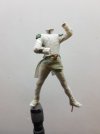
So I set about altering the original legs to the same position

IMG_20240124_191839843.jpg
That’s much better.

IMG_20240125_122857721.jpg

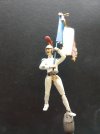
But I don’t want to commit to this pose without checking it with the rest of the composition. I did that and it STILL didn’t do it for me, so I changed the legs a bit more and this is where he has ended up.

IMG_20240125_175056540.jpg

So it’s out with the Milliput again, and another Navy blue jacket to paint! But I’ve come this far and even though I really just want it finished I don’t want something that will niggle at me for ever more.
Sorry!
 

JR

Member of the Rabble and Pyromania Consultant
SMF Supporter
Joined
May 26, 2015
Messages
17,275
Points
113
Location
lincs
First Name
John
Well he certainly look better following major surgery Neil.
Agree with you on the niggling part, there are times when you just have to re do it.
 

rtfoe

SMF Supporter
Joined
Apr 29, 2018
Messages
7,509
Points
113
Location
Malaysia
First Name
Richard
The French Army must be paying a heavy cost on hospitalisation and surgery but well done Dr Neil on this last procedure...didn't even need a new donor for the limbs. Best corrected than having post trauma.

Cheers,
Wabble
 

Neil Merryweather

SMF Supporter
Joined
Dec 29, 2018
Messages
4,424
Points
113
Location
London
First Name
Neil
Right then, Porte-Aigle is ready for paint.
I have used white Milliput for the alterations up to now but I dug out some old Magic Sculpt for this and I much prefer it

IMG_20240130_195107069.jpg

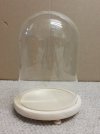
So on with the base. As I said before I want a very tight composition and I also want to have a dust cover so I have bought this

IMG_20240126_173521119.jpg

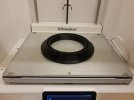
The wooden base is horrible so I have 3D printed a more elegant one in black plastic

IMG_20240127_111007624.jpg

I have been through many variations and arrangements with this and indeed a larger base size but this is where I have landed.

IMG_20240125_152721072.jpg
I don’t mind that the figures are in some cases right up against the glass, as if it ever goes on any kind of display the cover will be off.

IMG_20240125_152712546.jpg

I used a foamboard plate for flexibility whilst experimenting, and I am going to use Sculptamold (which is also a bit too soft) for the terrain itself, so I need something solid to peg the figures into for the final base.

IMG_20240129_161000569.jpg

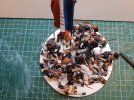
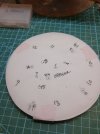
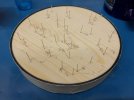
So I have trimmed down the original wooden base and set it into a 3D printed circular tray. I traced the holes and transferred them to the wood and marked them with numbered pins.

IMG_20240129_162936158.jpg

All the standing figures have a single peg and the lying down ones no peg at all, but I soon found that even having many photos it was impossible to remember precisely which way each figure was oriented. With them being so closely packed together the positioning is vital, so I had to add a second peg to the standing figures and two new pegs to the casualties.

IMG_20240130_194647750.jpg

This is to enable me to find the right holes when the landscaping is applied, but I am going to paint the Porte-Aigle first.
 

rtfoe

SMF Supporter
Joined
Apr 29, 2018
Messages
7,509
Points
113
Location
Malaysia
First Name
Richard
The base looks like the back of a hedgehog now but the pegs will help enormously once the groundwork is applied. Good planning Neil.

Cheers,
Wabble
 

Neil Merryweather

SMF Supporter
Joined
Dec 29, 2018
Messages
4,424
Points
113
Location
London
First Name
Neil
The base looks like the back of a hedgehog now but the pegs will help enormously once the groundwork is applied. Good planning Neil.

Cheers,
Wabble
Thanks Wabble, I wish I had planned it a bit better from the start. One thing I am disappointed about is the lack of interaction between any of the guys- it would have been good to have one guy helping another or one falling directly on to another. But it's too late now, that's for next time.
And I still don't know if the pins idea will work as intended...
 

Allen Dewire

Proud Rabble Member
SMF Supporter
Joined
Apr 27, 2018
Messages
4,105
Points
113
Location
Bamberg
First Name
Allen
Afternoon Fred,

Wow!!! I can't believe this is coming down to the finish line Neil!!! Love the Ringo shooting fig too. I can understand you not being happy with the flag bearer and nice to see you got him fixed up the way you want him. Truly outstanding scratchy on all the figs and definitely worth the wait to see them all together...

It looks like they'll be a tight bunch in place and the pin/flag idea is really a great idea. I just wonder how hard it will be trying to landscape around all those pins though. Did you drill the pin holes all the way through the wood or just part of it. I was thinking, (something I don't do often) that if you landscape the other side of the wood platter, and while the mix is drying, to gently push the pins through the base until they came out of the landscaping on top. Then, when it's dried, pull one pin at a time out and re-insert it into the landscape back into the wood. Two factors are involved here...1. have you drilled the holes all the way through the wood...2. Are the pins long enough for you to do it.

Just my 2 Pfennigs worth and maybe this was your idea all along my friend. I really can't wait to see the finished product of all your hard work Neil. I'm also glad you puttied up the flag bearer because in the test fitting, he seemed rather odd standing there with Mr. Happy hanging out...

Prost
Allen
 

Neil Merryweather

SMF Supporter
Joined
Dec 29, 2018
Messages
4,424
Points
113
Location
London
First Name
Neil
Afternoon Fred,

Wow!!! I can't believe this is coming down to the finish line Neil!!! Love the Ringo shooting fig too. I can understand you not being happy with the flag bearer and nice to see you got him fixed up the way you want him. Truly outstanding scratchy on all the figs and definitely worth the wait to see them all together...

It looks like they'll be a tight bunch in place and the pin/flag idea is really a great idea. I just wonder how hard it will be trying to landscape around all those pins though. Did you drill the pin holes all the way through the wood or just part of it. I was thinking, (something I don't do often) that if you landscape the other side of the wood platter, and while the mix is drying, to gently push the pins through the base until they came out of the landscaping on top. Then, when it's dried, pull one pin at a time out and re-insert it into the landscape back into the wood. Two factors are involved here...1. have you drilled the holes all the way through the wood...2. Are the pins long enough for you to do it.

Just my 2 Pfennigs worth and maybe this was your idea all along my friend. I really can't wait to see the finished product of all your hard work Neil. I'm also glad you puttied up the flag bearer because in the test fitting, he seemed rather odd standing there with Mr. Happy hanging out...

Prost
Allen
Allen you are a genius and I LOVE you for it!
No I haven't drilled all the way through but of COURSE that's the answer- many thanks indeed!:cool::cool::cool::cool:
In fact I THINK all I need to do is mark the holes on the underside then I might not even need the flags, although I will put that to the test first.....
 

JR

Member of the Rabble and Pyromania Consultant
SMF Supporter
Joined
May 26, 2015
Messages
17,275
Points
113
Location
lincs
First Name
John
Oh boy that is smart Neil. The wooden base into the printed one id great. Personally think this is up there with your best, the shear No in such a small area is fantastic.:thumb2::thumb2::thumb2:
 

Neil Merryweather

SMF Supporter
Joined
Dec 29, 2018
Messages
4,424
Points
113
Location
London
First Name
Neil
Well the first excellent news is that Granddaughter Penelope finally arrived safe and sound on Saturday 3 Feb.

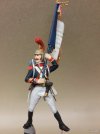
The second news is that Porte-Aigle is painted and ready to join his pals

IMG_20240205_155204391.jpg

And the third news is that I have made a start on the base.

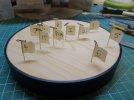
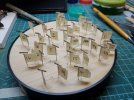
Using Allen’s fine suggestion I poked the pins through from the underside, now it looks like an instrument of torture…

IMG_20240205_145136568.jpg

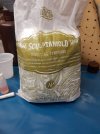
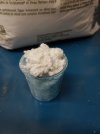
As promised I used Sculptamold, which is a kind of cellulose-reinforced instant papier-mâché.

IMG_20240205_145609410.jpg
IMG_20240205_145724322.jpg
It’s mixed with water and is supposed to set within an hour,

It’s white so I mixed in a large dose of brown acrylic paint, and although there are some bits that don’t take the paint it makes touching up a relatively simple task. The acrylic paint will probably delay the curing time, but that’s no bad thing in this case.

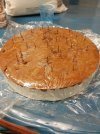
I applied the brown mix with a small palette knife to get in around the pins, and what a pointless exercise that was. Next time I will just shove the pins in afterwards. It now looked like a fetishist chocolate cake.

IMG_20240205_150918261.jpg

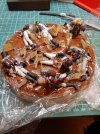
I put cling film over the whole lot and replaced the pins with the numbered flags, starting with the lying down figures. I want them to properly touch the ground. They will require some more work so that it doesn’t look like the Somme , and there is going to be grass but this is the first stage

IMG_20240205_155302006.jpg

I have to say it tells quite a story just like this- oh for some restraint….but I’ve made all the others so they are damn well going on!

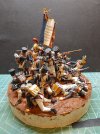
IMG_20240205_172442388.jpg

Every time I take this shot my phone helpfully tells me it’s food…………… :rolling: :tears-of-joy:

I removed as much clingfilm as I dare, although its presence will probably further inhibit the drying time- I will just have to wait and see

cheers
Neil
 

Tim Marlow

Little blokes aficionado
SMF Supporter
Joined
Apr 27, 2018
Messages
16,777
Points
113
Location
Somerset
First Name
Tim
Looks like the best birthday cake to give a modeller …. Also reminds me a lot of Bill Horan’s Gandemak diorama.
 
Top