Good Evening Everyone,
First I must apologize for the late response and a long overdue update. I also must apologize for my lack of commenting on so many fine builds going at the time. I have been on vacation? for 3 weeks, but a lot of personal crap has been going on in my life. Please be patient with the old dude and I will try to catch up with you all ASAP.
Even with all the crap going on, I wish everyone here a Happy New Year and I have gotten some things done on the trailer, but first,
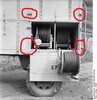
PaulE - Thanks for the pic, but like you said, it doesn't show anything. There is no door in the front and the thingy in the middle is a t-handle of some sort. I still have the option of emailing someone who is writing a book on all the support equipment and vehicles for the V2 battery. Have you gotten any word on your Camaro Yet??? Oh, and I thought it was loud enough when your ears started to bleed...
Steven - Thank you for following Sir and I hope it only gets better as I go...
Stevie - Hey Buddy, I'm giving it all I can and I'm glad you like it so far. Been practicing your swing with the 3 wood in the backyard of the Plymouth???...
Andrew - Thanks Sir! You're doing a heck of a job yourself, Etch King! Gotta catchup on your fine work...
Joe - Hey my friend, I hope you and the family are all safe and healthy in uptown Ohio, or is it downtown Ohio, Thanks much and it's just the good German beer that helps keep me going...
Jim - You are to kind Sir! Trust me, the madness has, sort of, just begun. Please see below and take care...
After all the nonsense with tires and reels, I decided to make a start on the trailer chassis to catch my breath. First off, the kit trailer only has the re-enforced frame cross beam on one end. That needed a fix,

Out with some sheet plastic and using the other end as a guide, I made a piece to re-enforce the other end. I had to hit the one side with some putty to get the angle correct, but it worked out. I'll coat it with some Mr. Surfacer 500 and then sand it back again. Then I went to work building the front axle assembly,

I found that the air tank was too long and I had to saw out about 3mm to fit the air pipe to the air junction box I scratched on the left side,

That looks better. Luckily, after researching for a few hours, I found a brake diagram from the original 5 ton trailer handbook and found that I needed to modify the brake drum actuating arms in the middle, on the axle, from what was in the kit. Done...Then it was on to the back axle components,

Heavy seam lines made this a lot of fun, but we finally got everything cleaned up. The trailer hitch lacked the lever to raise the pin, so I added that. Here you can better see the modified brake actuating rods and the piece I had to remove between them (the V). The 2 little arms go up to the air operated piston to work them. The brakes were of the normal type operated by air pressure. Anyway,

The trailer chassis (before I added the pipe on the air tank). Everything lines up pretty good and after it gets painted, I can add the air lines and the electrical wiring for the lights etc...Now onto something different, really different. After getting my order of new
Evergreen plastic rod, I broke out the chopper and started chopping up bits,

These are the towing hand bars for the carts. They are out of 1mm rod and the curve was formed using my thumb and first finger. The T-handles are from 0,064 rod. You may ask why I have made 3 of them. I need the third one for my Steyr generator wagon that's in rebuild at the moment. So, while going blind and slinging glue, we had these,

Now, we need to make the main cart frames. The cart frame will be made from 1,2mm rod and I needed two 90° angles. Oh, wait....I forgot to show you what I am trying to make here,

The thingies that are hanging on the back.....Sorry that I can't make the pic bigger! Now, where were we......Ok, making the frames. I tried bending the rod using hot water. Nope! Then with hotter water. Nope! Boiling water didn't work either. Time for a cold one and a think.....I needed constant heat and no open flame and I don't own a hair dryer. Bang, I do have an old soldering iron from my R/C car racing days when I made my own battery saddle packs. Hasn't been used since the 90s, but it was worth a try. It worked and dumb me for got to take pics of the finished pieces. I made axles and found 2 pieces from a Dragon Panther kit which I modified a tad. Glued all the stuff together and here is what came out of it,

Cable reel carts!!! The top one will be in use on the ground and the bottom one will be hung on the back of the trailer. You can see the Panther parts I used for the kickstand, along with a punched out disk for the foot. The kickstand on the top one will be glued on after I finish mounting the reel on the cart. Another pic,

They still need a little clean up and the cable reel rod holder's added. Of course, I have to paint them and the tires too...Next up will probably be making new end walls for the compartments as mine are too short in height. I need to make them 4mm higher, but that's another story........
Thanks for looking in and have a good week. Stay safe and all bla bla good or bad cheerfully accepted...........
Prost
Allen


![athene-6e9o8cji47kukqq9nmr_layout[1] (2).jpg](https://www.scale-models.co.uk/data/attachments/283/283536-66f5e79e07d59417664fbee0521af25c.jpg "athene-6e9o8cji47kukqq9nmr_layout[1] (2).jpg")
.jpg")


![f303t13371p195958n12_ulsgvIGo[1].jpg](https://www.scale-models.co.uk/data/attachments/283/283543-f694f628bd508dc326bb85c924f03421.jpg "f303t13371p195958n12_ulsgvIGo[1].jpg")
![f303t13371p195958n17_CNaeYHQm[1].jpg](https://www.scale-models.co.uk/data/attachments/283/283545-ab74fa78dd8de424bb3e3bb6a691589e.jpg "f303t13371p195958n17_CNaeYHQm[1].jpg")


")
