Neil Merryweather
SMF Supporter
I posted my current freelance project in ‘What’s On The Bench’ a month ago, and I thought some of you might find the process of interest, so I’ve decided to give it a thread of its own.
It is a model for a local architect, and I have created a digital model from their 2D plans with a view to 3D printing most of it. I used Rhino CAD software, which was quite a learning curve, and I spent a fair few hours on the phone to my brother who is a bit of a WIZ with it.
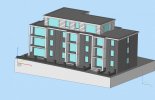
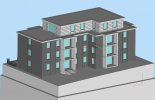
Here's the digital model - the scale is 1-60 (which is a bit of an odd scale), but it’s the biggest we can go to fit on a plinth they already have.
And here's the sample I made of a small section, to test the general concept, the brick pattern and to get the client’s approval of the colours.
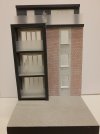
A few tweaks were required but we're good to go with the whole thing now. It will have lights so I've got to sort out the gaps around the window frames.
Incidentally, my airbrush died so it's all sprayed with rattle cans! They like it so I'm going with that for the finished article
My 3D printer is the Elegoo Mars2 Pro resin printer, which is a two, if not three upgrades earlier version of the one @Gary MacKenzie is using in his thread HERE. I’m using Elegoo ABS-Like resin. The printer has a relatively small build volume for this job - 130mm x 82mm x 160mm high, which means I have had to divide the walls up into bite-sized chunks, and they only just fit in height-wise by tilting them…
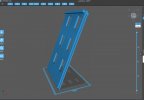
I’ve essentially had to design a model kit of small parts. Here’s a shot of most of them all laid out.
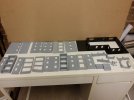
I do have a larger FDM 3D printer (like @Dave Ward 's in THIS THREAD), but it’s not suitable for the level of finish I require for the brickwork, although I have used it to print the roof in two pieces (the black part in the pic above)
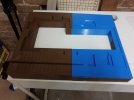
And the base in four pieces.
It will be clad in 1mm styrene for a better finish and to better disguise the joins.
There's more to come but I'll call it a day for now.
cheers
Neil
It is a model for a local architect, and I have created a digital model from their 2D plans with a view to 3D printing most of it. I used Rhino CAD software, which was quite a learning curve, and I spent a fair few hours on the phone to my brother who is a bit of a WIZ with it.
Here's the digital model - the scale is 1-60 (which is a bit of an odd scale), but it’s the biggest we can go to fit on a plinth they already have.


And here's the sample I made of a small section, to test the general concept, the brick pattern and to get the client’s approval of the colours.

A few tweaks were required but we're good to go with the whole thing now. It will have lights so I've got to sort out the gaps around the window frames.
Incidentally, my airbrush died so it's all sprayed with rattle cans! They like it so I'm going with that for the finished article
My 3D printer is the Elegoo Mars2 Pro resin printer, which is a two, if not three upgrades earlier version of the one @Gary MacKenzie is using in his thread HERE. I’m using Elegoo ABS-Like resin. The printer has a relatively small build volume for this job - 130mm x 82mm x 160mm high, which means I have had to divide the walls up into bite-sized chunks, and they only just fit in height-wise by tilting them…

I’ve essentially had to design a model kit of small parts. Here’s a shot of most of them all laid out.

I do have a larger FDM 3D printer (like @Dave Ward 's in THIS THREAD), but it’s not suitable for the level of finish I require for the brickwork, although I have used it to print the roof in two pieces (the black part in the pic above)

And the base in four pieces.
It will be clad in 1mm styrene for a better finish and to better disguise the joins.
There's more to come but I'll call it a day for now.
cheers
Neil
