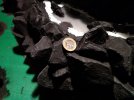
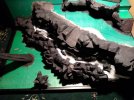
Castle Diorama - Lizard enclousre

Joined
Apr 25, 2022
Messages
19
Points
13
First Name
Mike
Hello
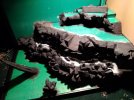
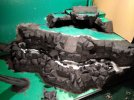
I am a complete newbie in diorama world and I am trying to build a diorama castle to serve as a lizard enclousre. Current progress:
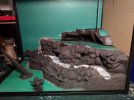
IMG_20220425_224024.jpg
It is made with grout over expanding foam.
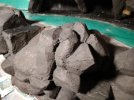
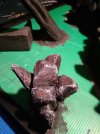
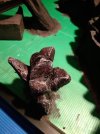
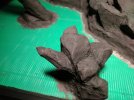
Unfortunately I have been defeated by painting the rock. I tried the wash and drybrushing techniques on the topmost level with appaling results:
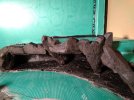
IMG_20220425_224818.jpg
What I would like is to have charcoal rocks with tint of dark red and blue around the ridges. Any tips how to progress would be highly appreciated.
IMG_20220425_224056.jpg

IMG_20220425_224826.jpg

IMG_20220425_224840.jpgThank you

Best regards
Michal
 

Gern

'Stashitis' victim
SMF Supporter
Joined
May 17, 2009
Messages
9,690
Points
113
Location
Stourbridge
First Name
Dave
I take it that this is roughly what you've already tried Michal:


It obviously works extremely well for lighter colours - could you try using dark grey, dark brown and black for your three washes? Mind you, I suspect you've used some more durable stuff than plaster to make the rocks. Maybe the material is not absorbing the colours the same way that plaster does?
 

Mini Me

SMF Supporter
Joined
Jun 1, 2018
Messages
10,159
Points
113
First Name
Rick
Cool video Dave.......gave me a few ideas and I wasn't even looking for a paint tutorial!! Thanks for posting that. :thumb2:
 

rtfoe

SMF Supporter
Joined
Apr 29, 2018
Messages
7,509
Points
113
Location
Malaysia
First Name
Richard
I'm guessing you dry brushed the rocks while the undercoat of paint was still wet which blended the color in. With all that contours to the surface it would be ideal for dry brushed highlights. You can add some green ochure to the undersides and speckle with pale blue green on the upper rock surfaces for lichen growth. You can still dry brush the edges with thicken red and blue paint for your charcoal rick effect. Used the side of the paint brush for this procedure against the edges.

Cheers,
Richard
 
Joined
Apr 25, 2022
Messages
19
Points
13
First Name
Mike
The base is black grout so it can take little but sharp claws. It will have to be sealed with watered down clear PVA glue. I there was no undercoat - I used black grout in case the paint would be scratched off in places.
I will try again then with three washes technique and tomorrow I will try to drybrush the edges with red and blue paint. I think it will best to use the bridge support as test subject as it is easily accesible and has small area for repainting if needed.

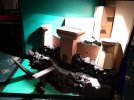
The theme is a castle in the desert probably with a small fantasy theme. The concept is shown below + a full height tower in the corner. I would prefer more slender towers but I need a set height and area for basking. Size is roughly 900x600x600mm.

IMG_20220426_210253.jpg
 

adt70hk

I know its a bit sad but I like quickbuild kits!!!
SMF Supporter
Joined
Sep 4, 2019
Messages
9,491
Points
113
First Name
Andrew
Very cool!!!
 

rtfoe

SMF Supporter
Joined
Apr 29, 2018
Messages
7,509
Points
113
Location
Malaysia
First Name
Richard
Thats high lizard living...lucky fella.

Cheers,
Richard
 
Joined
Apr 25, 2022
Messages
19
Points
13
First Name
Mike
I did the washes yesterday. Unfortunately it did not work out well. I will paint it black and retry the drybruch technique. It might be that there isn't engough detail to actually work with these techniques.
IMG_20220427_205046.jpg
 

rtfoe

SMF Supporter
Joined
Apr 29, 2018
Messages
7,509
Points
113
Location
Malaysia
First Name
Richard
I did the washes yesterday. Unfortunately it did not work out well. I will paint it black and retry the drybruch technique. It might be that there isn't engough detail to actually work with these techniques.
View attachment 452030

If your base is already black, any dark wash will not be seen. What I see is that there are some very light colors in the recessed areas in the rock texture so if you are intending to dry brush a similar light shade then it's going to blend and you won't see any results.

Just in case you might not know let me explain...a wash is basically to darken or add shadows to engraved surfaces or corners and crevices. Dry brushing is the opposite and catches the raised areas of the surface. Anything in between is the base color thus creating a forced contrast and that brings out the detail.

Actually now looking at your rock, you've got the dry brushing in reverse with the black on the raised surface and the sand tone probably the grouting color in the tiny recessed spots.

Working with dark colors at the beginning requires very opaque colors over it to make any difference. A wash would take many layers before seeing any results.

Cheers,
Richard
 
Joined
Apr 25, 2022
Messages
19
Points
13
First Name
Mike
I took your advice and used white and bright red. Unfortunately I have tilted to much in the other direction. Not easy to get the right color balance but it is definitely a step in the right direction. I put a black wash on it to see if I can get it a bit less pronounced - might be once it dries. I think the next step is less reds with a bit of black added and swapping the white with light grey. Also I have to strip the old layers with rotary tool as it started to be glossy.
Withuot a wash (actually it loosk a bit better on a photo than in real life):
IMG_20220429_073359.jpg
With a wash:
IMG_20220429_080558.jpg
 

rtfoe

SMF Supporter
Joined
Apr 29, 2018
Messages
7,509
Points
113
Location
Malaysia
First Name
Richard
I'm beginning to see it taking shape. Most important is that you are happy with the results.

Cheers,
Richard
 

Mini Me

SMF Supporter
Joined
Jun 1, 2018
Messages
10,159
Points
113
First Name
Rick
I think you are getting there Mike Keep 'er going. :thumb2: Rick H.
 
Joined
Apr 25, 2022
Messages
19
Points
13
First Name
Mike
After many trails on small scale I decided to make another atempt this time on the whole set of rocks. I think the probelm with getting good looking paint job is lack of detail on big flat surfaces and lack of small rocks (I need it to be relatively easy to clean). How far from acceptable would you guys consider it?
I settled on charcoal instead of black. I might try to give it a black wash tomorrow to get the recesses darker. I would also want to add some black around the lava moat (the white bits on first level) as burnt rock - should I use couple of layers of washes?
With built in lighting:
IMG_20220502_215343.jpg

With additional light at low level to show the highlighted edges:
IMG_20220502_215421.jpg


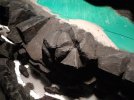
It does not look too good in a close up:
IMG_20220502_220600.jpg
Unless if someone would have some tips how to make it better (as I am out of ideas) I think I will move to the next step - casting stone blocks and setting up the lava river.
 

rtfoe

SMF Supporter
Joined
Apr 29, 2018
Messages
7,509
Points
113
Location
Malaysia
First Name
Richard
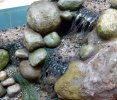
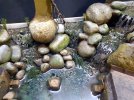
Have you tried painting the individual rocks in different shades of the same color but mixed in with other colors to vary the the one color look it has now. I wouldn't recommend a wash in such a large scale but to paint in the recessed areas and underneath the rocks with darker colors.

E33.jpgE66.jpgE79.jpg
Even with real stones I painted in the darker and lighter highlights and varied the shades. Try it with your rocks.

Cheers,
Richard
 

Tim Marlow

Little blokes aficionado
SMF Supporter
Joined
Apr 27, 2018
Messages
16,775
Points
113
Location
Somerset
First Name
Tim
Hi Mike.
Interesting project here…..First point though, don’t get disheartened….everyone goes through this process until they find a method that works for them. Several things to suggest here…..
Look at pictures of real rocks that illustrate what you are trying to achieve. This gives you a goal to aim at. Try to replicate what you see, not just what you think…..and you will probably see that, when dry, rocks are much lighter than you think….and they are not always grey….
For making a successful colour wash with acrylic paint, you will need flow aid. Water has a high surface tension which can stop it flowing well as a wash. Flow aid breaks that down, enabling the wash to flow where you want. Just diluting the paint with water is not that effective in my opinion.
Dry brushing acrylic paint is hard because it dries so quickly. For something this large I would use a big brush (in modelling terms) like a cheap 1/2 inch paintbrush, and household paint. Colour test pots are absolutely ideal for this, and are far cheaper than artist or model colours. House paint also dries slower than model colours and so is easier to dry brush with.
Painting different rocks different colours, as suggested by Richard, is a good idea. However, I would mix my colours rather than buy different ones, and would always have one base colour used as a starter for the mixes in all cases. This will visually tie the colour scheme together and make it seem harmonious.
Lastly, use you tube….there are some great communicators on there and you can see how it is actually done, rather than try to interpret written text. This guy is worth a look for starters….
The leopard spotting technique is another take on rock painting and may suit this better. I think Mel, in the video above, uses this technique ( I’ve seen him do this somewhere), but if not.. look it up. It gives great results….
Lastly
As always, have fun….you’ll get there despite the set backs….after all, if it all goes wrong you can simply put more paint on…..
 

adt70hk

I know its a bit sad but I like quickbuild kits!!!
SMF Supporter
Joined
Sep 4, 2019
Messages
9,491
Points
113
First Name
Andrew
Hi Mike

Can only second what Tim says about the usefulness of Mel's video he's embedded.

ATB.

Andrew
 
Joined
Apr 25, 2022
Messages
19
Points
13
First Name
Mike
First of all thank you all for the replies. Sorry for a weird format of my reply below but it helps me organize information, think and choose the viable solutions.
I tried using different shades first for large areas, which looked pretty bad and currently I have black and charcoal stones which is better then the previous attempt but not really visible unless you look very closely.
For drybrushing edges I mixed the grey separately for different areas to get different shades throughout - even less visible, probably not worth the extra effort.
As a flow aid for washes I used a drop of washing liquid - it was recommended on some you tube videos about washes. Now I bought dishwasher rinse agent to be used for moulding the stone blocks - I could try to use that.
Unfortunately I cannot use any other paint than non-toxic acrylic paint as this is the only one that is proven to be safe for lizards throughout the reptile keeping community.
The only way forward I can see is to paint the cracks in black and add more shades of black.

So I painted the cracks in black with the smallest brush I had and it did not work - the cutoff between the the crack and the flat surface is too visible and artificial.
I will give it a black wash tomorrow as I have to repaint the whole level anyway.
If that does not work I will try to add some more texture using grout and aluminum foil on one or two stones to see if this is the problem.
If that fails as well I will repaint everyting with 3 or 4 shades of charcoal mixed with different quantities of black. Then drybrush the edges again in gray and probably settle for the result.

As for the youtbe videos I probably spent more time watching than actually painting. This is the one I used as inspiration - looks super simple on the tutorial:
<iframe width="560" height="315" src="
" title="YouTube video player" frameborder="0" allow="accelerometer; autoplay; clipboard-write; encrypted-media; gyroscope; picture-in-picture" allowfullscreen></iframe>
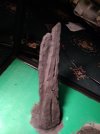
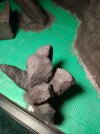
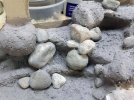
Please notice though that the scale is completely different. I think two rocks are equal to the whole piece from the videos. For reference:
IMG_20220503_215756.jpgIMG_20220503_215715.jpg
 

rtfoe

SMF Supporter
Joined
Apr 29, 2018
Messages
7,509
Points
113
Location
Malaysia
First Name
Richard
Hi Mike, if you keep using black as a base and wash you will get no where but a consistent flat coloured finish however you dilute or thicken the paint. Also if your surface is porous it will absorb all that wash. The grout should cover the cracks. Have you tried sealing the whole surface with PVA before painting?
To be safe for reptiles I would have used drift wood for the base to simulate rock or slabs of dried tree bark that look like rock. Saves on painting and is natural. Everything needs to be pinned down or tacked with nail or wire as glue can be toxic unless you can get natural tree gum.

Cheers,
Richard
 

Tim Marlow

Little blokes aficionado
SMF Supporter
Joined
Apr 27, 2018
Messages
16,775
Points
113
Location
Somerset
First Name
Tim
That last shot looks like you are making progress Mike. Richard is probably right about porosity and your wash, but there are ways around that as well….
Try pre-wetting the surface first by painting it with clean water. Once the area is wet, paint in any deep cracks with dilute paint. You want the paint to be like a heavy wash, not like thin paint (if that makes any sense). The pre-wetted area should allow the paint to diffuse into the surface water at the edges of the stroke, so minimising the hard lines you have been getting before. The water will also stop the substrate soaking up the paint like a sponge.
As to the dry brushing, start with an intermediate shade, not too light, and use the brush slightly wetter so it deposits more paint. This is called overbrushing, or wet brushing, by some people. Once that paint is dry, use a lighter shade on a dryer brush, to bring out shapes and textures. Follow that with a lighter shade still, again on a dryer brush, repeating the sequence until you get the effect you are after. On something that size you really need to be using a quarter inch flat paintbrush or it will take forever….
 
Top