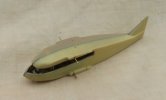
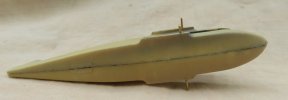
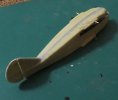
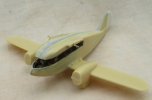
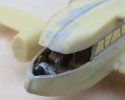
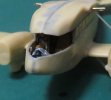
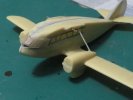
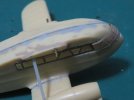
Chris's 1/72 Planet Models Breda Ba.44

Steve-the-Duck

SMF Supporter
Joined
Jul 3, 2020
Messages
1,129
Points
113
Location
Medway Towns
First Name
Chris
Quite a challenge that one Chris, however you are doing a great job with it. :thumb2:
Not as much of a challenge as you might think (unlike a certain Hawker Hector I could mention). Really just a case of adding and 'improving' what's already there.
It really is a nice little kit, and well cast without the typical bubbles you might expect

The REAL challenges are what I've got planned AFTER this...
 
Last edited:

Steve-the-Duck

SMF Supporter
Joined
Jul 3, 2020
Messages
1,129
Points
113
Location
Medway Towns
First Name
Chris
Chris, I'm sorry, I've missed your build and just had a catch up; if you need some help in translating parts of your reference book, I'll be more than glad to help.
Andrea, thank you SO VERY much! Some of it I can just about struggle through with individual words, but others I draw a blank
You, sir, are now officially my hero!
 

Andy the Sheep

SMF Supporter
Joined
Apr 7, 2019
Messages
1,539
Points
113
Location
North Eastern Italy
First Name
Andrea
Sir, I endeavour to give satisfaction, as Jeeves would have said.
I've heroically (:upside:) sent you my e-mail address; feel free to mail me whatever you need to be horrendously translated into something I boast to be English language. :rolling:
 

Steve-the-Duck

SMF Supporter
Joined
Jul 3, 2020
Messages
1,129
Points
113
Location
Medway Towns
First Name
Chris
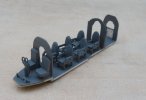
The interior undercoated, with Halfords Grey Primer
IMG_2685.JPG
I can't find any reference to the colours of the interior of Ala Littoria airliners, assuming that, when the 'plane was camo'ed only the outside was repainted. The phot I have shows the interior as VERY shiny. I'm going to go with blue, as Ala Littoria and SAN 'planes had blue markings on the cream (Bianco Avorio) outsides
Or red
The build I've seen by an Italian modeller did the entire interior in brown, but I've no idea what he sourced
 

Steve-the-Duck

SMF Supporter
Joined
Jul 3, 2020
Messages
1,129
Points
113
Location
Medway Towns
First Name
Chris
Well, thanks to Andrea's (Andy the Sheep) translations and 'a guy he knows' we've now made a leap ahead.
I did do a quick paint of the interior in blue and blue-grey, then Andrea pointed me toward the interior being ivory, like the outside. Which does make sense, even if the photo of the interior makes it appear darker (but the windows are VERY bright)
So then...
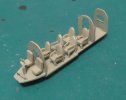
IMG_2707.JPG
A quick spray with Tamiya deck tan, which is a bit darker / browner than most of the Avorio 'chips' but, it's good enough
Now, detail painting
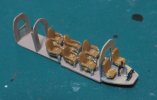
IMG_2708.JPG
Seats sandy brown / leather-like, with Tamiya 1mm tape for seat belts. Have to go over with a matt or semi-gloss just to tone the seats down. Nowhere near as good as the build I've found and ma basing some work on, but satisfactory. Also shows how different it looks from daylight to camera flash
Then, a few additional details into the cockpit, the visible frames and cable runs
IMG_2709.JPG
I've gone over the cockpit with a lighter shade, just to punch it up a bit. The door inside I've added, I've also done lighter so it might just be visible in the back
Still thinking I might cut the door open later, but the visible fuselage thickness might look too much

Almost time to put the halves together
 

Waspie

SMF Supporter
Joined
Mar 13, 2023
Messages
2,467
Points
113
Location
Portland - Dorset
First Name
Doug
Very nice Chris. And a big thank you too. Your mention of tape for the seat belts has given me an idea!!
In the back of helicopters to walk around we used a dispatcher harness. Now you mention the tape thing makes me want to try and make a harness from tape and wire for the D rings etc!! :thumb2:
 

Steve-the-Duck

SMF Supporter
Joined
Jul 3, 2020
Messages
1,129
Points
113
Location
Medway Towns
First Name
Chris
I always use Tamiya tape, usually the 1mm stuff, for belts in 1/72. If I haven't got a specific brass set, that is. Being brown, it doesn't usually need recolouring, though you can paint it before applying. And it's self-adhesive too

Can be just a little fiddly though. But that's what needle-nose pliers are for!
 

Steve-the-Duck

SMF Supporter
Joined
Jul 3, 2020
Messages
1,129
Points
113
Location
Medway Towns
First Name
Chris
Right, we actually have the fuselage halves together
IMG_2710.JPGIMG_2712.JPG
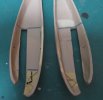
The two sides have come out slightly different sizes, so didn't quite match up, so not the best fit, but a bit of rasping, filling, and sanding and we're there.
IMG_2716.JPG
Thanks be to slow curing cyano

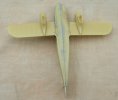
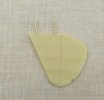
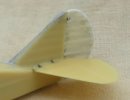
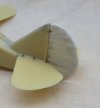
Also, the re-profiled tail is now on, as you can see

IMG_2714.JPG
IMG_2715.JPG
The gap looks worse than it is
Next will be the windows

I've been drilling mounting points in the wings for struts and rigging as best as I can, but it looks like I'll have to attach the lower wings to be able to line stuff up properly. It was always my intent to leave the top wings off as long a possible anyway, but the brass rod pins will hold them in place for alignment
 

Steve-the-Duck

SMF Supporter
Joined
Jul 3, 2020
Messages
1,129
Points
113
Location
Medway Towns
First Name
Chris
So, for my next trick...
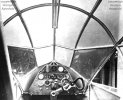
First I took a scan of the photo of the control panel
breda Ba44 cockpit controls.jpg
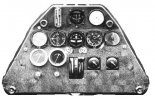
..Manipulated it a bit to get a 'clean' panel
breda Ba44 control panel.jpg
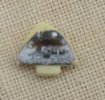
Printed that out at 7% and stuck it on the model piece
IMG_2713.JPG
Yes, the detail is barely visible, but it works. And it'll be almost invisible behind the windows anyway
But it will be there!
 

Waspie

SMF Supporter
Joined
Mar 13, 2023
Messages
2,467
Points
113
Location
Portland - Dorset
First Name
Doug

Steve-the-Duck

SMF Supporter
Joined
Jul 3, 2020
Messages
1,129
Points
113
Location
Medway Towns
First Name
Chris
Cheers Waspie

I may patent this method!

What, there are 3D printed self-adhesive control panels now?
Oh well... My way is cheaper! Just need to add the four throttle levers in the centre now!

Or not
 

Steve-the-Duck

SMF Supporter
Joined
Jul 3, 2020
Messages
1,129
Points
113
Location
Medway Towns
First Name
Chris
Well, it's actually starting to look like a 'plane now
IMG_2717.JPGIMG_2718.JPG

Once again, the drawback with a lot of resin kits like this is no locating pins, just simple butt joints. Although, the mating surfaces are very flat and smooth
Of necessity, though, the tail planes are pinned with brass rod, like the wings
IMG_2719.JPG

IMG_2721.JPGIMG_2722.JPG
Just have to take car in lining up all the holes, as I discovered with the starboard side. The forward pin interefered with the pin to port, then I realised I had the hole in the wrong place anyway

IMG_2723.JPG
One of the biggest troubles with this kit is and will be the struts. While they are all in pairs in the moulding, there's no guide to which goes where other than actually placing them. That and resin struts can be fragile. I will be pinning some of the main struts, probably with .030 or .020 rod, same as i use for rigging. Luckily, I have a pack of old Aeroclub strut material
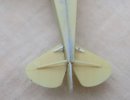
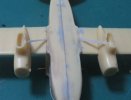
And microstrip, which was used for the forward tailplane supports here. They are entirely missing from the kit, as are two struts that connect the engines to the upper side of the wing and two that support the wheels
Apart from that...

I'm now in the process of fitting the windows, which is turning out to be quite laborious fitting. I'm dreading how the windscreen is going to go

Oh, another shout-out to Andrea (Andy the Sheep) for his absolutely invaluable translation work, advice and pointers. If anyone else does Italian aircraft, it's handy to have a helping hand like his around!
 

Waspie

SMF Supporter
Joined
Mar 13, 2023
Messages
2,467
Points
113
Location
Portland - Dorset
First Name
Doug
Well, it's actually starting to look like a 'plane now
View attachment 502361View attachment 502362

Once again, the drawback with a lot of resin kits like this is no locating pins, just simple butt joints. Although, the mating surfaces are very flat and smooth
Of necessity, though, the tail planes are pinned with brass rod, like the wings
View attachment 502363

View attachment 502364View attachment 502365
Just have to take car in lining up all the holes, as I discovered with the starboard side. The forward pin interefered with the pin to port, then I realised I had the hole in the wrong place anyway

View attachment 502366
One of the biggest troubles with this kit is and will be the struts. While they are all in pairs in the moulding, there's no guide to which goes where other than actually placing them. That and resin struts can be fragile. I will be pinning some of the main struts, probably with .030 or .020 rod, same as i use for rigging. Luckily, I have a pack of old Aeroclub strut material
And microstrip, which was used for the forward tailplane supports here. They are entirely missing from the kit, as are two struts that connect the engines to the upper side of the wing and two that support the wheels
Apart from that...

I'm now in the process of fitting the windows, which is turning out to be quite laborious fitting. I'm dreading how the windscreen is going to go

Oh, another shout-out to Andrea (Andy the Sheep) for his absolutely invaluable translation work, advice and pointers. If anyone else does Italian aircraft, it's handy to have a helping hand like his around!
Nice team work going on between Andrea and Chris as well as a good build. The power of the internet and this forum. :thumb2: :smiling4:
 

Tim Marlow

Little blokes aficionado
SMF Supporter
Joined
Apr 27, 2018
Messages
16,777
Points
113
Location
Somerset
First Name
Tim
Going on nicely Steve. Not for the faint hearted is it.
 

Steve-the-Duck

SMF Supporter
Joined
Jul 3, 2020
Messages
1,129
Points
113
Location
Medway Towns
First Name
Chris
So, 'a challenge' eh?

IMG_2729.JPG
As I mentioned above, these struts are missing entirely from the kit
IMG_2730.JPG
The wheel mounting, which is a separate piece, connects up to those supports

Now, these things are sent to try us. the rest of the struts that ARE there all all in pairs, but, NONE of them were the right size for the struts between the cowlings and the wing root, so, more Aeroclub strut material
IMG_2728.JPG
In retrospect for what's next, fitting these MAY haver been a mistake at this stage
 

Steve-the-Duck

SMF Supporter
Joined
Jul 3, 2020
Messages
1,129
Points
113
Location
Medway Towns
First Name
Chris
Well, the control panel went in fine. No trouble at all. Didn't even need re-gluing
IMG_2727.JPG
Just put a little wiring detail on the back, as it will show
IMG_2733.JPG
But you can also see how tall the control column should not be

And now the fun begins
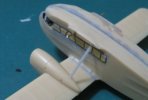
The transparencies are fairly thick, compared to other vac-form canopies I've experienced, and relatively difficult o cut. Or at least the side panels were. And with a lot a LOT of fettling I got them to fit. I picked up some AK Crystal Glue for canopies, as I knew my usual PVA was NOT going to cut it here. Also, my bottle of ACTUAL canopy glue (which looked a LOT like PVA anyway) has vanished from my trays of stuff

The windscreen seemed thinner than the side windows, even though they're all on the same sheet. Fill with blu-tack, carefully slice, then shape to palace
IMG_2734.JPGIMG_2735.JPG
It's not a good fit by any means, and one side popped off every time I got the other in place. So it's stuck, taped, and time top walk away for a bit. There will needs be filler at the top, and i may have to overlay a strip or something at the joins, or the interior will get repainted when I prime and paint.
I'm also dreading removing the masks when I get to it...

Oh yes, and i managed to knock of the bottom of that port-side cowling strut three times while trying to fit the windscreen

Still, we're progressing
 

Allen Dewire

Proud Rabble Member
SMF Supporter
Joined
Apr 27, 2018
Messages
4,105
Points
113
Location
Bamberg
First Name
Allen
Ok Buddy, I just found this one and am also amazed at all the scratchy, dicing, slicing, filling and other black magic arts involved. Pretty easy to do in 1/32, BUT in 1/72???...Tip 'o me hat to you Chris!!! Great stuff and you might just be right about the struts getting in the way later...

Prost
Allen
 
Top