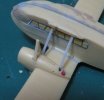
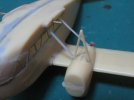
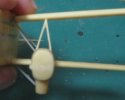
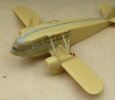
Chris's 1/72 Planet Models Breda Ba.44

Steve-the-Duck

SMF Supporter
Joined
Jul 3, 2020
Messages
1,129
Points
113
Location
Medway Towns
First Name
Chris
Oops, to late on the struts!!!...
Yeah, good job I didn't fit the forward ones. They connect to the base of a V-strut that attaches to the top wing
And, with a little dry-fitting test, the kit parts sit too low and therefore will be too short

Never mind that the only mounting points even marked are on the lower wing. I really don't know if I'll be using ANY of the kit struts

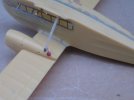
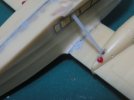
BTW the big holes I've drilled in the side of the cowlings are for the rigging. And going by the photos, my holes are too small!
 

yak face

Wossupwidee?
Staff member
Moderator
SMF Supporter
Joined
Jun 13, 2009
Messages
12,398
Points
113
Location
sheffield
First Name
tony
Stirling work chris , its a real slog and a test of modelling skills for sure . Youre doing a fantastic job , keep at it , cheers tony
 

Andy the Sheep

SMF Supporter
Joined
Apr 7, 2019
Messages
1,533
Points
113
Location
North Eastern Italy
First Name
Andrea
Great job, Chris. :thumb2:
About helping hands: apart from translations, I have a good friend who's the real expert in Italian aircrafts and most of my suggestions and pointers are just a rebound of his encyclopedic knowledge summarized and translated.
I'll report him your satisfaction.
 

papa 695

Moderator
Staff member
Moderator
SMF Supporter
Joined
May 9, 2011
Messages
20,354
Points
113
Location
Doncaster, South Yorkshire
First Name
Ian
Well Chris you have been busy since I last looked at this build. Some fantastic work going on, and looking great. Keep up the Stirling work.
 

Steve-the-Duck

SMF Supporter
Joined
Jul 3, 2020
Messages
1,129
Points
113
Location
Medway Towns
First Name
Chris
Great job, Chris. :thumb2:
About helping hands: apart from translations, I have a good friend who's the real expert in Italian aircrafts and most of my suggestions and pointers are just a rebound of his encyclopedic knowledge summarized and translated.
I'll report him your satisfaction.
And without whom... Cue Oscars acceptance speech. 'Encyclopedic knowledge' of my pet subject, hmm?
There will be questions later
 

colin m

Moderator
Staff member
Moderator
SMF Supporter
Joined
Dec 26, 2008
Messages
8,604
Points
113
Location
Stafford, UK
First Name
Colin
Good heavens Chris, serious work going on here. I admire your tenacity.
 

Steve-the-Duck

SMF Supporter
Joined
Jul 3, 2020
Messages
1,129
Points
113
Location
Medway Towns
First Name
Chris
This does not bode too well
IMG_2738.JPGIMG_2739.JPG
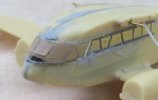
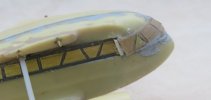
You can see the amount of filler, plus shims, I've had to put in. Haven't smoothed it down yet, but it's not looking great at this stage. I intend to prime with grey, then Insignia white where the fuselage bands and crosses go, plus for the cowlings. Hopefully I won't get too much bleed
I'm not taking off the masks until final painting, so if I then discover the windows have fogged or marked, I might replace with a better fit
We'll see
 

Steve-the-Duck

SMF Supporter
Joined
Jul 3, 2020
Messages
1,129
Points
113
Location
Medway Towns
First Name
Chris
I may have spoken too soon. One step forward, half a step back

First the good bit
IMG_2743.JPG
Added the fuel line mounting and the vent pipe. The first was easy. I will also be adding a pipe to the rear strut that will lead into the top wing. The vents were a pain though. Drill a base, then cut off a sprue end for the round vent pipe base. then do another three because they keep pinging into the ether.
And THEN, the micro drill bits broke off in the holes for the vent pipes, which I was going to use brass rod. So NOW they're just micro-rod stuck on top
Can't see them lasting
 

Steve-the-Duck

SMF Supporter
Joined
Jul 3, 2020
Messages
1,129
Points
113
Location
Medway Towns
First Name
Chris
And now, of course, the step back.
My intention is to build and paint as much as possible before mounting the top wings, then do touch ups. I may also have to do the rigging between the two struts that go from the engine cowlings to the upper wing root BEFORE adding the complex struts on top of the cowling
Fortunately, with the pins in place I can rest attach the top wings to try and fit the struts
That was the idea.
So the port wing requires fettling around the hole to get it to the right height, no real problem. The inverted-V strut at the front of the cowling should be tall enough I've discovered, as long as it mounts high enough. I'll have to tape it in place to work on it.
Okay, so time to try the starboard wing

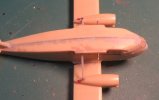
At which point I discover the upper and lower starboard wings don't match up, because the lower wing was canted back. Something I hadn't noticed, and even tried shaving a bit of an angle off the root of the upper wing to align them
So, a quick saw at the front, a short sharp snap, and miraculously none of the struts part, and here we are
IMG_2744.JPG
You can see how much needs filling at the back of the wing
But I'm still progressing enough not to set this aside to join the stalled Hector. And THA|T will be go when I can get hold of the building jig

No, not ready to go on to the Pegasus Fairey Fox JUST yet. And at least THAT one I KNOW in advance how much work I have ahead of me! Lots...
 

Waspie

SMF Supporter
Joined
Mar 13, 2023
Messages
2,467
Points
113
Location
Portland - Dorset
First Name
Doug
Some amazing work there Chris.:thumb2:

Oh, is it just me - BUT. Can anyone else see a similarity to the 'Alien' (Film creatures of the same name). I'm referring to the pics in post 47 above!!! If it is just me I think I may lay off the gin for a few weeks!!!! :smiling2:
 

Steve-the-Duck

SMF Supporter
Joined
Jul 3, 2020
Messages
1,129
Points
113
Location
Medway Towns
First Name
Chris
Some amazing work there Chris.:thumb2:

Oh, is it just me - BUT. Can anyone else see a similarity to the 'Alien' (Film creatures of the same name). I'm referring to the pics in post 47 above!!! If it is just me I think I may lay off the gin for a few weeks!!!! :smiling2:
No, it's just y...

Wait a moment! I can't UN-see it now!

Fortunately, there's no extending refueling probe under the nose or I'd really be worried
 

Steve-the-Duck

SMF Supporter
Joined
Jul 3, 2020
Messages
1,129
Points
113
Location
Medway Towns
First Name
Chris
Well now. Filling that gap seems to have worked out okay
IMG_2756.JPG

So, on with some more strutting
IMG_2757.JPGIMG_2758.JPG
The forward v-strut attaches almost to the front of the top wing. So, I taped the wing on to get it to sit in place... And then managed to get the forward strut in, after much fettling to get to length. Did I mention so far NONE of the kit struts, if I can work out which is supposed to go where, will actually fit? I think I did

Also, you'll notice the vent pipe has, naturally, parted company. Won't be replacing that just yet

So...
IMG_2759.JPG
The top wing is pushed down a bit at the root here, but you get some idea of how much I'm either going to need to gouge out of the top wing for a mounting point, or shave off the top of the struts to get them to fit.
Probably a bit of both
Good job I checked this as i now know how much fettling the rear upright strut, which also carries the fuel pipe, and the intermediate strut that goers between the V and the base of the rear strut, will need to fit. Oddly, the intermediate strut is the only one so far I know for definite where it's supposed to go, because of the angled ends. But it's still too long
A little pinning will be needed
 

Steve-the-Duck

SMF Supporter
Joined
Jul 3, 2020
Messages
1,129
Points
113
Location
Medway Towns
First Name
Chris
Been a while, with all the other stuff doing at the same time (including a secret fourth biplane), but the Breda is back, baby!

Well, I had to take off the v-strut to drill and fix a pin to the top so it would fit into the top wing. Pinning like this is really working out
IMG_2815.JPGIMG_2816.JPG
So, here we are with all the engine struts in place, all shortened slightly to fit, and the fuel feed pipes attached. And I've replaced the vent nozzle
This all took about two hours work
IMG_2817.JPG
Plus, I dug a hole in the top wing for the rear upright to fit into, and drilled all the holes for the outer struts and rigging. And yes, I did have two goes at the mounting hole because the first one had the strut bend out too far. The filled hole will mount rigging now
 

Steve-the-Duck

SMF Supporter
Joined
Jul 3, 2020
Messages
1,129
Points
113
Location
Medway Towns
First Name
Chris
And the starboard wing struts took all of half-an-hour. Talk about a sharp learning curve
IMG_2818.JPGIMG_2819.JPG
And I did use entirely kit supplied struts here!
Don't think I'll be adding the main struts until after the wings are on. That will make the main rigging easier too

You might also see that the starboard v-strut, straight off the moulding sheet, is a little less distorted than the port one, after all the work done with that. It still sits the same height overall tho'!
 
Last edited:

Steve-the-Duck

SMF Supporter
Joined
Jul 3, 2020
Messages
1,129
Points
113
Location
Medway Towns
First Name
Chris
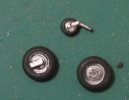
A quick spray of Halfords black primer, some gun metal, aluminium and silver details, grey drybrush, and the wheels are done
IMG_2820.JPG
They'll likely be the last things to go on. There's a rear mudguard, not included, that I'll need to add, which appears to be held on by a long wire bent around it

Now, time for undercoating. Mostly I'll be using Halfords grey, but also some insignia white on the fuselage and tail for the cross and band. Might use the kit transfers for the tail cross, but I'm not sure what they'll be like. Also, the cowlings will be white base, as they'll eventually be Italian chrome yellow

I may leave the undersides in the grey primer as that's not so far from a Grigio Mimetico alike.
 

Steve-the-Duck

SMF Supporter
Joined
Jul 3, 2020
Messages
1,129
Points
113
Location
Medway Towns
First Name
Chris
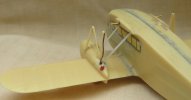
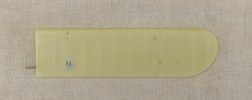
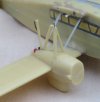
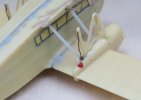
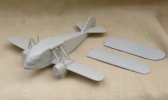
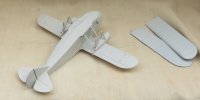
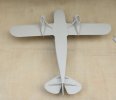
And here we are at the undercoat stage. And not how I originally planned...
IMG_2821.JPGIMG_2822.JPGIMG_2823.JPG
So, the PLAN was, just do the tail cross and the fuselage band areas in Insignia White, then the rest all over grey. But... this looks fine. It also showed up a few spots that needed extra filler. Using the Halfords grey would have been a bit dark for the underside grgio mimetico equivalent
Although the cross and band are 'white,' a 'pure' white is very rare until the present, so this will suffice

Now, I just have to decide on just which 'sand' / giallo mimetico to use
 
Top