FDM PLA 3D printing - with a model making inclination

Dave Ward

Still Trying New Things
SMF Supporter
Joined
Apr 27, 2018
Messages
8,714
Points
113
Location
South Gloucestershire
First Name
David
Those look really nice Dave.
nice and clean prints Dave, they look fabulou
Thanks, Gents! Through a lot of mistakes, I think I'm getting the hang of things! Although FDM printing is never going to be as good as resin printing, it can come pretty close in certain areas! One thing is that you have to be patient! Slicing the layers on a model at 0.05mm layer height increasess the print time alarmingly, and slowing the print speeds does the same, but that's the way to get better quality. I've been trying to upgrade my original Anet A6 printer, so I can use that as well, but some parts are not easy to source. and that is still very much a work in progress
Dave
 

Dave Ward

Still Trying New Things
SMF Supporter
Joined
Apr 27, 2018
Messages
8,714
Points
113
Location
South Gloucestershire
First Name
David
The upper bridge section. Well, the prediction was 18 hours - but it actually took 22 hours 34 minutes.........................
DSCF4583.JPG
I'll put up more pictures when I've removed the supports. Tonight, another overnight print - this time the hull - prediction is 16 hours, but I have little faith in these long predictins!
Dave
 

Dave Ward

Still Trying New Things
SMF Supporter
Joined
Apr 27, 2018
Messages
8,714
Points
113
Location
South Gloucestershire
First Name
David
Print prediction was pretty close. The hull printed OK, needs all the supports removing.
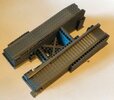
I've cleaned up the upper bridge section a bit. It needs a lot. Sometimes it's difficult to differentiate between supports & actual model & I had a few breakages, luckily nothing complicated, easily replaced
DSCF4585.JPG
There's only one overnight print left, the lower bridge half, then there's a load of parts, which comprise the launcjing gear, which looks pretty complex.
I won't be putting any more pictures of the bridgelayer up here........................... when I've got all the parts printed, I'll do a blog of the assembly ( might be quite a while )
Dave
 

Dave Ward

Still Trying New Things
SMF Supporter
Joined
Apr 27, 2018
Messages
8,714
Points
113
Location
South Gloucestershire
First Name
David
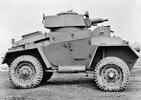
I was looking for an armoured car - and I came across this
guy-armoured-car.jpg
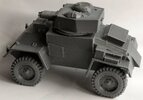
Guy armoured car - I was surprised that no-one made a 1/35 model of this - which saw limited action in the Battle of France in 1940.
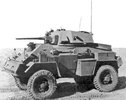
On further digging, I found that, due to their commitment to making artillery tractors, Guy couldn't do any more production, or development. The whole package was handed over to Rootes & produced as the Humber armoured car
Humber_Mk_4_Armoured_Car.jpg
I'm printing out a1/35 model of the Guy at the moment
Dave
 
Last edited:

Dave Ward

Still Trying New Things
SMF Supporter
Joined
Apr 27, 2018
Messages
8,714
Points
113
Location
South Gloucestershire
First Name
David
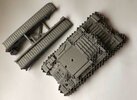
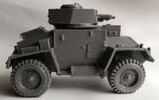
I have to say I'm quite happy with the Guy armourd car..............
DSCF4587.JPG
DSCF4588.JPG
Still a few bits to clean up, but pretty good ( even the tyres have lats on them )

The Valentine bridgelayer parts are just about finished, but I have one problem part.....................
ptoblem part.jpg
I've printed it in four orientations so far - and all have one ( or more ) problems. with supports, or poor definition.. It's just a matter of finding the right angle! I may have to cut into pieces, but that would be admitting defeat :unamused:
Dave
 

Dave Ward

Still Trying New Things
SMF Supporter
Joined
Apr 27, 2018
Messages
8,714
Points
113
Location
South Gloucestershire
First Name
David
After an another overnight print.................DSCF4590.JPG
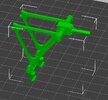
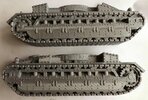
I had to slice this model down the middle, so the track detail will print at a best orientation - the diagonal structures are the support material, which should remove easily ( ! ) The mating faces will need grinding/sanding to give the best fit with the other side.
I've been tweaking printer setting a bit, dropping the temperatures slightly to decrease the amount of stringing - it's resulted in one of the cleanest prints so far.....................
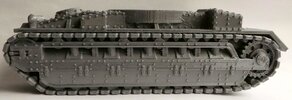
DSCF4589.JPG Blown up from 1/56 to 1/35 This is half of the hull for the Birch Gun, an 18pdr mounted on a Vickers Medium Mk.II chassis, it was the first proper self propelled gun & this in 1925! Sadly it was never developed further, as the British Army didn't see the need for such a weapon & was finally scrapped in 1931.
Dave
 

langy71

SMF Supporter
Joined
Apr 27, 2018
Messages
1,564
Points
113
Location
Nottingham
First Name
Chris
Crikey Dave, you're taking to this printing lark like a duck to water..(or orange sauce)... nice prints buddy..
 

Dave Ward

Still Trying New Things
SMF Supporter
Joined
Apr 27, 2018
Messages
8,714
Points
113
Location
South Gloucestershire
First Name
David
Printed the other half of the hull overnight - just under 14 hours!
DSCF4591.JPG I hadn't altered any settings, so the prints are the same quality.
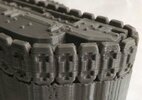
I hadn't noticed that the tracks are nicely detailed
DSCF4592.JPG
The rivets look a little overscale, but a coat of primer & topcoat should help with that. I have a couple of hours work removing all the support material.
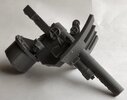
I've printed & partly cleaned up the 18 pdr
DSCF4593.JPG I'm not sure why the Birch Gun has taken my fancy, but it has, and I'm hoping all the work is going to be worth it
Dave
 

Dave Ward

Still Trying New Things
SMF Supporter
Joined
Apr 27, 2018
Messages
8,714
Points
113
Location
South Gloucestershire
First Name
David
It's all looking be tidy nowadays, Dave. You're consistently nailing them now
Ah, but I don't post all the mistakes! Today, I found that I had printed part of the Valentine Bridgelayer at a weird scale. Instead of blowing up the 1/56 model by 160% to give 1/35 - I'd blown it up by 286% ( ratio of 1/100 to 1/35 ) giving an odd scale of around 1/19! I'm amazed it hasn't happened before, I'm pretty careful about scaling things.
I've been thinking that the first model files I purchased was the Matilda I in April - I've learnt a lot since then, so I might print it again, so I can see if I get a much better, cleaner, detailed print that doesn't need as much clean up
Dave
 

Jim R

SMF Supporter
Joined
Apr 27, 2018
Messages
13,839
Points
113
Location
Shropshire
First Name
Jim
Neil's right Dave, your prints are getting very neat and tidy.
 

Dave Ward

Still Trying New Things
SMF Supporter
Joined
Apr 27, 2018
Messages
8,714
Points
113
Location
South Gloucestershire
First Name
David
The removal of supports on the Birch Gun was painless, and I'm pretty happy with the results.

DSCF4594.JPGDSCF4595.JPGDSCF4596.JPG
Obligatory 17ml paint pot for scale. Just Blu-tacked together. The mating faces need sanding flat to get the best fit, but that doesn't look that bad!.
Dave
 

JR

Member of the Rabble and Pyromania Consultant
SMF Supporter
Joined
May 26, 2015
Messages
17,375
Points
113
Location
lincs
First Name
John
You've got the bit between you teeth now, there's no stopping you.
Your previous engineering skills have really supported you in this Dave . Full of admiration.
 
Top