Jakko’s 1:35 Dragon Sd.Kfz. 251

Jakko

Way past the mad part
SMF Supporter
Joined
Apr 28, 2018
Messages
10,839
Points
113
First Name
Jakko
My entry is going to be one if Dragon’s German Sd.Kfz. 251 half-tracks:
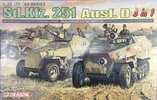
782B9B79-A3FC-42D3-BAB4-239FDB210439.jpeg

I bought this kit second-hand earlier this year because while building an Sd.Kfz. 7, I felt like adding another of this general type of half-track to my collection, and someone happened to offer one for sale.

It’s a three-in-one kit, which is kind of true, but like most of those claims, only just … The three choices are a Sd.Kfz. 251/1, which is the basic APC; a 251/1 with infrared night-fighting gear, which I think wasn’t ever actually used during the war; or a late-model 251/9, which has a short-barrelled 7.5 cm gun for infantry support mounted on the top of the fighting compartment. I make that two-in-one, with one of the two having a further option :smiling3: The basic vehicle is an Ausführung D, the final production variant of the Sd.Kfz. 251 that is easily recognisable by the way its rear slopes outward all the way — earlier variants had the top half slope inward — and the stowage lockers on the sides being apparently integrated into the hull instead of being separate boxes on the mudguards. The /9 is a late model because the gun sits on top of the hull instead of lower, in a recess cut in the front plate (Tamiya makes that one, BTW).

Anyway, the side of the box promises all kinds of extras as well:

50F42569-8BB1-418A-8A47-0C6BDB9318F2.jpeg

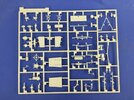
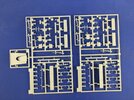
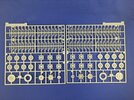
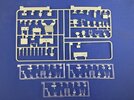
The instructions are available on Scalemates, so I’m not going to post them here. The rest of the box contents are:
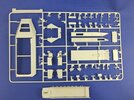
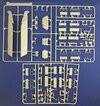
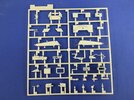
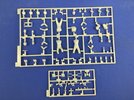
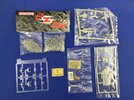
3ED32834-3C91-49BB-BA36-2B8644158130.jpegE3FC0E3A-E0BC-4F7E-8C5F-68DBFE33237F.jpeg0C2B8D4B-E62A-4EA5-B728-C8BDE9A3FBD2.jpegF3D9D188-2909-45DA-AA6A-8272664A305D.jpegE67817D3-9031-4FCD-9B9B-13F1F450601A.jpegEB3B1CD8-1BD0-4A18-B026-A4DCEEDA97B1.jpeg9F252A54-2460-4671-880A-66595FE719B2.jpeg

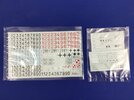
Here are the extras:

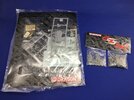
395090AC-FF95-4E17-AAA6-7D0A7784639A.jpegA1D3CE3B-4689-499D-920D-63B71146ECC5.jpeg8634BBF2-2AEA-40CE-8F58-2FF28B1938CD.jpeg99378CAA-5B04-4043-A392-C0D9FDFC639A.jpeg

There are two sets of tracks: the original type is on the sprues with the wheels, while the bags have the simplified type that was used late in the war. Note the turned aluminium barrel and the three brass 7.5 cm rounds. The driver figure is in soft plastic, that seems to deform quite easily, but maybe it helps to get him with his hands on the wheel?

I’m not quite sure yet how I’m going to finish this one, but I do know it won’t be as a /9 or with the infrared gear. The parts for those two are in my German vehicles spares box already :smiling3:
 

Gern

'Stashitis' victim
SMF Supporter
Joined
May 17, 2009
Messages
9,705
Points
113
Location
Stourbridge
First Name
Dave
Welcome aboard Jakko. Looks like you got enough parts to keep you occupied for a while.
 

Jim R

SMF Supporter
Joined
Apr 27, 2018
Messages
13,754
Points
113
Location
Shropshire
First Name
Jim
Lots of parts Jakko. I suppose many will be destined for the spares box depending on what you build. Looking forward to the build.
 

Allen Dewire

Proud Rabble Member
SMF Supporter
Joined
Apr 27, 2018
Messages
4,105
Points
113
Location
Bamberg
First Name
Allen
I'm in for this Jakko and that is a nice kit. I'm using the /9 parts for my conversion of the Tamiya D kit. The I/R version was used late in the war and was known as the "Falke" and some supported the I/R equipped Panthers. Prob was the I/R equipment on the Panther only had a range out to 500 meters, hence the introduction of the "UHU", giving an increase out to 1500 meters. Too little, too late as the old story goes.....Have fun with it and don't let the interior inaccuracies get you down.........

Prost
Allen
 

Jakko

Way past the mad part
SMF Supporter
Joined
Apr 28, 2018
Messages
10,839
Points
113
First Name
Jakko
Looks like you got enough parts to keep you occupied for a while.
Actually, it doesn’t appear to be too bad. Sure, those track links and plenty of wheels, but other than that it seems a fairly straightforward kit. I don’t intend to do major rebuilding/conversion/surgery on it, which should help :smiling3:

I suppose many will be destined for the spares box depending on what you build.
I already put some of the sprues in there :smiling3:

The I/R version was used late in the war and was known as the "Falke" and some supported the I/R equipped Panthers. Prob was the I/R equipment on the Panther only had a range out to 500 meters, hence the introduction of the "UHU", giving an increase out to 1500 meters.
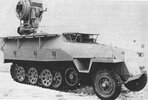
Are you thinking of the 251/20 with the big IR spotlight?

Sd.Kfz. 251:20.jpg

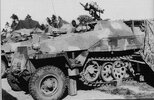
That’s not what’s in this kit, else I might just have gone for that :smiling3: However, looking for a picture like the one above, I found this:

Sd.Kfz. 251:1 with IR sights.jpg

So it looks like the night-fighting variant was actually used, and not just “Wehrmacht 1946” as I thought it was.

don't let the interior inaccuracies get you down.........
Which inaccuracies are those?
 

Allen Dewire

Proud Rabble Member
SMF Supporter
Joined
Apr 27, 2018
Messages
4,105
Points
113
Location
Bamberg
First Name
Allen
Are you thinking of the 251/20 with the big IR spotlight?

Sd.Kfz. 251:20.jpg


That’s not what’s in this kit, else I might just have gone for that :smiling3: However, looking for a picture like the one above, I found this:

That's the UHU Jakko, and It has the same designation as the Falke in the second pic. AfV Club make a good kit of the UHU, but it's incomplete (no generator, etc.). Unfortunately, Dragon got some details on their 251 Ausf. D series of kits wrong. Both inside and on the outside too. If you go to Terry Ashley's site, PMMS, you can read through his reviews of the Dragon D kits. Inside, the transmission hump is too small, for one. There are others and then on to the outside, including the roadwheels, drive sprocket teeth offset and so on. Worth a read if you are going for accuracy in your build...Most of all, just have fun!!!

Prost
Allen
 

Jakko

Way past the mad part
SMF Supporter
Joined
Apr 28, 2018
Messages
10,839
Points
113
First Name
Jakko
That's the UHU Jakko, and It has the same designation as the Falke in the second pic.
Yeah, I got confused :smiling3: In any case they’re not relevant as I will build neither here :smiling3:

Unfortunately, Dragon got some details on their 251 Ausf. D series of kits wrong. Both inside and on the outside too. If you go to Terry Ashley's site, PMMS, you can read through his reviews of the Dragon D kits. Inside, the transmission hump is too small, for one. There are others and then on to the outside, including the roadwheels, drive sprocket teeth offset and so on.
I did a little research after your remark about the problems, and came across a review on Armorama:
Jesse [ OLDBEAN ] said:
Dragon has fixed the problem of the floor. Before, the transmission hump was too small and there were tabs for putting a water tank in (only used in the ambulance version of the 251). Now the transmission hump is the correct size and shape.
… but I haven’t checked if my kit has the corrected parts or not.

It also shows other issues, some of which are going to have to be corrected, yes.
 

Jakko

Way past the mad part
SMF Supporter
Joined
Apr 28, 2018
Messages
10,839
Points
113
First Name
Jakko
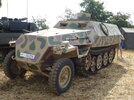
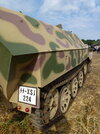
Thanks, though unfortunately, that’s (almost certainly) not an Sd.Kfz. 251 but an OT-810 converted to look like one :smiling3:

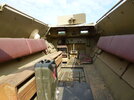
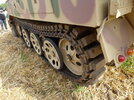
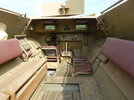
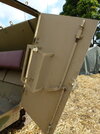
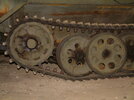
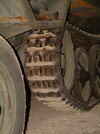
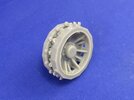
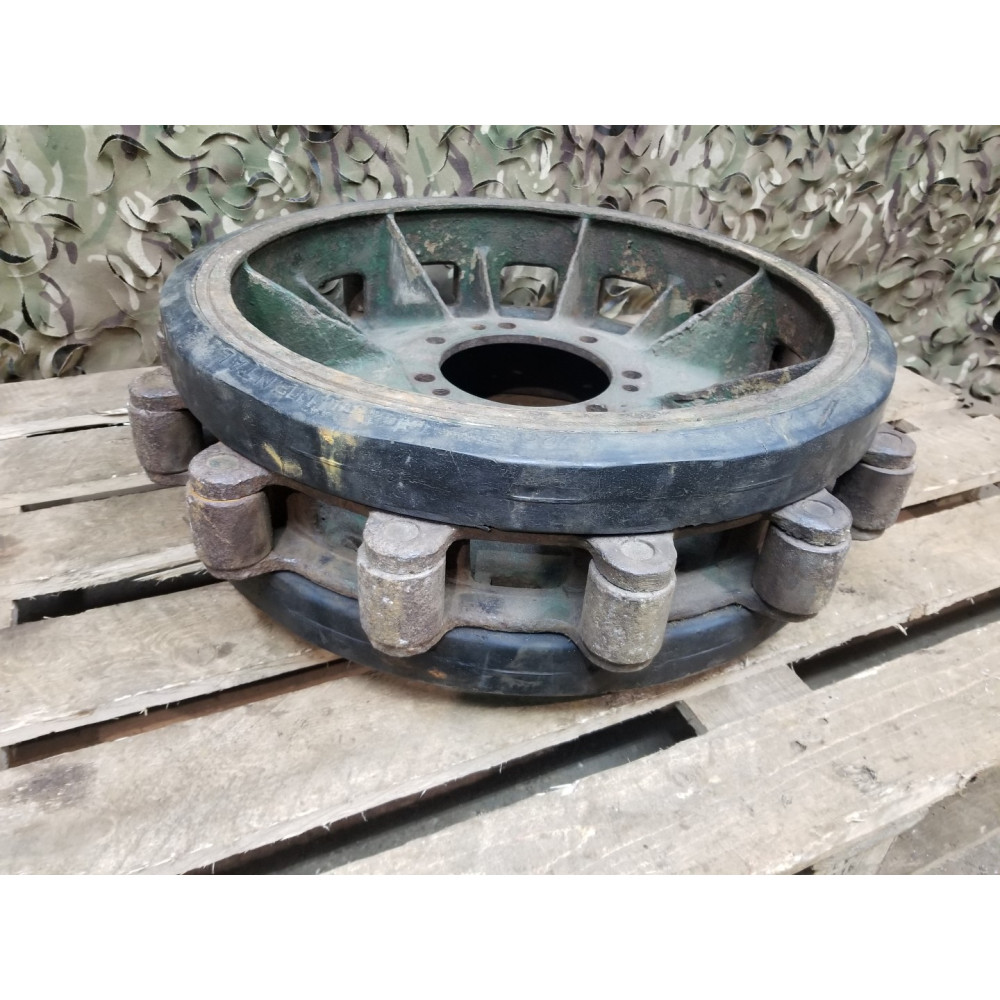
The OT-810 is the Czechoslovakian improved version of the 251, built after the war and used into the 1970s by the Czechoslovakian army, with a diesel engine and a roof over the troop compartment, in addition to detail changes. From the 1990s on, a lot of these became available to collectors, and the vast majority of those cut out the roof and made other visual changes to turn them into Sd.Kfz. 251-replicas. Some of the more obvious differences are the headlights, the muffler (flat on the OT-810 vs. an upright cylinder on the Sd.Kfz. 251) and the flaps for the driver’s vision ports. However, the best giveaway is the running gear: the track has a shorter pitch and the drive sprocket has teeth instead of rollers. This vehicle’s tracks have rubber pads added that gives more of a 251 appearance, but the tracks normally look like this:

OT-810 wheels.jpgOT-810 track.jpg

This is an OT-810 that I photographed at IWM Duxford twenty years ago.

A long time ago, on another forum someone asked, IIRC, “My father just bought an OT-810, which colours should we paint it?” — with the clear meaning of Which German camouflage pattern and markings will look good on it? My reply was, “Czechoslovakian military green, with 1960s markings.” He didn’t even reply to that … Really, these vehicles are like DeLoreans: there are more converted ones than originals left, probably.
 

Jakko

Way past the mad part
SMF Supporter
Joined
Apr 28, 2018
Messages
10,839
Points
113
First Name
Jakko
It took me a while to decide how to finish the model, as that would likely affect whether I would need to make any modifications to it. The bog-standard German three-colour or winter camo doesn’t appeal to me — everybody does that already, so there must be something more interesting you can do with a 251. After some research, I found these pictures, among others:

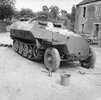
A British-captured one in Normandy, most likely a 251/8 ambulance, repainted in (probably) SCC 15 olive drab:

A-captured-German-SdKfz-251-ambulance-half-track-15-June-1944..jpg

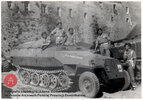
A Polish-captured vehicle in Italy, again probably in SCC 15 and with full, standard British Army markings:

FCAnowwXsAIfW4Z.jpeg

Note the missing driver’s visors and the dark yellow surrounds that produces, as well as having a cut-down Notek (black-out) light on both front mudguards to serve as normal headlights.

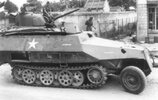
A Canadian-captured vehicle, probably a /1, in Normandy as well and again, probably painted SCC 15 and with Canadian Army markings:

sdkf.jpg

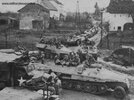
American-captured /1s (probably) in the winter of 1944–45, prominently but very crudely marked to prevent friendly fire, but very dirty and not in great shape:

troops_use_capt_ht.jpg

I’m not sure, but I think they’ve been repainted American olive drab as well, though I also saw models of these painted in German three-colour camo with the American markings added.

A French vehicle in Indochina, probably late 1940s:

Frans in Indochina 1.jpg

Note the added grille on the front plate, and (barely visible) four exhausts for the cooling air on the sloping side panel to the engine bay. This vehicle was painted in an unknown colour, possibly American olive drab, but other options seem to be French post-1949 OD or even Japanese paint left over from the war. The T16 carrier alongside is probably American OD, but all you can really say about the 251 is that it appears to be a little paler, but that could just be faded paint and/or how it catches the light.

I eventually decided on that last one, because of the added interest of the tropical cooling system. That done, I started on the model yesterday, with the underside as per the instructions:

BCB93831-64B5-4A0B-BFA9-B64AF7476BD8.jpeg

Though I deviated from Dragon’s instructions almost straight away because their order doesn’t make all that much sense at times. Also, there are mistakes in the instructions already here: C1 and C2 (the idler mounts) have been confused, so that where it says C1, you should use C2 and vice versa — the drawing is right, the caption for the part isn’t. The suspension arms are very difficult to line up straight: their locating pins are too loose and too short, so they can move not only up or down by accident but also the angle the axle makes to the hull side, seen from behind, may not be 90 degrees. Not all of mine are quite right, but it’s very hard to correct them.

Also, the shock absorbers on the last wheel arm have two problems. One is that Dragon would have you add them to the hull side before the arms themselves, which would make things almost impossible to line up. The second is that the instructions would have you glue the shock absorber’s lever to the outside of the tip of the connecting rod between that lever and the suspension arm. In the real world, there was a fork at the top of the connecting arm that the lever sat in (Dragon gives just the outside of that fork, and has you glue to lever to its outer face).

There are also a variety of things to add inside the underside, including what I think is the fuel tank, but all of these will be under the floor which has no removable panels (in the kit, anyway), so their inclusion is very puzzling. Needless to say, they won’t be fitted on my model.

I’m not sure yet about how to proceed: the instructions want you to add the floor first and then slide the hull sides into the gap this leaves between the floor and the underside. I’m leaning to fitting the sides first, though. I also haven’t decided what to do about the transmission hump, partly because I haven’t figured out yet how it’s too small :smiling3:
 
Last edited:

Jakko

Way past the mad part
SMF Supporter
Joined
Apr 28, 2018
Messages
10,839
Points
113
First Name
Jakko
Well, problematic may be a big word, but they should have made the locating pins longer and fit more tightly in the holes in the lower side, that would have produced an instantly-square suspension. Everything seems to have slightly too great tolerances, really: the bump stops above the arms, for example, have square pins and square holes, but you still need to make sure by eye that they’re actually straight and not twisted slightly.

I think what I need to do first is find out how much bigger that transmission hump is supposed to be. Going by googling a few photos, it seems too low in the kit, but I need to compare them better to make sure.
 

Allen Dewire

Proud Rabble Member
SMF Supporter
Joined
Apr 27, 2018
Messages
4,105
Points
113
Location
Bamberg
First Name
Allen
Late evening Jakko,

Dragon destructions for the most part are a soup sandwich and I'm sure you know that. As for the tranny hump, if you have an AFV Club 251 Ausf. C or D in your stash, you can compare them and see how big the difference is. Personally, I wouldn't stress too much over it. I would throw one of Dragon's DS clothing jacket pieces over it and no one would be the wiser. If you do build the tropical version, I'm sure you could find something else to put on it. Even Terry (PMMS) said it would be difficult to correct this shortcoming in the Dragon kits. Just my thoughts. If you do build the tropical one, those slats on the front plate will be right up your alley and easy for you to create. Have fun!!!....

Prost
Allen
 

Jakko

Way past the mad part
SMF Supporter
Joined
Apr 28, 2018
Messages
10,839
Points
113
First Name
Jakko
It doesn’t look like it would be overly difficult: it’s just a bevelled square (a very truncated pyramid, in other words) with a rectangular raised part in front of it. My main problem in deciding whether or not to correct it, is that finding good pictures of it is proving difficult, let alone drawings that show the correct size :sad:
 

Jakko

Way past the mad part
SMF Supporter
Joined
Apr 28, 2018
Messages
10,839
Points
113
First Name
Jakko
After looking at photos, I decided I can’t be bothered to correct the transmission bulge in the floor. I have a hard time working out how it’s too small, and it’s not exactly in full sight anyway, so unless someone comes up with actual dimensions, I’m going to leave it as-is,

So, the next step was to glue the sides to the lower hull:

3286BC2B-8E9D-4462-91EF-98F703877B4E.jpeg

To do this, I first added the rear plate and then used that to line up the sides, glueing one to the rear plate first and then to the lower hull, working from rear to front. When it was on, I did the same on the other side, then dropped in the floor and engine bulkhead (glued together) as well as the upper hull, without glueing them to the rest of the model yet. Fit was poor at the lower left front, but much better on the right. My tip would be to install the sides first, and when the glue is still wet, add the nose floor (part B9) so you can get everything to fit together.

On to the tracks, which are best tackled while building the rest of the model, IMHO. This kit comes with two types: on the wheel sprue are the early style of links, with holes through them, while it also has the later type without holes, in separate bags as a set of Dragon’s “Magic Tracks” that theoretically don’t need cleanup. Sure …

7B6CDEF2-48C9-445B-AA1B-6AE343663E6A.jpeg

That’s the sprue with the older links and some of the Magic Tracks, for comparison. If you look closely at the links at upper right, you can see ejector pin marks on the flat part on each side of the link, which I filed off on the five links at lower right. This seems to be about as much work as cleaning up the sprue attachments of the other links, so there is not really much to choose between them, effort-wise. Just choose whichever style you want or need on your model.

Here’s the drive sprocket:

9D216C16-2F56-4EBF-8763-21C74DC416E8.jpeg

Spot the two issues …

The obvious one is that it doesn’t have any rollers. All these early German half-tracks had a complicated sprocket that didn’t have teeth, but rollers:

20200108_163011-1000x1000.jpg


These are easy enough to add from some plastic rod of the right diameter — that is, slightly larger than the teeth that Dragon did mould, which are 1.15 mm wide (on the inside half anyway).

The second, and less obvious, problem is that the teeth/rollers are in the wrong position … You can’t tell from the real sprocket above because its tyre has worn down, but the teeth/rollers should be at the rear of each flat, not in the middle like this kit has them (and that makes the left and right sprockets different, not identical like here). This is not a problem unique to Dragon, say reviews: Tamiya’s kits also have this mistake, only AFV Club seems to have gotten this right.

I’m still debating how best to correct this. I’m thinking that carefully cutting off the teeth, glueing in rollers and then re-installing the teeth will be the easiest way, but stands a bit of a chance of losing some of them. I would prefer scratchbuilding them so I can make as many as needed (28 in total, there’s no point in making them for the inside half) but that half-round top makes this hard.
 
  • Wow
Reactions: JR

Jakko

Way past the mad part
SMF Supporter
Joined
Apr 28, 2018
Messages
10,839
Points
113
First Name
Jakko
TBH, I wish I had the AFV Club kit :smiling3: I bought this one without actually looking into if it has any problems, and to tell the truth, I’m getting put off Dragon kits because of all these small, hidden problems that they have. My recent Sd.Kfz. 7 had different issues, but on the same kind of scale, and the one before was a Sherman that is just bad compared to Asuka, RFM, etc. Back when Dragon made kitsof vehicles nobody else did, they were worth the bother. Now? Not so much.

But this kit isn’t actually bad — fit is quite good (so far :smiling3: ) and moulding standard is high. It’s just that it has some small mistakes that are a bit inexplicable.
 
  • Like
Reactions: JR

Jim R

SMF Supporter
Joined
Apr 27, 2018
Messages
13,754
Points
113
Location
Shropshire
First Name
Jim
On my Trumpeter kit the rollers are correct but also incorrectly centred on the flats. A few reviews point this out. I have built a short section of track and it fits ok and seems to sit nicely against the tyre. Moving the rollers will be a major job and if I'm honest perhaps beyond me so I'll leave well alone. You have more experience of this kind of thing so I look forward to seeing how you go about it
 
Top