Jakko's TC’s Hughes 500 from Magnum, P.I. Italeri 1/72

Jakko

Way past the mad part
SMF Supporter
Joined
Apr 28, 2018
Messages
10,891
Points
113
First Name
Jakko
Scratchbuilding him is out of the question — way beyond my skills. I looked through my spares boxes and couldn’t find any suitable figure, whether lightly enough dressed for Hawaiʻi or not, so I think the helicopter will have to do without :sad:
 

Jakko

Way past the mad part
SMF Supporter
Joined
Apr 28, 2018
Messages
10,891
Points
113
First Name
Jakko
9A1D2085-D785-4C23-A94F-5D612C2664CC.jpeg

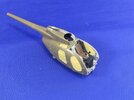
Fuselage halves with the windows and the cockpit together, but not the windscreen yet — masking that is proving very tricky mostly because you can’t see where most of the framing is once the tape is on :sad: The windows that are in also don’t fit overly great, and neither do the fuselage halves, but it’ll have to do.
 

adt70hk

I know its a bit sad but I like quickbuild kits!!!
SMF Supporter
Joined
Sep 4, 2019
Messages
9,517
Points
113
First Name
Andrew
Looking good Jakko!

Hope you sort out windscreen masking ok.

Andrew
 

Jim R

SMF Supporter
Joined
Apr 27, 2018
Messages
13,786
Points
113
Location
Shropshire
First Name
Jim
Much smaller than I imagined, Jakko. That will make it very fiddly. Good call with the rear seats. Masking is often awkward but the shapes and the curve of the screen makes thing worse.
 

Jakko

Way past the mad part
SMF Supporter
Joined
Apr 28, 2018
Messages
10,891
Points
113
First Name
Jakko
Hope you sort out windscreen masking ok.
I will, but I had had enough of it again this afternoon when I had redone about a third of it and still got it wrong. Will try again later :smiling3:

Much smaller than I imagined, Jakko.
I’ve built a couple of these over the years, but I feel like I had forgotten quite how small a Hughes 500 actually is in 1:72 :smiling3:
 

Jakko

Way past the mad part
SMF Supporter
Joined
Apr 28, 2018
Messages
10,891
Points
113
First Name
Jakko
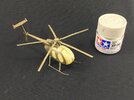
It’s an uncomplicated little kit but still took me rather long to actually build:

9D831030-2904-45B2-9A73-D323D423A8A5.jpeg

Much of that is due to the not-stellar fit of the very small (see the Tamiya paint jar for scale) fuselage and clear parts and because it took a while before I felt like giving the masking of the windscreen a third go … but it’s done now :smiling3: The main rotor is still loose, and the tail rotor also hasn’t been attached yet, but otherwise, I just need to wait for the glue to dry so I can put a coat of white over this, then paint it yellow and start making those stripes. At least the tape I purchased for that seems to be exactly the right width for most of them :smiling3:
 
Last edited:

adt70hk

I know its a bit sad but I like quickbuild kits!!!
SMF Supporter
Joined
Sep 4, 2019
Messages
9,517
Points
113
First Name
Andrew
It's almost as small as 1/100 Huey I did last year
 
Last edited:

papa 695

Moderator
Staff member
Moderator
SMF Supporter
Joined
May 9, 2011
Messages
20,364
Points
113
Location
Doncaster, South Yorkshire
First Name
Ian
Just seen this one Jakko, and it’s nearly finished, some very nice work going on. Looking very good indeed.
 

Jakko

Way past the mad part
SMF Supporter
Joined
Apr 28, 2018
Messages
10,891
Points
113
First Name
Jakko
Thanks, the fit of the side windows isn’t great, but the only way to fix that would have been a lot of work carefully scraping or filing out their frames, and the fuselage halves were also tricky to get to line up with each other. But a little care and it goes together well enough. Still, I think that if I were to do this again, I would buy a 1:48 or 1:35 scale kit instead :smiling3:
 

Jim R

SMF Supporter
Joined
Apr 27, 2018
Messages
13,786
Points
113
Location
Shropshire
First Name
Jim
That is very small Jakko. Looks fine in the photo. The window masking looks time consuming.
 

Jakko

Way past the mad part
SMF Supporter
Joined
Apr 28, 2018
Messages
10,891
Points
113
First Name
Jakko
It was, especially the top of the windscreen. The side windows were easy: stick the part to the tape, burnish it down a bit and cut around it with a sharp knife. The main problem with the windscreen was cutting out the frame, which was almost impossible to see through the tape. Attempt numbers 2 and 3 were to put two pieces of tape along the transverse bit of frame instead, leaving it free rather than having to cut it out, but on attempt 2 I put them at a slight angle that wasn’t really noticeable off the helicopter but very apparent once the glazing was held up to the fuselage …
 

Jakko

Way past the mad part
SMF Supporter
Joined
Apr 28, 2018
Messages
10,891
Points
113
First Name
Jakko
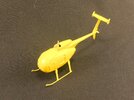
Bright yellow now!

C808945F-2AD2-4E69-A94A-EAE60142133D.jpeg

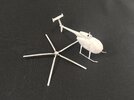
This is just from an aerosol can of RAL Traffic Yellow, largely because I had one available and I didn’t want to be thinning very small amounts of paint if I could avoid it :smiling3: Once it’s dry I’ll mask the stripes and paint the orange.
 

Jakko

Way past the mad part
SMF Supporter
Joined
Apr 28, 2018
Messages
10,891
Points
113
First Name
Jakko
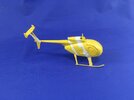
I finally got myself to do the chore of masking the yellow stripes:
EC7F87E9-F5BD-410F-8047-B04A119EA470.jpeg

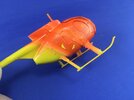
And then I had a stroke of bad luck. I pulled open the paint drawer where I had put the orange paint I bought specifically for this model, and discovered that it wasn’t Mr. Aqueous Hobby Color as I thought, but Mr. Hobby Color — the lacquer paint that I can’t get along with :sad: Not sure who made this mistake, though. I’m certain I wouldn’t have clicked on the paint if I noticed it was lacquer, but the order confirmation from the web store where I bought it, only says “orange paint (10 ml)” so it’s also possible they confused the two. In any case, I couldn’t do what I had wanted to: paint the model orange.

After checking if there happened to be an orange aerosol in the house and finding no, there wasn’t, I went to a paint store in the next village. That turned out to have yellow and red aerosols, but not orange. Sigh … Back home, then, wondering what else I could try,

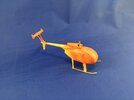
This evening, I went through all of my acrylic paints and only found oranges that had dried out, as I expected — else I wouldn’t have ordered the paint some months ago. Then I remembered that last year, I had been given some Badger airbrush acrylics, when my mother’s junk shop had gotten in a Badger 150 with paints, cleaner and some beginner’s instruction books from the 90s. Lo and behold, there was a half-empty bottle of orange among them! I was in business!
1DB29A89-BA4C-421A-85D5-0C58F8AA12D0.jpeg

This Badger paint doesn’t seem to like going over the generic glossy aerosol paint, though. I had to mist it on to prevent it beading up, but I eventually got a coat that covers on the model.

After that there was one more lesson: these paints know which brand of airbrush they’re in! It was fairly hard to clean it out of my airbrush even with Badger airbrush cleaner, because clearly, Badger paints don’t really want to work in an Iwata …
 

Jim R

SMF Supporter
Joined
Apr 27, 2018
Messages
13,786
Points
113
Location
Shropshire
First Name
Jim
Well the orange is on the little 'copter. Spent far more time finding the paint and cleaning the airbrush but the only cost was time :smiling:
 

adt70hk

I know its a bit sad but I like quickbuild kits!!!
SMF Supporter
Joined
Sep 4, 2019
Messages
9,517
Points
113
First Name
Andrew
Looking very good Jakko!
 

Jakko

Way past the mad part
SMF Supporter
Joined
Apr 28, 2018
Messages
10,891
Points
113
First Name
Jakko
Now I just need to mask the orange as well and spray the brown. Luckily I bought a bottle Tamiya acrylic for that :smiling3:
 

Jakko

Way past the mad part
SMF Supporter
Joined
Apr 28, 2018
Messages
10,891
Points
113
First Name
Jakko
Dammit!

DE33457E-B266-421A-8CCC-B26ACF497958.jpeg

That bloody Badger paint that doesn’t want to get out of an airbrush cup, does want to come off a model :sad: I just put on a strip of masking tape, but had to pull it off to reposition it slightly, and orange paint came off with it … the second bit, further ti the right, is where I tested it to see if the paint elsewhere sticks poorly too.

I think I may have to clean all the paint off and try again with some other orange. That I will need to find somewhere first … Maybe hand-paint it with a 35-year-old tin of Humbrol or something.
 
Top