Andy the Sheep
SMF Supporter
Late as always... a back seat near Mike will do.
Right Andrea, thanks for joining, seat to your left.Late as always... a back seat near Mike will do.
 they broke , but
  the pins were ok eack side so just had to re glue the top and base plate. Will wait for the new tape to arrive.
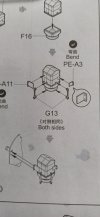
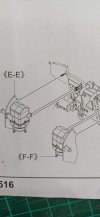
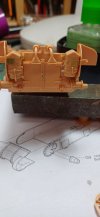
 . Think there are some spare on one of the sprues.
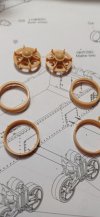
 .
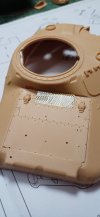
.Not much risk of that, I think. The whole upper hull was cast in one piece, so any moulding seams you see on the plastic parts are safe to remove, and the same goes for the turret and the commander’s cupola. The bogie bodies were also cast steel, but without any prominent seams that you should definitely leave on. Pretty much all other major parts on an M3A1 medium tank were flat plates riveted or bolted together — and that’s little more than the lower hull, really.Think I need to look at a walk round ! Before I remove any more seams
phewWhen removing the tracks form the jig this morningthey broke , but
the pins were ok eack side so just had to re glue the top and base plate.
 I was worried it had actually broken, but that just sounds like the block halves just weren’t glued that well. Lucky escape there
I was about to say: most of those things will be largely out of sight anyway.As the top goes on later most of that section won't be seen.
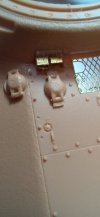
Those are the air filters, yes. There were two types, square like you have here, and cylindrical; both types were also found on M4 and M4A1 Shermans, as those had essentially the same engine and engine compartment as the M3 and M3A1 medium tanks.also made one of those bar things on the air filters ?
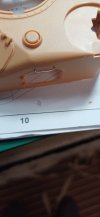
Oh, that’s a fairly good way to do the idler wheels. It will leave a big seam around the outside that you’ll need to remove, but unlike the MiniArt version, there are no fragile rings to fit to the wheels.View attachment 501576
At least this part is right.
 Only the roadwheels do, everything else is entirely steel.
You’re doing very nicely, IMHOStanding by for a bl****** from Jakko.

Thanks.Not much risk of that, I think. The whole upper hull was cast in one piece, so any moulding seams you see on the plastic parts are safe to remove, and the same goes for the turret and the commander’s cupola. The bogie bodies were also cast steel, but without any prominent seams that you should definitely leave on. Pretty much all other major parts on an M3A1 medium tank were flat plates riveted or bolted together — and that’s little more than the lower hull, really.
phewI was worried it had actually broken, but that just sounds like the block halves just weren’t glued that well. Lucky escape there
I was about to say: most of those things will be largely out of sight anyway.
Those are the air filters, yes. There were two types, square like you have here, and cylindrical; both types were also found on M4 and M4A1 Shermans, as those had essentially the same engine and engine compartment as the M3 and M3A1 medium tanks.
Oh, that’s a fairly good way to do the idler wheels. It will leave a big seam around the outside that you’ll need to remove, but unlike the MiniArt version, there are no fragile rings to fit to the wheels.
BTW, when it comes to painting, these wheels don’t have a rubber tyreOnly the roadwheels do, everything else is entirely steel.
You’re doing very nicely, IMHO
No need to apologise Bob, just look in when you can .My groveling apologies John.
Should have posted a lot earlier.

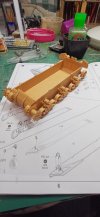
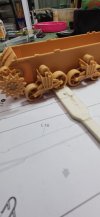
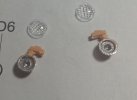
Trying , and at times it isLooking good
Nice of you to say, cheers Joe, hope all is well .Keep the magic coming JR
Thanks , the only problem Paul is the small PEComing on very nicely me old mate.
 .
.Arh, the Mk7, and perfect choice Doug.Nice going John. I'm hovering around on ye magic carpet Mk7.
Indeed, a vast improvement over the Mk6. Hot beverages, a biccy dispenser and a hot water bottle for the colder transits!!!Arh, the Mk7, and perfect choice Doug.
Thanks Mick.Looking good JR
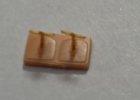

But no WC...Indeed, a vast improvement over the Mk6. Hot beverages, a biccy dispenser and a hot water bottle for the colder transits!!!
Oh you armoured person you!! The hole in the centre of the carpet isn't just for pouring ones dregs from tiffin you know!!!! Keep up please. Magic Carpet design has been around a long time you know!!!!But no WC...


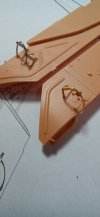
That is the problem I suffer with John. Depth of field and I have two eyes, well usually!! Gin has a detrimental effect of vision I find too!!! That's the problem with dealing in small scale I guess!!With this being the thinnest PE I'm struggling to gauge any depth of field with having only one good eye. At least a coat of paint , mud and tank riders will see it right
John.
For FULL Forum access you can upgrade your account here UPGRADE
