Rick's Cornerstone 1-87 scale P-51 Mustang

Mini Me

SMF Supporter
Joined
Jun 1, 2018
Messages
10,160
Points
113
First Name
Rick
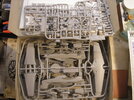
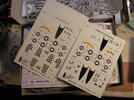
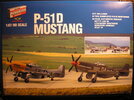
I'm on the same kit as Paul E.......I was gonna do three of these at once but am reconsidering just doing one as a trial piece as I have never done a bare metal anything and would hate to lose all three of these to an experiment. Anyway, here's the box art and sprues with destructions and decals.P1012219.JPGP1012378.JPGP1012379.JPG
 

Mini Me

SMF Supporter
Joined
Jun 1, 2018
Messages
10,160
Points
113
First Name
Rick
Not yet Colin, I have had to take on a bit of an outdoor project and have been off the bench for over a week now. Should have this wrapped up in a day or two.....then back to the GB. Thanks for stopping by :thumb2:
 

Jim R

SMF Supporter
Joined
Apr 27, 2018
Messages
13,746
Points
113
Location
Shropshire
First Name
Jim
I've never heard of Cornerstone. Are they 1/87 specialists? There looks to be a high parts count for this scale.
 

Mini Me

SMF Supporter
Joined
Jun 1, 2018
Messages
10,160
Points
113
First Name
Rick
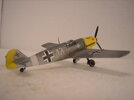
Actually Jim, you are looking at three models in the same box. This kit comes with two complete models and decals to do three different planes. I ended up with three as I sent a half kit to Paul coz he didn't have a kit for the GB. These kits were only available for a short time and have been out of production for several years. Cornerstone is a brand name used by Wm. K. Walther's Co. They are the largest model RXR distributor in the US. Mostly HO (1-87 scale). At one time there were other kits available.....Me 109 e and a P38 Lightning. Here's a shot of a Me109 I did over 20 years ago.photo gallery submissions 217.jpg
 

Mini Me

SMF Supporter
Joined
Jun 1, 2018
Messages
10,160
Points
113
First Name
Rick
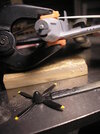
Not much progress on this......scratched a instrument panel and stick decaled panel and temp fitted it all to see how things will go together. painted prop tips will mask and spray the blades when tips are dry. That's all for now.P1012407.JPG
 

Mini Me

SMF Supporter
Joined
Jun 1, 2018
Messages
10,160
Points
113
First Name
Rick
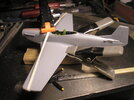
Managed to get all of the fuselage put together and filled and sanded. As most of you know, I'm also going for the bare aluminum look so can't have any exposed seams. Wings are now assembled and glued in place. P1012409.JPGP1012410.JPG
 

Mini Me

SMF Supporter
Joined
Jun 1, 2018
Messages
10,160
Points
113
First Name
Rick
Thanks guys....hope to get more done on this, stay tuned.
 

Mini Me

SMF Supporter
Joined
Jun 1, 2018
Messages
10,160
Points
113
First Name
Rick
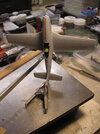
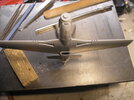
More finite progress........the horizontal stabs. are now in place as well as the "cooler" intake....both the nose intake and cooler required drilling out as they were molded shut and looked as phony as a 3 dollar bill. also got the waste gate installed. This is getting very close to a coat of Black Alclad Base.P1012411.JPGP1012412.JPG
 

Mini Me

SMF Supporter
Joined
Jun 1, 2018
Messages
10,160
Points
113
First Name
Rick
If I could find a decal set by that title I would OWN it!! Not because I love buxom babes, mind you... ;)
 

Mini Me

SMF Supporter
Joined
Jun 1, 2018
Messages
10,160
Points
113
First Name
Rick
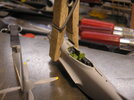
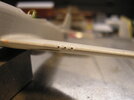
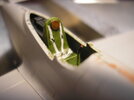
Slow as Mole-Asses on this but making progress.....I found more ugly seams to fill around the lower nose and managed to drill out the wing MG's. final weathering done in cockpit, clear coated it and decaled the seatbelts in place. I'll dull coat the interior once the decals are dry and then it will be on to masking the canopy before I fix it in place. Then I can maybe get a base coat on this.... P1012414.JPGP1012416.JPG
 

JR

Member of the Rabble and Pyromania Consultant
SMF Supporter
Joined
May 26, 2015
Messages
17,275
Points
113
Location
lincs
First Name
John
Your making good progress Rick, liking that engineers table , bet you've had that some time .
 
Top