Sd.Kfz. 7 half-track, post-war

Jakko

Way past the mad part
SMF Supporter
Joined
Apr 28, 2018
Messages
10,954
Points
113
First Name
Jakko
More details added to the battery box, as well as a small hatch below it from some thin plastic card with stretched sprue for a hinge:

409126AD-350B-4115-A0E2-6E21A489D60E.jpeg

I also primed the brass mudguard:

874C6FE4-4DA4-48D4-8B7F-5EE04D565A21.jpeg

For this, I used Mr. Surfacer 1000, applied with a brush. The reason is that I wanted to prime it before attaching the cab to the chassis, but I didn’t want to use an aerosol to avoid getting primer over all of the cab. I was thinking I may have to decant primer, before I remembered I have a bottle of Mr. Surfacer at the back of one of my paint drawers :smiling3:

Inside the cab again, I added the basic dashboard:

BB89D875-1AC5-4648-902C-CFDCE1A4289F.jpeg

All the holes were made with punch-and-die sets, as were the two dials that are still present. It still needs plenty of details added, though, like switches, a filler cap and more.
 

Graeme C.

SMF Supporter
Joined
Apr 29, 2018
Messages
1,487
Points
113
First Name
Graeme
Impressive stuff Jakko, the rockers are going to be pretty difficult to do, a lot of awkward shapes. Do you have any pictures of the ones on this vehicle?
 
  • Like
Reactions: JR

Jakko

Way past the mad part
SMF Supporter
Joined
Apr 28, 2018
Messages
10,954
Points
113
First Name
Jakko
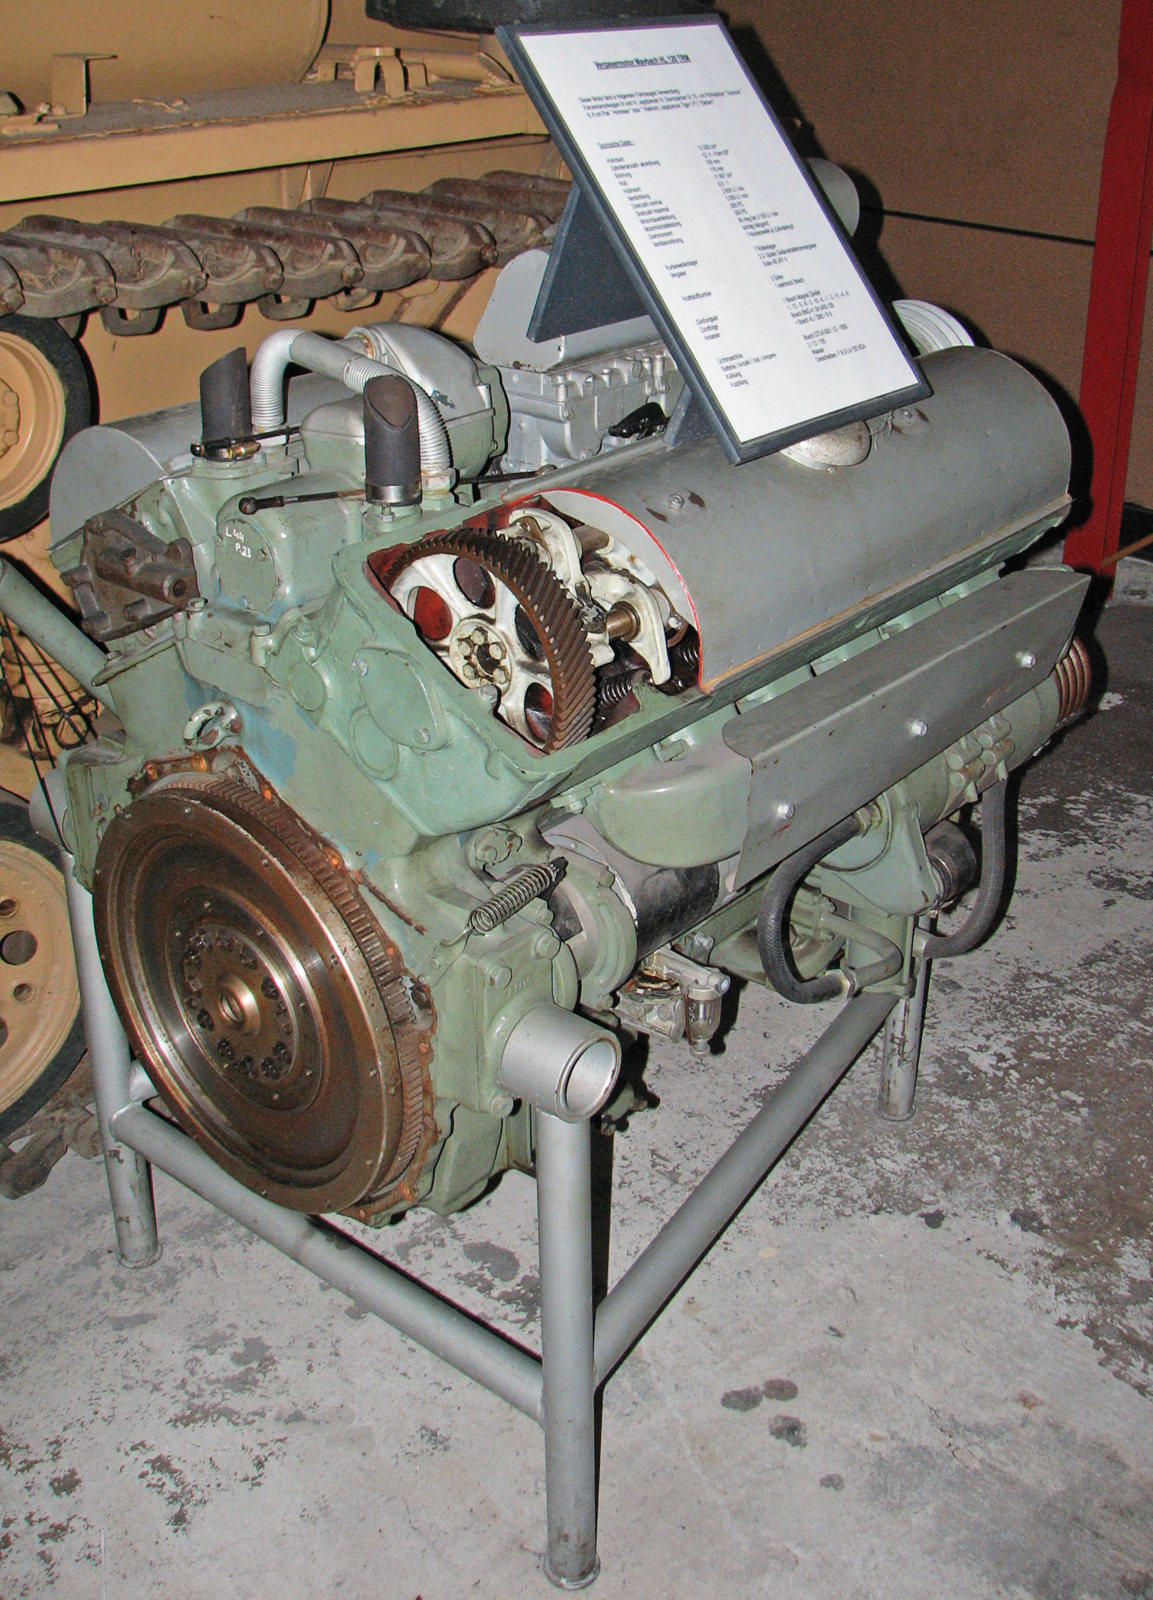
Thanks. Those rockers have a an awkward, curved shape with a roller on one end. They are very similar to the ones on this HL 120 engine:

Munster_Maybach_HL120_%28dark1%29.jpg
(source)

Which means they will be very hard to build, especially as I need twelve of them …
 
  • Wow
Reactions: JR

Jim R

SMF Supporter
Joined
Apr 27, 2018
Messages
13,841
Points
113
Location
Shropshire
First Name
Jim
Hi Jakko
Those rockers will be hard to do and getting 12 done the same will be really difficult.
Could they be 3D printed or make one and cast another 11? :rolling:
Just another difficulty which I'm certain you'll overcome.
Dash and battery box look good.
Jim
 

Jakko

Way past the mad part
SMF Supporter
Joined
Apr 28, 2018
Messages
10,954
Points
113
First Name
Jakko
That would be an option, but then I might as well have had someone print the whole interior of the top of the engine :smiling3: I think I’ll try cutting a few bits of plastic card and see how far I get with that. It’s small enough that the exact shape isn’t overly important anyway.
 
  • Like
Reactions: JR

adt70hk

I know its a bit sad but I like quickbuild kits!!!
SMF Supporter
Joined
Sep 4, 2019
Messages
9,526
Points
113
First Name
Andrew
Simply outstanding detailing Jakko.

Very well done.

Andrew
 

Jakko

Way past the mad part
SMF Supporter
Joined
Apr 28, 2018
Messages
10,954
Points
113
First Name
Jakko
Thanks :smiling3: You’ll be happy (I suppose :smiling3:) to read that I thought of a way to make passable rocker arms. I began by glueing triangles cut from plastic strip to the shafts:

96DF4EEE-7960-4C33-9D39-70613D85AA0F.jpeg

followed by punched discs of plastic card on the other side:

C164AA7C-579F-49A3-B933-3B2557C2BBD7.jpeg

Once the glue is dry, I’ll add a piece of plastic strip over all this, but not just yet :smiling3:

Meanwhile, I turned to the radiator, which Dragon has missed completely. I replaced the front grill by one from Panzer Art, because it is actually open while Dragon has moulded a large piece of plastic behind the louvres. Next, I cut a square of 1.5 mm plastic card and covered both sides in fine steel mesh, to sit between the grille and the fan shroud:

DE28F861-AFE9-49A2-980E-8F3749442892.jpeg

The mesh is from some cheap garden light thingie that takes a tea candle, which my mother was throwing away last summer. As it had about 0.5 mm mesh in it, I said, “I’ll have that, thanks!” :smiling3:

Assembled, it looks like this:

7781DB14-D282-4D0A-9309-006D4E36BAFC.jpeg3BEC5EA4-C93E-402B-94D2-172E96A1C960.jpeg

It’s not easily visible in the photo from the front, but can be seen well enough in the flesh. I’ve glued the radiator to the fan shroud, but the grill is still loose for painting.

The Panzer Art grill had a Krauss-Maffei badge on it (as does the Dragon part), but on these late Sd.Kfz. 7s, the manufacturer’s badge was deleted, so I scraped it off. You should leave it on for earlier vehicles, or replace it by one of the other manufacturers, Hansa-Lloyd, Henschel, Krupp or Saurer.

Also, the louvres could be opened or closed from inside the cab, so another option would be to remove then entirely and replace them by a piece of plastic card scribed to represent them closed.
 

therapy

SMF Supporter
Joined
Apr 21, 2019
Messages
887
Points
93
Location
East Anglia
First Name
Nick
That really is excellent work on the engine Jakko. If I'd had to guess, I never would have expected they'd be overhead cam either....

Nick
 

Jakko

Way past the mad part
SMF Supporter
Joined
Apr 28, 2018
Messages
10,954
Points
113
First Name
Jakko
All these Maybach engines were, I think — it was recommended to me to also look at other types than the HL 62 because they’re really all built the same way. Talking of which:

5E7E5488-A514-41C3-B92C-B59AFD921261.jpeg

I bent and glued small bits of plastic strip over the rocker arms to complete them, and then added bolt heads to the seven whatchamacallits that secure them.

And back in the cab, I think it’s nearly complete now too:

FE76FD20-901B-4B60-9B0F-165344FC586B.jpeg994E6A98-81B4-4ED9-B551-5703B2941D55.jpeg

I made the supports for the driver’s seat from plastic strip (great fun, making L-profile from two bits of 0.75 × 0.25 and 0.5 × 0.25 mm plastic strip …) and also added all the dashboard details, including a cap for the fuel tank for the starting motor :smiling3:

I say “nearly complete”, by the way, because I noticed that I’ve forgotten to round off the two bits of plastic strip to the left of the steering column and add a knob to each.
 

Jakko

Way past the mad part
SMF Supporter
Joined
Apr 28, 2018
Messages
10,954
Points
113
First Name
Jakko
Thanks, I’m glad it’s done and I’ve left all the really fiddly bits behind me now. Probably :smiling3:
 

Jakko

Way past the mad part
SMF Supporter
Joined
Apr 28, 2018
Messages
10,954
Points
113
First Name
Jakko
This is the kit that just keeps on giving … wrong and missing details, that is.

88EF563A-5CCF-4996-99D0-A0E70162918B.jpeg

Now the cab is attached to the chassis, I can turn to the engine bay. The white plate at the front of the picture is the base for the air cleaners — Dragon would have you glue them straight to the mudguard, when pictures of the real vehicle show a plate like this. I’m not sure yet if I’ll fit the air cleaners themselves, but chances are that I will.

On the other side, the curved plate seems to be some kind of guard over the steering mechanism, and on top of it is a little shelf for two blowtorches. Those are missing in the pictures of the real vehicle (I highly doubt those were on it for very long once somebody opened the bonnet :smiling3:) but the curved plate and shelf are obvious if you know they’re supposed to be there.

The horn is from my M113 spares box, probably from an AFV Club YPR-765 kit but I’m not entirely sure. In any case, Dragon provides an older style of horn with a big, conical, well, horn on it, and tells you to fit it in the wrong spot, at least for this variant. Dragon’s preferred location is where you can see the bit of filler that I haven’t smoothed out yet.
 

Ian M

Administrator
Staff member
Administrator
Moderator
SMF Supporter
Joined
Dec 14, 2008
Messages
19,805
Points
113
Location
Falster, Denmark
First Name
Ian
Just dived into this build thread. Gob well and truly smacked!
That is some impressive witchcraft model making going on here!
 

Jakko

Way past the mad part
SMF Supporter
Joined
Apr 28, 2018
Messages
10,954
Points
113
First Name
Jakko
Thanks, guys :smiling3: TBH, this is a far more involved build than I expected at the start. My idea before I began was that I would need to adjust the suspension and build new sides to the cab, then just build the rest straight from the box. I think I assessed it slightly wrong :smiling3:
 
Top